Keyline
Stylised inverted-hull outlines for URP and HDRP — with an X-Ray pass, interior fills, merge groups and fourteen drop-in components for the things outlines are usually bought for.
1 · Overview
Keyline draws an outline by building a second copy of the mesh, pushing it outward and drawing it behind the original. Everything in this manual follows from that one sentence.
It is a per-object effect. A hard-edged outline needs no fullscreen pass, no depth-normals prepass and nothing on a renderer feature list: an object has an outline because it has the component, and objects without it are not touched. A soft 3D rim is optional — one pipeline pass, added with a click, see 4.4. That is the trade against a post-process edge detector, which sees the whole frame at once and gives every edge in it the same weight. If you want one uniform line across the entire image, a post-process is the right tool. If you want this enemy outlined in orange through a wall while that pickup pulses green, this is.
1.1 What is in the box
- Six independent passes per object — the rim, an X-Ray rim for when the object is hidden, a fill for each (Main Fill and X-Ray Fill), and an optional Cutout Overlay on the Main and the X-Ray rim, which a mesh has and a sprite does not. Every pass carries its own complete profile.
- Fifteen styles — Solid, Neon, Halo, Sketch, Pattern, Double, Electric, Rainbow, Gradient, Frost, Lava, Smoke, Crystal, Water and Fire.
- Hard-mesh handling — the part that is hard to write yourself: flat leaves, single-sided cards and thin prongs, which a naive hull turns into blades.
- Merge groups — several objects as one silhouette, explicitly or automatically.
- Fourteen drop-in components in
Runtime/Recipes/— hover, selection, damage flash, gauges, waves, reveal, and the arbiter that keeps them from fighting. - A demo of ten chapters that is also the fastest documentation in the package.
Two properties are worth stating before anything else, because they are what most outline assets ask you to give up.
Your material is never touched. Keyline does not swap the shader on your renderer, does not require a specific one, and does not add a pass to it. The outline is drawn from a separate hull with its own material, so the source object keeps whatever it had — Lit, Shader Graph, a third-party toon shader, an asset-store character with a stack of custom passes. Nothing has to be re-authored to be outlinable, and removing the component leaves the object exactly as it was.
It adapts rather than demands. The same component covers a static prop, a skinned character, a flat card and a texture-cut leaf; it picks the hull it can build from the mesh in front of it. Pipeline, colour space, shadow settings and quality level are read, not dictated — there is no renderer feature required for a hard edge, no prepass to enable and no project setting the package insists on. Soft 3D rims optionally add one pass — 4.4.
1.2 Requirements
| Unity | 6000.3 or newer |
|---|---|
| Pipelines | URP 17.x and HDRP 17.x — one package, both supported |
| Built-in RP | not supported: the shader carries a SubShader per SRP and picks by tag |
| Tested on | Windows (URP and HDRP), Android (Vulkan and OpenGLES3), WebGL |
| Untested | iOS — not run, and this table says what was measured rather than what is expected |
| VR | outlines are stereo-aware and untested; Soft Edge is not. Its shaders address a single eye, so under single-pass stereo — instanced or multiview — the pass switches itself off and says so once in the console. Outlines still render, without the soft edge. Multi-pass stereo draws one eye at a time into ordinary targets and is unaffected |
2 · Install
- Import the package. Everything lands in
Assets/4ssets/Keyline/. - Wait for the compile. The package looks at which pipeline packages are installed and writes
the matching defines itself — if that ever goes stale, force it with
Tools ▸ Keyline ▸ Refresh Pipeline Defines. - Keyline Setup opens once. Pick the platform and how much of Keyline the project uses, or press Decide Later to keep everything — see 2.3.
- Open
Demo/Demo.unityand press Play.
Nothing else is required for a hard-edged outline. There is no renderer feature to add, no volume profile to author and no layer to reserve. A soft 3D rim is optional: one click adds a pipeline pass, and without that click Edge Softness does nothing — see 4.4.
Tools ▸ Keyline ▸ Fix Demo Materials For This Pipeline runs it by hand. The
outline shaders are never involved: they carry a SubShader for each pipeline and pick by tag.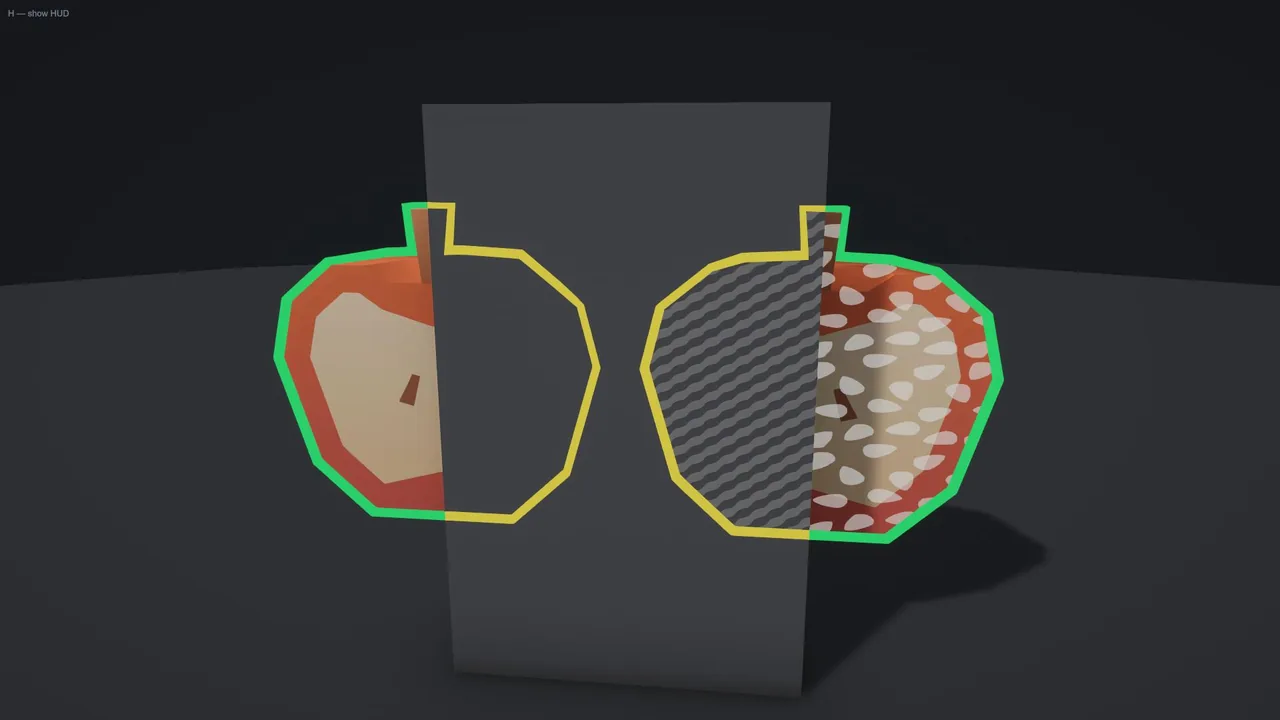
2.1 Package layout
| Folder | Holds | Needed at runtime |
|---|---|---|
Runtime/ |
the component, the profile asset, the merge group, the recipes, the default materials | yes |
Shaders/ |
the outline shader, the Mobile Solid variant, the generated pipeline header | yes |
Editor/ |
inspectors, the bake tool, the variant stripper, the build hook that carries the project settings into a player | no — stripped from builds by the assembly definition |
Patterns/ |
84 textures for the Pattern style | only if you use them |
Demo/ |
the demo scene, its scripts, models, character and cutout textures | no |
Deleting the demo is safe and expected. It is the largest folder in the package and
nothing in Runtime/ references it. Delete Demo/ whole rather than in
parts: it carries a link.xml and a WebGL plugin that belong to it and to nothing
else.
While you keep the folder, its link.xml applies to every build: Unity merges every
one under Assets/ into managed code stripping. It preserves the eight physics types the
demo adds from code — the stripper cannot see them — and nothing else, so a project that ships no
physics keeps a handful of engine classes it does not use. Deleting Demo/ removes
it.
The same applies to Patterns/ if you never use the Pattern style, and to the
example art in general. See Licence and credits: it is public domain, so
keeping, changing or deleting it is entirely yours to decide.
2.2 Removing Keyline
Deleting Assets/4ssets/Keyline/ takes the whole package with it. Almost nothing of
Keyline lives anywhere else: the component leaves the object exactly as it was, the generated
mirrors and their __Keyline folders are marked HideFlags.DontSave and
never reach a scene file, and the profiles are ordinary assets you either keep or delete. On HDRP
the two passes live in a hidden, unsaved volume that exists only while the editor or the game is
running, so nothing of them is written into your project either.
There is one exception, and it is worth thirty seconds before you delete anything. On URP
the two optional passes are ScriptableRendererFeature objects, and URP stores a
renderer feature inside the Renderer asset it belongs to — yours, not ours. Remove the
package while they are installed and those objects stay behind in your …_Renderer.asset
with the script that defined them gone.
So, before deleting the folder, open Project Settings ▸ Keyline ▸ Features
and untick Pass In Pipeline under Layer Filtering and under Soft Edge. That is the uninstaller: each switch
takes its feature out of every URP Renderer asset in the project and deletes the object with it.
Then delete the folder, and nothing is left.
…_Renderer.asset, not the URP Asset above it — find the red block, press
Attempt Fix, and answer Yes when it offers to remove the feature and its sub-asset.
That both drops the entry from the list and deletes the orphaned object out of the file. Repeat for
each Renderer asset that shows one; a project with a separate renderer per quality level has more
than one.Reinstalling Keyline over a project in that state is safe, but it does not clean the old entries by itself — they belong to a build of the scripts that no longer exists. Press Attempt Fix first, then add the passes again from Project Settings.
2.3 Setup and Features
The first time the editor loads Keyline — after an import, and once after updating from an
earlier version — it opens Keyline Setup. It asks what the project outlines (3D, 2D or
both), how much of Keyline it uses there, and whether to install the two render-pipeline passes.
A project whose set matches no preset is offered This Project's Current Set, selected, so
opening Setup only to install a pass changes nothing else. Apply,
Decide Later and closing the window all count as an answer, and it does not open by itself
again; Tools ▸ Keyline ▸ Setup… brings it back whenever you want it. On a build machine
it never opens.
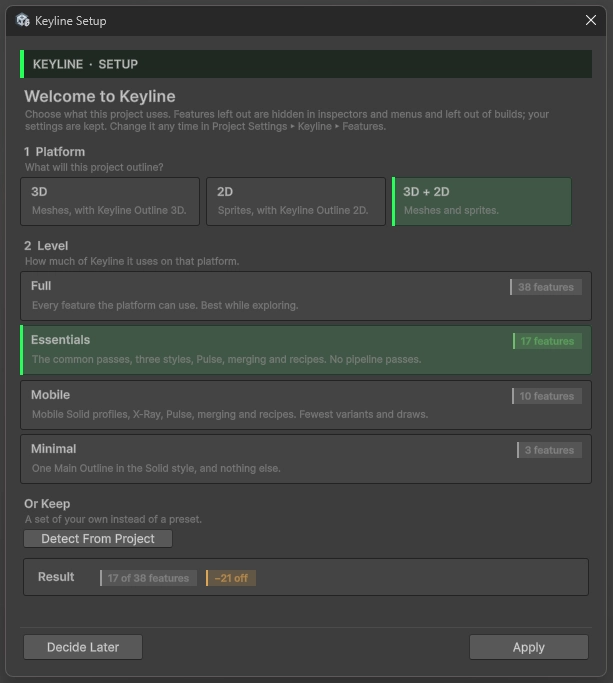
The same choice lives afterwards in Project Settings ▸ Keyline ▸ Features
(Tools ▸ Keyline ▸ Features… opens it), in full detail. Every part of Keyline that
costs something — shader variants, a whole shader, draw calls, per-frame work, a menu entry, a
block of the inspector — has a switch there. A feature that is off:
- disappears from the editor — its fields leave every inspector, its components leave Add Component, its assets leave the Create menu;
- is ignored at runtime — a Fire profile draws as Solid, an X-Ray slot is skipped, a Sees Through mask is not read, a pulsing profile holds still;
- is left out of builds — its shader variants, and a whole shader where nothing else needs it. The page shows the count for the set you are editing, before you apply it.
Nothing you made is changed. Switching a feature off writes nothing into any profile, component or scene; every value stays where it was, and switching the feature back on brings all of it back. It is also what makes a scene saved in a project with more features safe to open in one with fewer. An asset that uses a switched-off feature gets one line in its inspector saying so, with an Enable button; a script writing to a switched-off setting gets one console message per feature and session (under Report API Misuse).
What cannot be switched off is the core: Keyline Outline 3D or 2D — one of the two always stays — with its Main Outline, the Solid style and a hull grown along normals. A project can go all the way down to exactly that: one Main Outline, one Solid style.
The page
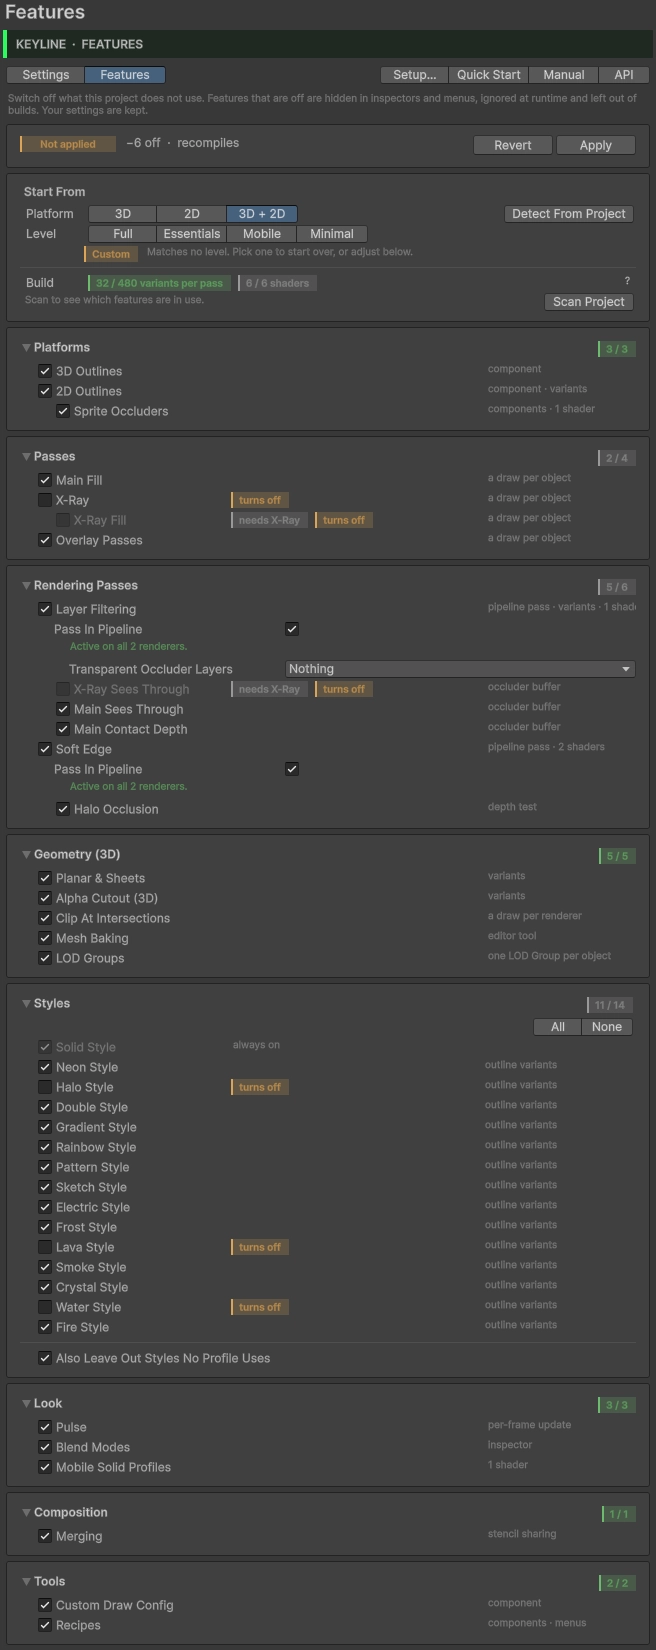
Start From sets two things. Platform is 3D, 2D or 3D + 2D. Level is how much of Keyline the project uses on it:
- Full — every feature the platform can use. Full on 3D + 2D is everything, as shipped.
- Essentials — Main Fill, X-Ray, X-Ray Fill, Neon, Halo, Double, Pulse, merging and recipes, plus sheets, cutout, clipping, baking and LOD Groups on 3D and Sprite Occluders on 2D. No pipeline passes.
- Mobile — Mobile Solid profiles, X-Ray, Pulse, merging and recipes, plus baking and LOD Groups on 3D and Sprite Occluders on 2D. The fewest variants and draws.
- Minimal — one Main Outline in the Solid style (and LOD Groups on 3D, which costs nothing without a LOD Group).
The same four levels, feature by feature. A feature marked 3D is one only a mesh can use, and a 2D set leaves it out at every level; Sprite Occluders (2D) is left out of a 3D set the same way.
| Feature | Full | Essentials | Mobile | Minimal |
|---|---|---|---|---|
| Main Outline in the Solid style | yes | yes | yes | yes |
| Main Fill | yes | yes | — | — |
| X-Ray | yes | yes | yes | — |
| X-Ray Fill | yes | yes | — | — |
| Main Overlay and X-Ray Overlay (3D) | yes | — | — | — |
| Pipeline passes: Layer Filtering, X-Ray Sees Through, Main Sees Through (3D), Main Contact Depth (3D), Soft Edge (3D), Halo Occlusion (3D) | yes | — | — | — |
| Sheets, Alpha Cutout, Clip At Intersections (3D) | yes | yes | — | — |
| Bake for Runtime (3D) | yes | yes | yes | — |
| LOD Groups (3D) | yes | yes | yes | yes |
| Neon, Halo, Double | yes | yes | — | — |
| The other eleven styles | yes | — | — | — |
| Pulse | yes | yes | yes | — |
| Blend Modes | yes | — | — | — |
| Mobile Solid profiles | yes | — | yes | — |
| Merging | yes | yes | yes | — |
| Draw Config (3D) | yes | — | — | — |
| Recipes | yes | yes | yes | — |
| Sprite Occluders (2D) | yes | yes | yes | — |
Anything else reads Custom. Switching the platform keeps the level; on a Custom set it switches the platform alone and leaves the other ticks where they are.
Detect From Project ticks what the project's scenes, prefabs and profiles use, plus what those need. It reads them rather than opening them — no scene is loaded, nothing runs, nothing is dirtied; scenes already open are read from the live objects, unsaved edits included. It errs one way only, towards "in use": a default that happens to be on counts, and a file saved in binary counts as using everything its components could. The demo is left out unless one of your scenes instantiates its prefabs, and so are the bundled profiles unless something references them. What it cannot see is code: a script that sets a Fire style or assigns an X-Ray profile at runtime leaves nothing in an asset — tick those by hand. Scan Project runs the same reading without ticking anything and marks each switch in use, with the places in its tooltip.
The switches form a tree. A child sits under its parent and cannot be on without it: with X-Ray off, X-Ray Fill shows off and locked, with needs X-Ray beside it, and keeps its tick for when X-Ray comes back. A few features borrow another's machinery and hold it on while they are on — Main Sees Through, Main Contact Depth and Halo Occlusion all keep Clip At Intersections, which shows the reason beside it.
Changes are staged. The bar at the top of the page counts them, and every switch that would change says turns on or turns off. Nothing happens until Apply; Revert drops them. Applying:
- asks first when something in use is going. The project is scanned and the dialog lists what uses each feature being switched off. Disable Anyway goes ahead; those assets keep every setting and draw without the feature.
- takes a pipeline pass off the renderer when Layer Filtering or Soft Edge is switched off. Switching them on does not install anything: Pass In Pipeline under each is the switch that does, as it always has been.
- takes bundled profiles out of the project. Switching a style off moves its
Runtime/Profiles/Profile_<Style>.asset— and Mobile Solid Profiles itsProfile_MobileSolid— intoRuntime/Profiles/Disabled~. Unity ignores a folder whose name ends in a tilde, and the.metakeeps the GUID, so switching the style back on returns the very same asset. A bundled profile that something references stays where it is and draws as Solid; the dialog names it. Reimporting Keyline puts the bundled set back in full. - changes the menus, which recompiles. A menu entry is an attribute, decided when the
code compiles, so hiding one takes a scripting define —
KEYLINE_OFF_<FEATURE>, on every build target. Only the attribute is inside it: the class, its API and every scene holding one compile and work the same.
Also Leave Out Styles No Profile Uses, under Styles, goes one step further at build time: the variants of every style no profile of yours uses are left out as well. Off by default — a style set only from code would then draw as Solid in the build.
| Feature | Needs | Off |
|---|---|---|
| 3D Outlines | — | Keyline Outline 3D leaves the menu; existing ones stop drawing |
| 2D Outlines | — | Keyline Outline 2D leaves the menu; existing ones stop drawing; the sprite variant is left out |
| Sprite Occluders | 2D Outlines | Occluder 2D and Occluder Layers 2D leave the menu and stop writing depth; their shader is left out |
| Main Fill | — | Main Fill slots hidden and skipped |
| X-Ray | — | X-Ray slots hidden and skipped |
| X-Ray Fill | X-Ray | X-Ray Fill slots hidden and skipped |
| Overlay Passes | — (X-Ray Overlay also X-Ray) | Main and X-Ray Overlay slots hidden and skipped |
| Layer Filtering | — | its pass comes off the renderer; its shader and variant are left out |
| X-Ray Sees Through | Layer Filtering, X-Ray | mask hidden; every occluder reveals the X-Ray |
| Main Sees Through | Layer Filtering, 3D Outlines | mask hidden and ignored |
| Main Contact Depth | Layer Filtering, 3D Outlines | hidden and ignored |
| Soft Edge | — | Edge Softness hidden, rims hard; its pass comes off the renderer; its shaders are left out |
| Halo Occlusion | Soft Edge | hidden; soft rims ignore depth |
| Sheets | 3D Outlines | Sheet Solidify and Sheet Detection hidden; every part of a hull grows along its normals; the sheet variant is left out |
| Alpha Cutout (3D) | 3D Outlines | Use Cutout hidden, rims follow the mesh; the variant stays while 2D Outlines are on |
| Clip At Intersections | 3D Outlines | rims draw along intersections; two draws per renderer fewer |
| Mesh Baking | 3D Outlines | bake buttons and Bake All hidden; meshes already baked keep being used |
| LOD Groups | 3D Outlines | every LOD level is outlined at once, as before 1.3.0; Outline From LOD hidden — see 4.6 |
| A style (fourteen switches) | — | leaves the Style list; profiles using it draw as Solid; its variants are left out |
| Pulse | — | hidden; pulsing profiles hold still |
| Blend Modes | — | hidden; every rim uses its style's own blend |
| Mobile Solid Profiles | — | leave the Create menu; drawn as Solid by the full shader; the Mobile Solid shader is left out |
| Merging | — | every outline draws on its own; Merge Group leaves the menu. An object's own children still merge |
| Custom Draw Config | — | Draw Config leaves the menu; outlines use the factory values |
| Recipes | — | leave the menu; components already in scenes keep working |
ProjectSettings/KeylineSettings.asset,
with Keyline's other settings — version control carries it, so a team, its build machine and every
build agree. A player build gets it through the same small manifest as the Runtime settings
(16.4); a project with every feature on carries nothing extra
for it.2.4 Updating from 1.2.0
Import the new version over the old one. Nothing in a project has to change: scenes, prefabs and profile assets load as they are. What is worth knowing before you do:
- Renamed API still compiles. Every renamed member keeps its 1.2.0 name as an
[Obsolete]forwarder, and the warning names what to write instead.KeylineOutlineSettingsis nowKeylineStyleProfile: accept Unity's API Updater when it offers, or see 13. - A class of your own that implements
IKeylineOutlinemust add the interface's new members. Code that only calls through the interface is unaffected. - Keyline Setup opens once after the update, to offer a smaller feature set. Every feature starts on, and Decide Later keeps everything (2.3).
- LOD Groups. An object with a LOD Group is now outlined from one LOD level and culled with the group, where 1.2.0 outlined every level at once. Switch the LOD Groups feature off to keep the old behaviour (4.6).
- Mirror Layer. Components saved with 1.2.0 keep their outlines on layer 0
(Fixed); components added from now on in the Editor or through
KeylineOutlineRef.GetOrAdduse their renderer's layer (Match Renderer). A plainAddComponentkeeps Fixed. See 4.2. - Generated objects now sit in one
__Keylinechild per renderer. They were never saved, and nothing in a scene refers to them. - Disabled outlines keep their generated objects. In Play mode an outline that is disabled or deactivated keeps them hidden until it comes back, instead of destroying them. Turn Keep Mirrors While Hidden off in Project Settings ▸ Keyline to destroy them on disable as before (16.4).
- Rainbow, Frost's height and Sketch's grain in Object space are measured across the model and centred on it, as Gradient's ramp already was, so they no longer depend on its scale, on the units it was authored in or on where its pivot sits. On most models their density or placement changes (5.2).
- Halo on a mesh fades evenly outward and is fainter than in 1.2.0, which drew every layer at full strength. A Halo profile whose Opacity or Glow was lowered to make up for it can go back up (6.3).
- Bake for Runtime again. Outline meshes baked with 1.2.0 are out of date, because the outline's copy of a mesh now has corner bevels and joined seams. The inspector says so; until you re-bake, a readable mesh is prepared at runtime and an unreadable one draws its raw hull (7.4).
- Hard edges and UV seams no longer open the outline, and Corner Topology starts on Rounded, so hard corners get a bevel. Join Coincident Vertices is on for every component, old ones included; it now decides only whether vertices that nearly meet are closed too. Choose Simple for 1.2.0's corners. A double-sided surface, or a model with a triangle wound the wrong way, gets the outline it was missing. See Geometry and 7.1.
- One way to build a hull. Expand Mode is gone: every hull is built as Mixed was —
solid parts grow along their normals, flat parts are found and grown in their own plane, with
a shell (7). An object that was on Normal or Planar is outlined
that way now; flat and single-sided parts that Normal turned into spikes or lost get their
outline. A surface modelled with both sides grows along its normals on each side and gets no
shell, under Mixed too (7.1). The Planar-only settings — Expand Center and the Planar Width and Height scales —
went with it.
ExpandMode,ExpandCenterMode,ExpandCenterCustom,PlanarWidthScaleandPlanarHeightScalestill compile, with an[Obsolete]warning, and do nothing. - Geometry moved to the component. Miter Limit, Sheet Solidify, sheet detection and Min Outline Triangles are in the component's Geometry section now. A component saved with 1.2.0 takes them from its Main Outline profile (or the first profile it has) the first time it runs; save the scene or prefab to keep them there. Where an object's passes used different settings, they all use the Main Outline's now.
- Scripts that set those fields on a profile (
profile.miterLimitand the rest) still compile with an[Obsolete]warning, but no longer change an outline that has its own geometry: set the component property of the same name —MiterLimit,SheetThicknessand so on. - Miter Limit 1. The shipped profiles now carry 1 (they had 1.45), and that is what a component outlined with one of them takes over, so hard edges get a slightly thinner band. Set 1.45 on the component to keep the 1.2.0 look (7.1).
- Sheet Solidify Lateral 1. The shipped profiles now carry 1 (they had 0.5), the same as Thickness, so a shell spreads further within a sheet. Set Lateral 0.5 on the component to keep the 1.2.0 look (7.3).
- A Keyline Custom Draw Config saved with 1.2.0 keeps its queues as they were, Clip At Intersections' claim in the Mask queue included. That layout keeps outlines with Clip At Intersections on from batching; tick Clip Claim Own Queue in its inspector, or press Reset Queues (4.5). Without a Draw Config there is nothing to do.
- Sheet detection ranges are narrower: Thickness 0.01–1 cm and Ray Cone 5–30°. A value above them is clamped when a component takes it over.
The full list is in Documentation/CHANGELOG.txt.
3 · Concepts
3.1 The inverted hull
The component builds a hidden copy of every mesh under it — a mirror — pushes its vertices outward and draws it with front faces culled, behind the original. The copy is bigger, so it shows past the edges of the real object and nowhere else. That ring is the outline.
Everything else in this manual is a consequence of the direction those vertices are pushed:
- Along the normal — right for anything with volume, wrong for a flat sheet, where the normals all point the same way and the copy simply moves towards the camera.
- In the plane of the face — right for a sheet, wrong for a sphere, which has no plane to stay in.
Keyline does not make you choose: it decides per face which of the two applies, when the outline is built (7). That is how a carrot with flat leaves and a solid root has one outline.
Width is authored in one of three units. World is metres, and keeps the outline in proportion to the object, so it thins with distance. Screen is pixels, and holds the same count at any distance — what a marker on a far objective needs, and what turns a crowd of distant objects into a solid mass. Pixels is a whole number of the sprite's own texels, and exists because an edge aligned to a texel grid cannot honour anything else; a mesh has no texel grid and ignores it.
Where the mirrors live. Every mirror built for one renderer goes into a single child of
that renderer named __Keyline. A component has up to six passes and each builds
several mirrors per renderer, so without the folder a figure of a dozen meshes fills the Hierarchy
window with a few hundred loose objects — which is exactly when you most need to read it. The
folder and everything in it is generated and marked HideFlags.DontSave: it never
reaches your scene file, never appears in version control, and is thrown away and made again on
every rebuild. Nothing in it is meant to be edited, reparented or referenced from a script. If
clicking in the Scene view keeps landing on a mirror rather than on the object, that is what
Mirrors Not Clickable is for — see 16.4.
3.2 The passes
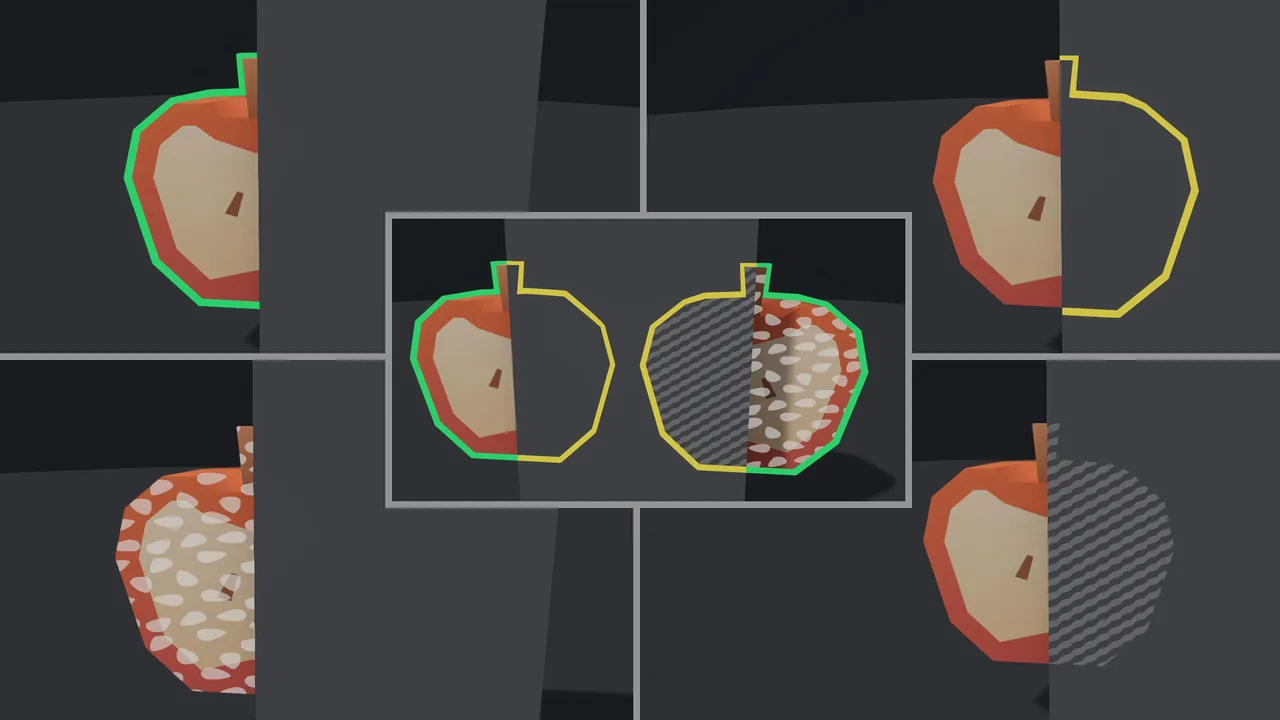
One component draws up to six things, each with its own switch and its own profile asset — four that every outline has, and two Cutout Overlays that only a mesh offers:
| Pass | Draws | Typical use |
|---|---|---|
| Main Outline | the rim, where the object is visible | the ordinary outline |
| X-Ray Outline | the rim, only where the object is behind something | an objective through a wall; a teammate through terrain |
| Main Fill | the object's own surface, not a hull around it | damage flashes, gauges, dissolves |
| X-Ray Fill | the surface, only where the object is hidden | a solid silhouette through geometry |
| Main Overlay | a second draw of Main, with its own stencil pair | a hull silhouette and an alpha rim on one object. Mesh only, experimental — see 4.1 |
| X-Ray Overlay | the same second draw, through walls | as above, for the hidden half. Mesh only, experimental |
The passes are independent in both directions: a solid rim around a perforated fill is a valid combination, and so is a thin grey Main rim with a bright orange X-Ray one. Each pass reads a complete profile, so "its own style" means its own everything.
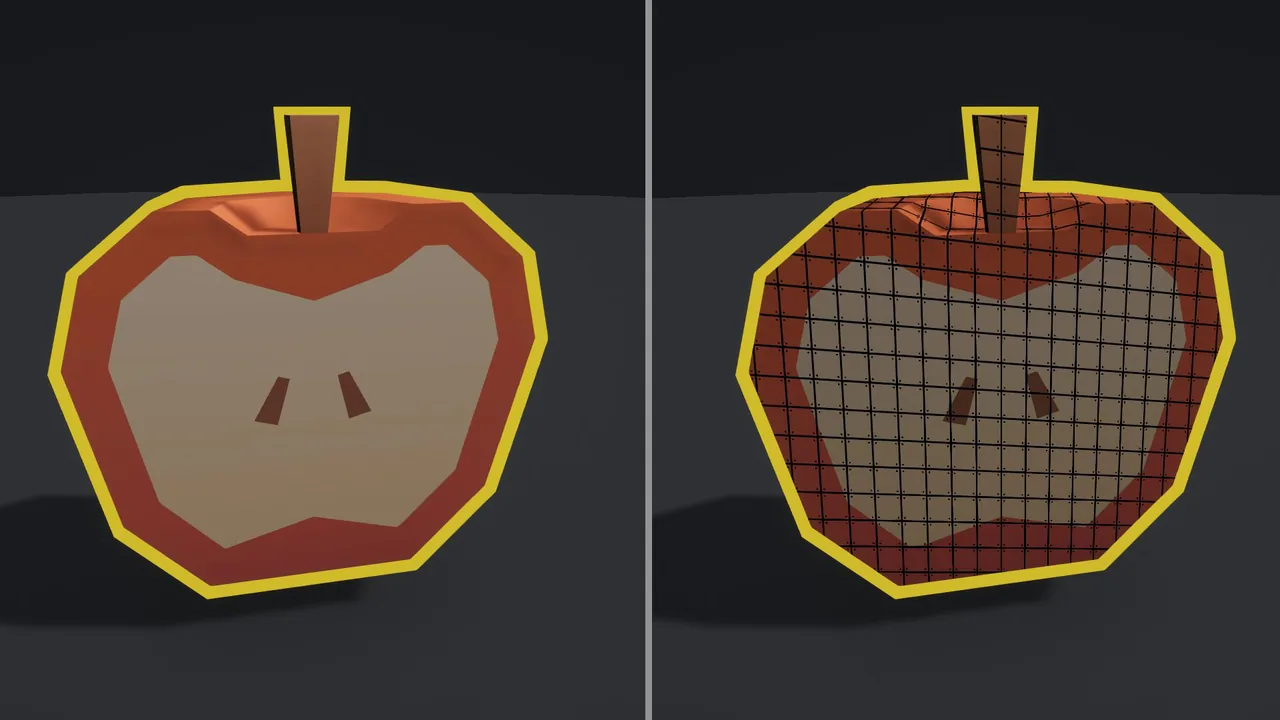
3.3 Profiles are shared assets
A profile is a ScriptableObject. Assign one to a hundred enemies and there is one
object in memory, which is exactly what you want for memory and for the SRP Batcher — and exactly
what you do not want the moment gameplay writes to it. profile.color = Color.red on
one enemy turns all hundred red, and in the editor the asset stays modified after play mode ends,
because a ScriptableObject edited at runtime is the same object that sits on disk.
Instance Override is the answer and it is on by default. With it on, the first write forks the slot: the controller clones the asset, points the slot at the clone and writes there. Reads before and after return the same values, so nothing observable changes except that the shared asset is now safe. Forking is lazy — an object that only ever reads keeps sharing.
The rule that follows: go through the component, not the profile.
outline.Color = Color.red forks; outline.MainOutlineStyleProfile.color = Color.red does
not, because at that point the profile is a plain object and nobody is watching. See
13.4.
3.4 The stencil budget
Outlines have to know where they are allowed to draw, and the answer is written in the stencil buffer. The pool hands out 126 unique pairs for a scene — enough for 126 objects whose outlines are independent of each other at the same time.
Past that, further objects fall back to a shared pair, and outlines that share a pair stop fencing each other off: where they overlap, the result is decided by whichever drew last. On a crowd this reads as flicker.
An object with a Main Overlay - Cutout Outline or an X-Ray Overlay - Cutout Outline assigned spends a second pair for that overlay. The hull still shares whatever silhouette it belongs to; the overlay keeps its own pair so Single Layer on the overlay profile can fence that rim without sharing the hull's stamp.
Three things spend from that budget, and all three give something back:
- A merge group spends one pair for the whole group, however many members it has. A squad of eight costs what one object costs. Overlay rims on those members still take their own pairs.
- Automatic merging clusters objects whose outline bounds overlap and gives the cluster one pair, for as long as they overlap.
- Share Stencil With Others hands one pair to every outline that asks for it, without joining any of them into one silhouette. A crowd of a hundred separated objects then costs one pair between them, and batches. What it gives back it also takes: sharing outlines that overlap on screen clip each other's rims, which is why it is off by default and why the cases are set out in 14.1.
So the practical limit is not "126 outlined objects" but "126 things that need to be told apart from each other". A forest of shrubs that always overlap is one of them.
Sharing the stencil with your own effects
Keyline writes the stencil buffer of the camera it draws into, and so may whatever else you have there — a Render Objects feature with a stencil override, a decal system, a custom pass of your own. Two effects writing the same bits do not fail loudly; they take turns, and each looks intermittently wrong.
What Keyline uses:
- All eight bits are spoken for, and not in the same way. Pairs are handed out as whole values from 2 to 254, and a pair's identity lives in bits 1 to 7 — the pool is a range of values, not a set of flags, which is what lets 126 objects be told apart in seven bits at all. Bit 0 is the odd half of each pair and carries the X-Ray hollow stamp, which belongs to the scene rather than to any one object. Between the two there is no bit left over, and the stamps mask off whichever of them they are not asking about.
- Values 64 and 65 are reserved as the shared fallback pair for objects past the pool.
- Zero is left alone — an untouched cell means "nobody has claimed this pixel".
So an effect of yours that writes a fixed stencil value in the same frame will be overwritten by an outline drawn after it, and will overwrite one drawn before it. There is no bit to hide in. The ways out, in order of how well they work:
- Separate the frame. Put your effect before
AfterRenderingTransparents, or after Keyline has finished with the stencil, and clear it between. Outlines read the stencil only within their own draws. - Separate the camera. An overlay camera stack gives your effect its own buffer.
- Turn Soft Edge on for the objects that clash. A soft rim is composited in a private target with its own stencil and never touches the camera's — see 4.4.
3.5 X-Ray see-through layers
The X-Ray passes draw where an object is hidden. Out of the box "hidden" has one meaning for the whole scene — behind anything that wrote depth — and that is often too blunt. An enemy should show through the foliage in front of it and stay hidden behind the wall beside it, and those are the same answer to the depth buffer.
X-Ray Sees Through, in the Visibility section of both outline components, narrows it per object.
It is an ordinary LayerMask over GameObject layers:
- An occluder on a listed layer lets this outline's X-Ray rim and X-Ray fill appear behind it.
- An occluder on an unlisted layer hides the object outright, as though X-Ray were switched off.
- Everything — the default — is what Keyline has always done.
The layer being read is the occluder's, not the outlined object's. Put the things you want to see through on a layer of their own, and list that layer on the outlines that may see through it.
Two objects behind the same wall can disagree, which is the point of putting the value on the component rather than in a profile or a scene-wide setting. Nothing anywhere else narrows, widens or overrides it: what the component says is what happens.
Generated child outlines inherit it — a figure is seen through the same things all over. A child carrying its own Keyline component keeps its own value, which is how one part of a model gets a different answer. Members of a merge group need no special rule: they share a silhouette and each draws by its own mask, so a pixel appears when any member both covers it and is allowed through.
It can be changed from script while the game runs, like any other Keyline parameter:
outline.XRaySeeThroughLayers = LayerMask.GetMask("Foliage", "Glass");Occluders you can see through
Keyline decides what counts as an occluder by the render queue: opaque geometry writes depth, so the buffer this mask is read from agrees with the depth buffer it stands in for. A transparent material with ZWrite switched on is the one case where that rule is wrong. It does hide things — the ordinary X-Ray appears behind it exactly as it would behind a wall — but it sits in the transparent queue, so no mask can name it. Glass, a shop window, a water surface.
Transparent Occluder Layers, under Layer Filtering in
Project Settings ▸ Keyline ▸ Features, is where you name the layers those live on. It is
empty out of the box and empty is a complete answer — everything on this page works without
it, and almost every project leaves it alone.
Two things are worth knowing before you fill it in. Geometry on a named layer is collected whether or not it writes depth, so a pane that hides nothing will still block an X-Ray that is not allowed through its layer — keep the list to the layers that do the hiding. And the layer has to be one no outlined object is on, which is what putting occluders on a layer of their own already means.
The setting is stored where the render pipeline can read it in a build — on the renderer feature under URP, with Keyline's HDRP pass switches under HDRP — so the page shows one field either way and there is nothing to keep in step by hand.
What it costs
Nothing, until a mask is actually narrowed. With every outline seeing through everything there is nothing to test: the shader branch is not compiled in, no buffer is allocated and no extra geometry is drawn.
Once something does narrow, Keyline fills one screen-sized buffer per camera, and — this is the part worth knowing — the cost does not grow with the number of different masks in the scene. Layers every narrowed outline sees through can veto nothing and are skipped entirely; layers no outline sees through all block equally and share one channel. Only layers your outlines actually disagree about need a channel of their own, and a project where every outline uses the same mask needs none. Giving fifty objects fifty different masks costs the same pass as giving one object one.
The buffer is four float channels, so at 1080p it is about 33 MB while layer filtering is switched on, and nothing at all while it is off. The precision is what buys the seam: the test has to forgive the difference between the buffer's record of a surface and the fragment's own, and in a sixteen-bit buffer that forgiveness is a couple of millimetres a few metres out and centimetres at twenty — wide enough to leave a hairline of rim along a line where an object meets a floor. On hardware that cannot blend into a float target — some mobile GPUs — Keyline uses the sixteen-bit buffer instead, at half the memory and with that hairline back.
Layers your outlines answer alike share a channel, so what the budget counts is groups, not layers. An X-Ray mask reading "everything except Ground" and a Main mask reading "Ground" — 3.6 — disagree about every layer in the project and still need two channels between them: one for Ground, one for the rest. Three such groups may be in play at once. If more are, the extras fold in with the layers that block everybody and the inspector says which — so the failure is always less see-through than you asked for, never an outline drawing in front of something it should not.
Turning it off
The feature needs Keyline's occluder pass in the render pipeline, and it is off until you
ask for it — Pass In Pipeline under Layer Filtering in
Project Settings ▸ Keyline ▸ Features puts it there or takes it away, see 16.4. Keyline never adds a pass
to your renderer unasked. Narrow a mask while it is off and the component says so on the spot, with
a button to switch it on: the moment you are watching for the setting to work is the moment to be
told it cannot. With the pass absent every mask is
ignored and X-Ray behaves exactly as it always has; no component is edited and no value is lost.
A missing pass never produces a picture you cannot explain.
In 2D, this is a second axis
A sprite scene has two layer systems and they answer different questions. Sorting layers decide who is an occluder — that is 12.4, and it stays a scene-wide decision. GameObject layers, this mask, decide which of those occluders a given outline can be seen through.
So a sprite can be an occluder and still let one particular character's X-Ray through, which sorting layers cannot express at all: a sorting layer is one number shared by everything drawing against it.
3.6 Main see-through layers
The same machinery answers the opposite question. A Main rim is a hull standing off the object, so it reaches past every surface the object touches — and where it reaches into the floor, the floor is nearer than the rim and the depth test cuts it. That is correct by the letter of the test and wrong by everything else: a crate on the ground is not behind the ground. With Edge Softness it is worse than a missing pixel, because the blur is built from a rim that has already been sliced and the slice becomes a hard line across the glow.
Main Sees Through, under X-Ray Sees Through in the Visibility section of Keyline Outline 3D, names the layers that never hide this outline's Main Outline and Main Fill:
- An occluder on a listed layer does not hide them — the rim draws over it.
- An occluder on an unlisted layer hides them exactly as it always has.
- Nothing — the default — is what Keyline has always done.
The default is the opposite of the X-Ray one, and the meaning is the same. Both masks say "these layers do not hide me". An X-Ray rim starts out visible through everything, so its mask starts at Everything and narrows; a Main rim starts out hidden by everything, so its mask starts at Nothing and widens.
outline.MainSeeThroughLayers = LayerMask.GetMask("Ground");It is the same pass and the same buffer as 3.5, so a project that has Layer Filtering on for one has it on for the other, the channel budget is shared, and a scene that uses only one of them pays for one. What changes for the two passes named above is where the depth question is answered: the hardware test is switched off for them and the shader asks the occluder buffer instead. Everything the mask does not list still hides the object exactly as before.
The glow follows. A soft rim's halo is cut against the nearest occluder this outline may not draw in front of, rather than against the camera's depth, so the floor that no longer cuts the rim does not cut the glow around it either — which is the artefact this feature exists for. Glow Outside Only follows as well: the part of the object lying under a listed occluder is kept out of the glow like the rest of it, rather than being washed over because the depth test said it was hidden.
Listing the object's own layer means it stops hiding itself. The far side of a crate is hidden by its near side through the same buffer, so the rim of the back edge will draw over the front. Put the floor on a layer of its own — the same advice as for X-Ray, for the same reason.
Transparent geometry is not in the buffer and so never hides a filtered outline, listed or
not. Water, glass and foliage cards with ZWrite off already behave that way for the ordinary depth
test; with the mask in use they behave that way whatever the mask says. Transparent Occluder
Layers in Project Settings ▸ Keyline ▸ Features is the place to name the transparent things
that really do hide, and it feeds this mask as it feeds the X-Ray one.
It waits for the pass. With Layer Filtering off, the buffer every read falls back to says "nothing occludes anywhere". An X-Ray outline can act on that safely — it only ever clips further — but a Main outline that had handed its depth test over would draw in front of the whole scene. So the test only moves once a pass is actually recording: with the pass absent the mask is stored and the outline draws exactly as it always has, and the component says so with a button to switch the pass on.
3.7 Main contact depth
The same complaint as 3.6, answered from the other end and without naming a layer. Main Contact Depth, under Main Sees Through, judges the Main Outline rim at the depth of the object rather than at the depth of the hull drawn around it. The rim that hangs below a crate is still part of the crate, so it is asked the crate's question: the floor the crate rests on stops cutting it, and a wall the crate is genuinely behind still hides it.
outline.MainContactDepth = true;
outline.MainContactReach = 0.05f;   // metres
The object's volume is read as its bounding box — the whole figure's box when the outline covers several meshes, so a character's arm does not stop being seen in front of the floor at the line where the torso's box ends. A box is generous for a shape much thinner than it: a ring, a thin L, a flat blade held diagonally keep a little more of their rim than they strictly should. That is the trade for a setting that needs no layer list, and Main Sees Through is the exact answer where it shows. The two are meant to be used together and cost the same single pass.
Contact Reach, in metres, is how far past the object's own volume the test reaches. A rim stands off the object by its own width, so the test has to reach at least that far or the outermost band of the rim misses the box and is cut as before — roughly the rim's width in metres is the value to aim for. It is also how far towards the camera the contact point is carried, which is what settles the pixels along the line where the object meets the floor: there the two surfaces are coplanar, and an object sunk a millimetre into the ground would otherwise still be cut by it. Too large and the rim starts drawing over things genuinely in front of the object, by about that distance.
The same pass. Contact Depth reads the same occluder buffer, needs the same Layer Filtering pass, and waits for it the same way: with the pass absent the setting is stored and the outline draws exactly as it always has, and the component offers the button to switch the pass on. What it costs on top of 3.6 is that the buffer has to record every layer rather than only the disputed ones, because with no mask named there is nothing to leave out.
The rims only, not the fills. What this rescues is a hull reaching past the object; a fill is the object's surface and has no such part, so Main Fill and X-Ray Fill keep the depth test they have always had. Main Sees Through still speaks for both of them, because a mask names occluders rather than moving a depth.
The X-Ray rim follows it. An X-Ray rim draws where its object is hidden, and the hardware answers that at the hull — so the strip of rim hanging below a floor reads as hidden and would be drawn there, underneath the Main rim that has just been given the same pixels. Asked the same question at the same depth, the two are complementary again. The one thing given up is an X-Ray rim shown through its own object: judged at its own front face, an object cannot hide itself.
Halo Occlusion set to Match Rim is ignored on a rim with this on. That cut compares the body's own depth against the scene, and the depth it works from is measured by a full-screen pass that knows nothing about the contact box — so below a floor it answers the old question and takes the rim the setting had just rescued with it. Main Sees Through remains the way to cut a Main glow by layer, and it composes with this.
Clip At Intersections is held on. What keeps a rim off its own silhouette is the stencil claim, not the depth test, and a claim means "the body is visible here" to the X-Ray family as well — so it cannot simply be widened and left. The widening that Clip At Intersections already does is exactly the right shape: spread for the length of the Main family, handed back before X-Ray reads it. It costs two stencil-only draws per source renderer while this or Main Sees Through is in use.
Several meshes cost the SRP Batcher for the Main passes. The box is described in one part's object space, so a figure built from more than one renderer needs a value per renderer — the same trade Style Space in Object or World space already asks for, and only while the setting is on.
4 · The component
Keyline Outline 3D is the only component you have to add — Keyline
Outline 2D if the object is a sprite. Everything else in the package either sits on top of
one of them or is optional.
4.1 Outlines
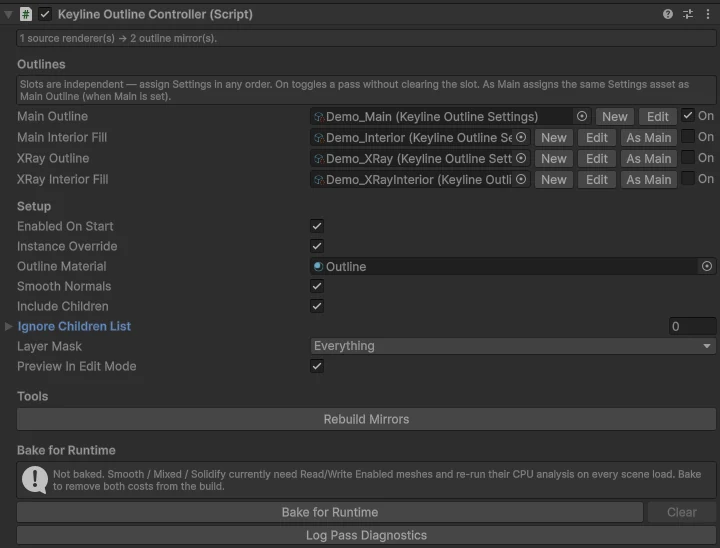
No card is on the page until you add it. Main Outline, the overlays, the interior fills and X-Ray all stay off the inspector until you add them with Add pass — a freshly added component shows its settings sections and nothing else. A pass with no profile still draws nothing. Each pass is a card: colour chip, On in the header, profile slot in the body.
On toggles a pass without clearing its slot. The × in a card's header hides the row and turns that pass off; the profile stays assigned, so Add pass brings the same asset back.
| Row | What it holds |
|---|---|
| Main Outline | the rim profile (hull, unless that profile has Cutout on) |
| Main Overlay - Cutout Outline | second draw of Main, own stencil: hull (outer silhouette) or Cutout (alpha rim). Single Layer lives on this slot's profile. |
| Main Fill | the fill drawn where the object is visible |
| X-Ray Outline | the rim drawn where the object is hidden |
| X-Ray Overlay - Cutout Outline | second draw of X-Ray, own stencil: hull or Cutout through walls. Single Layer lives on this slot's profile. |
| X-Ray Fill | the fill drawn where the object is hidden |
Clip At Intersections — objects that pass through this one
A rim is kept off its own object by the stencil: a mask stamps the body's claim and the rim refuses to draw where that claim is. The mask stamps it only where the body is visible, which is all it needs to be until something passes through the object rather than in front of it.
On the line of an intersection the two surfaces share a depth. The covered part of the silhouette carries no claim, the depth test is a tie, and the rim wins it — so the outline draws a band around the intruder's cross-section, on a face that has no silhouette there. A pillar through a crate gets a ring of outline where it enters. Ordinary overlap never shows this; only intersection does.
Clip At Intersections, in the Main Outline card, claims the whole silhouette for the length of the outline's own draws and hands it back before anything else reads it, so the rim treats the covered part as its own body. It is on by default, including on objects authored before it existed.
It is on the component rather than on a profile because whether anything passes through an object is a fact about where that object stands, not about the look it is drawn with — two objects sharing one profile should not have to agree about it.
| Costs | Two stencil-only draws per source renderer on that object. Each sits in a queue of its own, so across a crowd they batch like the rims do. |
|---|---|
| Turn it off when | nothing ever passes through the object and those draws matter — a crowd, or a platform counting every call. |
Where it does not reach. An intruder that carries an outline of its own has already claimed those pixels for its own rim, and a stencil cell holds one value, so the band can survive on it. The switch covers the visible outline only: an X-Ray rim draws where the object is hidden, so the silhouette it would be clipped against is the one it exists to show. The Cutout overlay keeps its own stencil pair and is not clipped either.
So on those profiles the switch shows ticked and greyed out, and its tooltip names the setting holding it. Main Sees Through and Main Contact Depth hold it on the same way (3.7). Your own value is not overwritten and comes back when the profile moves to Ignore Depth or Edge Softness 0.
4.2 Settings
Under the passes the component has five folding sections, each answering one question, in this order: General — when it draws and with what; Objects — which renderers it covers; Visibility — what hides it and which cameras see it; Geometry — how the hull is built; and Tools (4.3). Keyline Outline 2D has the same sections in the same order, plus Distance Field. A section remembers whether it is folded for the rest of the editor session. The tables below follow each section down the page.
General
| Field | Default | What it does |
|---|---|---|
| Enabled On Start | on | Whether the outline draws from the first frame. Off is the usual choice for anything a highlight component switches on later. |
| Preview In Edit Mode | on | Builds the mirrors in the editor so the outline is visible without entering play mode. |
| Instance Override | on | Runtime writes fork the profile into a copy this object owns, instead of editing the shared asset. Leave it on unless you specifically want one object's script to change every object sharing that profile. See 3.3. |
| Outline Material | empty | Empty uses the package material for the current shader profile. Assign your own only if you have modified the shader — the controller drives dozens of properties on it. |
Objects
| Field | Default | What it does |
|---|---|---|
| Include Children | on | Outlines every renderer under this transform, not just the one on it. What makes a multi-part prop read as one object. Each renderer it collects gets a hull of its own, so on a figure of many parts this is what sets the draw count — see 14.3. |
| Ignore Children List | empty | Exceptions to the above — a hitbox, a socket, a glow card you do not want traced. Also the lever for a figure with more parts than silhouette: anything that never reaches the edge can be left out of it. |
| Layer Mask | everything | Which renderers under this object are eligible at all. |
| Outline From LOD | 0 | With a LOD Group at, under or above the object: the LOD level the outline is built from. Shown when the LOD Groups feature is on and a LOD Group is near. See 4.6. |
| Auto Rebuild In Play Mode | off | Rebuilds when the renderers under this object change while the game is running — a weapon swapped, a limb detached. Off by default: in a build this is a standing cost paid to catch a case most projects never have. The Editor has a separate, project-wide switch for the same thing; the two never act at the same moment. See 16.4. |
| Style Follow Child Movement | off | Keeps Object- and World-space styles in step when a part moves inside the figure — a child dragged in the Scene view, a limb animated at run time. Costs a check per part per frame; an animated skinned mesh updates every frame. 3D only. |
| Merge Child Outlines | on | Children with their own Keyline component join this object's silhouette instead of drawing separately. See 9. |
| Merge When Overlapping | on | Two outlines whose rims meet draw as one silhouette. See 9. |
| Share Stencil With Others | off | Shares one stencil pair with the other outlines that have it on, so they batch. Outlines that share and overlap on screen clip each other's rims. See 9. |
| AdoptChild / ReleaseChild | runtime API | Mark another Keyline Outline 3D as a child of this one, even if it already has its own
component or does not sit under this transform. Rebuild then includes it like
a hierarchy child. sword.AttachTo(character) on pickup,
sword.DetachFromParent() on drop. Nested calls stay one figure:
gem.AttachTo(sword) then sword.AttachTo(character) puts
the gem in the character's silhouette. The child's component is not destroyed, and
its own look is given back when it is released — adoption lends the figure's
profiles for as long as it lasts, it does not take the child's away. |
| AdoptChild on a sprite | runtime API | Keyline Outline 2D has the same four methods with the same names, and one
difference worth knowing: a sprite is never folded into its parent's hull. On a mesh
an adopted child can be absorbed — its renderers join the parent's hull and it stops
drawing — because a hull is extruded geometry. A sprite rim is measured from that
sprite's own distance field, so an adopted sprite always keeps its own component and its
own quad; it wears the figure's look and draws itself. Two sprite outlines therefore stay
two silhouettes, and they fence against each other where they overlap unless
merging puts them together. The methods are typed to their own
component: a mesh outline cannot adopt a sprite outline, or the other way round. |
Visibility
| Field | Default | What it does |
|---|---|---|
| Hide With Renderer | off | Stop drawing a renderer's outline while the renderer is switched off or its object is inactive — for objects a game hides by switching renderers off. A body hidden by the Reveal recipe keeps its outline: that is what Reveal shows. One comparison per renderer per frame while on. |
| Mirror Layer | Match Renderer (new), Fixed (older) | Which layer the outline's own renderers go on. Match Renderer puts each on its
renderer's layer and rendering layers, so a camera, a render feature or a custom pass that
filters by layer treats the outline like the object — a weapon drawn by its own camera, a
minimap camera, split screen. Fixed keeps them all on layer 0 (Unity's Default layer)
whatever the object's layer, as 1.2.0 did. Components added in the Editor or through
KeylineOutlineRef.GetOrAdd start on Match Renderer; one added with a plain
AddComponent, and components saved earlier, keep Fixed until you change it. Changing an object's
layer in the Editor moves its outline at once. |
| Follow Layer Changes | off | Play mode only, with Mirror Layer on Match Renderer: move the outline when a renderer's layer
changes at run time. One comparison per renderer per frame. Code that changes a layer can
call SyncLayers() instead and leave this off. |
| X-Ray Sees Through | everything | Which occluders this object's X-Ray may be seen through. See 3.5. |
| Main Sees Through | nothing | Which occluders never hide this object's Main Outline and Main Fill — the floor it stands on, most often. See 3.6. 3D only. |
| Main Contact Depth | off | Judge Main Outline at the object's own depth instead of the hull's, so the floor it stands on stops cutting the rim without any layer being named. See 3.7. 3D only. |
| Contact Reach | 0.05 | How far past the object's volume that test reaches, in metres — roughly the rim's width. Shown only with Main Contact Depth on. See 3.7. |
Geometry
Every hull is built one way: solid parts grow along their normals, and flat parts — cards, leaves, blades, paper — are found when the outline is built and grow in their own plane, with a shell so they still outline edge-on (section 7). Smooth Normals stays in view. Everything that tunes the hull folds into groups under it, closed by default, each with a label on the right that shows its current setting — Rounded, On, Join 1 mm — so a closed group still says what it holds. A group appears only while its fields can change the hull: Sheet Solidify and Sheet Detection while Project Settings ▸ Keyline ▸ Features ▸ Sheets is on (Sheet Detection also when a pass uses Face Cull Both), Cutout Padding when a pass uses Cutout. Mesh Cleanup's label turns amber, reading Seam Open, when joining is off on a mesh the outline can open along.
Every pass of the outline uses the same hull. A pass whose profile has Cutout on extrudes nothing (8), and with the Sheets feature off every part grows along its normals.
| Field | Default | What it does |
|---|---|---|
| Smooth Normals | on | Averages normals across hard edges when the hull is built, so a cube's corners do not tear the outline open — and works out, per vertex, how much further that averaged direction has to travel for the faces to still clear Width. Miter Limit caps the second part; turning this off loses both. Faces that only share a point are not averaged together: the two sides of a double-sided card, two parts that touch at a corner, a triangle wound the wrong way round (7.1). Costs a one-time analysis when the outline is built. Greyed out while Sheet Solidify is on and no source is skinned: the shell bake fits the hull's normals itself, so the switch changes nothing then. |
| Corners — how hard edges and corners are built | ||
| Corner Topology | Rounded | How a hard corner of the hull is built. Rounded adds a bevel so the band keeps its width all the way round, and wraps the band round the edge where the two sides of a double-sided surface meet; a Sheet Solidify shell gets a rounded rim and domed corners. Simple keeps one vertex per corner and adds no triangles; Sharp Limit (1–4, a multiple of the width, default 1) sets how far that corner may reach, and at 1 the band narrows there. Only at that open rim of a double-sided surface, where one vertex would leave the band no width, does Simple build geometry too: a square rim with its edges cut, and square corners where it turns. Needs Smooth Normals or Sheet Solidify. A mesh with blend shapes gets no bevel. |
| Miter Limit | 1 | How far a vertex on a hard edge may be pushed beyond the plain offset, so that edge keeps the same outline thickness a curved surface gets. This is what makes a box and a sphere match — see 7.1 for why they otherwise do not. 1 adds no correction, so a hard edge's band is a little narrower than a curved one's. 1.45 clears the 1.41 a right-angled edge asks for, so square edges and cylinder rims reach the full Width while a three-face corner eases in rather than spiking out. Raise it towards 2 for a perfectly square corner; higher only matters on acute spikes, where the exact correction runs away. Needs Smooth Normals or Sheet Solidify. |
| Round Angle, Round Strength, Corner Bias, Concave Limit | 0–120°, 1, 0.015, 15° | Rounded only, and only on Sheet Solidify shells — greyed out with a note on an outline that has none. A shell corner is rounded when its angle falls inside Round Angle (From–To); Round Strength goes from a sharp miter (0) to a circular fillet (1); a corner whose arc would be shorter than Corner Bias (Width units, at the shell's band width) stays sharp, and so does one whose planes fold by more than Concave Limit (180 turns that test off). See 7.3. |
| Sheet Solidify | ||
| Sheet Solidify and its scales | on | Gives detected sheets a shell so they stop being infinitely thin — 7.3. |
| Sheet Detection | ||
| Sheet Detection | — | How sheets are told from solids — 7.2. |
| Mesh Cleanup — the outline's copy of the mesh | ||
| Join Coincident Vertices | on | A mesh split along hard edges or UV seams keeps two vertices at one point, and each pushed out along its own faces would open a gap. Vertices on the same point are therefore always joined in the outline's copy of the mesh, on or off. On also joins vertices that only nearly meet — closer than Join Distance (millimetres of mesh space, 0–10, default 1), as an export or a loose snap leaves them — which open the outline just the same, most visibly under Sketch and Electric. The same in the Editor, in Play Mode and in a build. Texture coordinates stay per face, so Cutout and UV Style Space keep their seam; pairs that bone weights or blend shapes move apart are left alone; the mesh in the project is never changed. Applies with Smooth Normals or Sheet Solidify; an unreadable mesh needs Bake for Runtime. Off is for a gap kept on purpose, and the inspector then says when the mesh has one. |
| Min Outline Triangles | 1 | Drops pieces of the outline smaller than this many triangles — a strip floating off a broken mesh. Pieces are counted across submeshes and seams, and the largest piece always stays. Applies wherever the outline builds its own copy of the mesh — on every readable mesh, unless a pass with Cutout and no padding draws it unchanged. |
| Cutout Padding — while a pass uses Cutout | ||
| Cutout Padding | auto | How far a Cutout rim may reach past the mesh's own edge. Auto works it out from the distance field's range at the card's texel density, narrowed by the profile's Width when Width is in World units; a manual value is for artwork whose alpha sits well inside the geometry. Read only when a profile on this object has Cutout on — see 8. |
4.3 Tools
- Rebuild Mirrors — throws the hulls away and builds them again. Needed only after changing the source meshes from outside the component.
- Bake for Runtime — writes the analysed hull meshes to assets, so the analysis does not run on load. Worth it on shipping content; see 7.
- Log Pass Diagnostics — dumps what each pass built, to the console. The first thing to run before reporting a bug.
- Add Draw Config — optional scene host for custom queues. Same item lives under
Tools ▸ Keyline. See 4.5.
4.4 Soft Edge (optional)
A 3D rim is hard by default. That is the product: hang the component on an object and you are done. Softness is a paid extra in setup, not a new default.
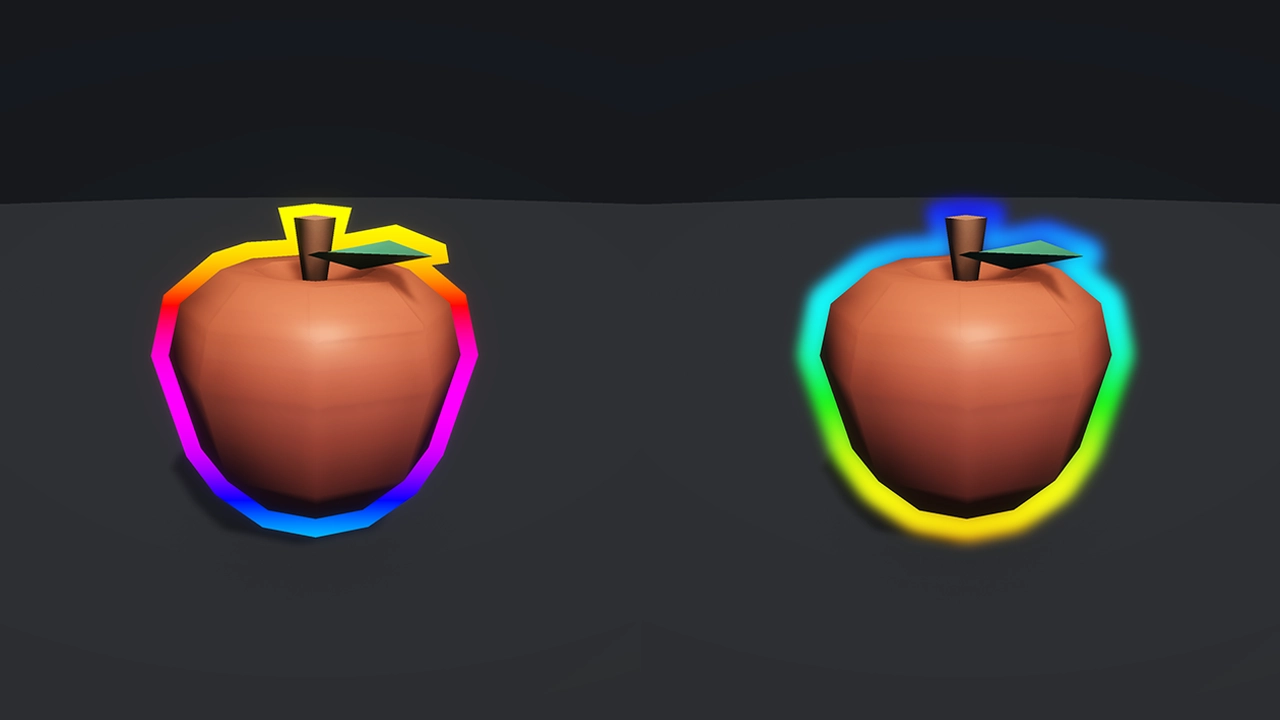
Edge Softness on a rim profile is a world-space halo, 0 to 8. One tick is about a centimetre. Zero is the old picture. The fade stays around the object as the camera moves — it does not spread in screen pixels. The value is read by Main Outline, X-Ray Outline, and their Overlays (Halo and Double extra layers travel with the rim). Main Fill and X-Ray Fill never soften — they stay on the camera path.
A rim drawn from a distance field does not use this at all — neither a sprite nor a rim
with Cutout on. Those already carry a softness of their own,
Rim Softness, and it is the better one: the field knows the distance to the edge, so
the fade is resolved per pixel at the place the edge actually is, for the price of the fetch that
placed it. This pass exists for the opposite case — a hard hull silhouette, which has no gradient
anywhere in it to widen. The field is not offered both, and the slider is hidden rather than left
to do nothing.
Softness above zero does nothing until the Soft Edge pass is in the pipeline. The profile tells
you so beside the slider and offers a button to add it; the same switch project-wide is
Pass In Pipeline under Soft Edge in Project Settings ▸ Keyline ▸ Features. The rim stays hard rather
than failing silently.
- URP — a renderer feature on every Universal renderer the active pipeline uses, injected
after transparents (
AfterRenderingTransparents). Opaque depth is still there, so X-RayZTest Greaterstill works. After the blur, the pass punches this object's silhouette out of the buffer so the glow sits around the mesh, not on its albedo. Hard rims stay on the camera queue. - HDRP — a global Custom Pass volume (
BeforePostProcess), spawned hidden from the project setting in edit mode, in play and in a build. No scene holds it and none needs to.
When the pass is present and softness is above zero, those rim mirrors leave the camera's transparent queue and are drawn into an off-screen buffer, Kawase-blurred, then composited. The blur radius is converted from world centimetres at the object's depth, so the halo stays around the mesh instead of spreading as the camera pulls away. After the blur, the object's own mesh is punched out of that buffer (depth test against the camera copy) so the glow stays around the silhouette and does not paint the albedo. Objects in that buffer share its stencil and fence each other as they did on camera. Soft rims and hard rims (including every fill) do not share the camera stencil in the same frame — Single Layer on a soft object will not fence a hard neighbour, and the other way around.
Each profile uses its own world radius. Grouped objects share one isolation RT so their stencil still matches. One object's Edge Softness does not change another.
Glow Outside Only — keeping the soft X-Ray glow off the body
A hard rim is already fenced out of the object's own silhouette: the mask stamps the body's stencil claim and the rim tests against it. A blur has no stencil. Raise Edge Softness and the glow spreads inward as well as outward — over the very area a Main Fill occupies, so the fill ends up with a glowing border painted on top of it.
Glow Outside Only sits in each rim's own card — Main Outline and X-Ray Outline — because the rim is what it changes. It answers one question for both: is the glow confined to outside the silhouette, or may it wash across the object?
The pass already removes the object's body from the blurred rim, so the glow does not land on its albedo — but only where the body wins the depth test. Hidden fragments are left glowing on purpose: that is the X-Ray look. From there the two families reach the same answer from opposite sides, which is why their defaults are opposite and both are what Keyline has always drawn.
| Rim | Default | On | Off |
|---|---|---|---|
| Main | On | Today's look: the glow stops at the silhouette. | Nothing is cut. The glow falls off inward over the object and over Main Fill. |
| X-Ray | Off | The whole silhouette is cut, hidden fragments included. | Today's look: the glow stays on the hidden part of the body. |
A Main rim only exists where its object is visible, so the ordinary cut already confines its glow and switching off means cutting nothing at all. An X-Ray rim exists where its object is hidden, which the ordinary cut spares on purpose, so confining it takes the whole silhouette.
Turning Main off gives a Main rim the look an X-Ray rim has by default — a glow lying over the object. The rim's own colour still never lands there; stencil fences that, and only the blur reaches inward. So it reads as a falloff from the edge rather than as a fill.
It is on the component, not the profile, because it describes this object's silhouette rather than a look. Each row appears only where it can act — while that card's own profile has Edge Softness above 0. With a hard rim there is no blur to keep out and the row is simply not there. Ticked while the Soft Edge pass is missing, it says so and offers Add Soft Edge Pass.
This is not the same control as Halo Occlusion below, and the two solve neighbouring problems. Glow Outside Only is about the glow lying over this object; Halo Occlusion is about the glow lying over the scene. They can be used together.
Halo Occlusion — whether the glow obeys the rim's own depth rule
The rim itself is depth-tested: a Main rim never appears behind a wall, an X-Ray rim never appears in front of one. The blur is not. It is a full-screen filter with no notion of depth, so it spreads the rim's colour straight across the line the depth test just drew. Both families get an artefact out of it, and they are mirror images:
- Main — an object half behind a wall casts its glow onto the wall's face, where the rim itself was correctly cut away.
- X-Ray — the glow of a rim seen through a wall smears past the wall's edge onto open space, where the rim itself correctly drew nothing.
Halo Occlusion, next to Edge Softness, decides whether that is what you want.
- Match Rim — the glow survives only where its rim would have been allowed to draw. Main where its object is in front of the scene, X-Ray where it is behind. The default, because a soft edge whose hard version is depth-tested and whose blur is not is not a style choice but a discrepancy.
- Ignore Depth — the glow draws wherever the blur reaches, which is what Keyline did before 1.2.0. Still the right answer when the glow is meant to read as light rather than as a marker: it keeps an object findable when most of it is hidden.
Match Rim also holds Clip At Intersections on for the Main rim of anything wearing the profile. The two remove the same band and the cut leaves a hairline the clip closes — see the note in 4.1. The component's own switch is left as you set it and returns under Ignore Depth.
It is one rule, not two features. The comparison is the same for both families; only its direction follows the pass. X-Ray is not exempt: honouring the rim's rule is what keeps the X-Ray glow on the far side of the wall instead of spilling off it.
What it costs. A halo has no depth of its own once it has been blurred, so one has to be built: a screen-sized two-channel target, seeded from the object's own mesh and spread with the same filter footprint the blur uses. It is allocated only when something in view actually asks for it — which, Match Rim being the default, means as soon as any visible rim has Edge Softness above 0. A scene with no soft rim allocates nothing, and neither does one whose profiles are on Ignore Depth. Edge Softness itself starts at 0, so a project that never uses soft edges never meets this cost.
How far it reaches. The depth field is built from the object's mesh and spread as far as the blur reaches, so within that distance the test is exact. Further out — the band the rim's own width contributes, beyond anything the blur touched — there is no depth to test against, and the glow is left alone rather than guessed at. In practice that means a rim much wider than it is soft keeps an untested outer fringe: it may survive on a surface it would otherwise have been trimmed against. Raising Edge Softness, or narrowing Width, closes the gap.
Leaving it untested is deliberate: guessing a depth there (the object's centre, say) cuts the fringe away often enough that the outline appears to eat its own edge. Showing a little too much is the safer failure.
4.5 Draw Config (queue and depth)
Queue, ZTest, ZWrite, Cull, depth bias and stencil Comp / Op / masks are hardcoded until you
add a scene host. Without KeylineDrawConfig in the scene, every 3D outline uses the
same factory numbers as the current working defaults — no ScriptableObject, no Resources asset.
The host is optional. Tools ▸ Keyline ▸ Add Draw Config creates a
Keyline Draw Config object if the scene does not already have one, writes
Assets/KeylineCustomDrawConfig.asset if that file is missing, and assigns it to
Custom Draw Config. Running the item again does not spawn a second object or a second
asset. There is no Create Asset menu for this type.
Reset All on the assigned asset writes those working defaults back; Reset Queues, Reset Stages and Reset X-Ray Overlap do the same for one tab. Added in play mode, the host lasts for the session only, and the console says so.
The inspector is three tabs:
- Queues — base queue, family offsets (Main / Overlay / X-Ray / X-Ray Overlay) and layer offsets (self-occlude, fill, clip claim, mask, rim, gap, extra hull). The clip claim — the stamp Clip At Intersections adds — has a queue of its own so the claims and the masks of a crowd each draw as one batch; it has to stay after Fill and Self-Occlude and before Rim. A Draw Config saved with 1.2.0 keeps the claim in the Mask queue, and its inspector says so: tick Clip Claim Own Queue or press Reset Queues.
- Stages — per-draw ZTest, ZWrite, Cull, bias and stencil. Names follow the pass cards: Main Outline, X-Ray Outline (Through Walls), the fills, masks, overlays.
- X-Ray Overlap — auto-sort nearer X-Ray families before farther ones, and the queue stride reserved for each object.
Greater, and its stencil WriteMask must stay None. The overlay family
must not overlap the hull’s queue block. The inspector warns; it does not block the edit. Stencil
which bit an object owns is still allocated by the pool — that is not in this asset.Soft Edge isolation (drawing soft rims into a private RT) is not a Draw Config field. It stays a pipeline pass, see 4.4.
4.6 LOD Groups
An object with a LOD Group is outlined once, from one LOD level — Outline From LOD, LOD0 by default — and the outline disappears where the LOD Group culls the object. Without this, every level was outlined at the same time: the LOD Group switches its own renderers and knows nothing about the copies an outline draws with.
- Your LOD Group is never modified. The other levels are simply left out of the outline. Cross Fade and everything else the group does keep working on the object itself.
- The outline follows the object out of view. A hidden LOD Group with one level is added beside yours, holding only the outline's renderers, with your group's size, reference point and cull height. It is not saved and never needs touching.
- One set of hulls for every level. A higher Outline From LOD means fewer vertices to draw at every distance; LOD0 follows the silhouette most closely. At the distance where LOD2 shows, the difference is rarely visible.
- A LOD Group added or edited after the outline was built is noticed by the inspector, which offers Rebuild For LOD Groups. Nothing rebuilds by itself.
- Switched off in
Project Settings ▸ Keyline ▸ Features(LOD Groups, under Geometry), every level is outlined as before 1.3.0.
LODGroup.ForceLOD on your
group does not reach the hidden one; the outline keeps following the camera distance.5 · The profile
A profile is an asset: Assets ▸ Create ▸ Keyline ▸ Style Profile, or the New
button next to any empty slot. Beside it in the same menu sits Mobile Solid Style
Profile — the same asset drawn by a lighter program, with no layered styles and no mesh
Cutout, and that absence is where the saving comes from. See 16.
Sixteen profiles ship in Runtime/Profiles/: one per style, plus
Profile_MobileSolid, the bundled Mobile Solid one. Tools ▸ Keyline ▸ Restore Bundled
Style Profiles puts them back if they are edited by accident — rewriting the ones still
there, and recreating any that have been deleted.
The inspector hides what the current style does not read. That is deliberate and it goes both ways: a control that does nothing is worse than a missing one, because it invites tuning and then teaches the wrong lesson.
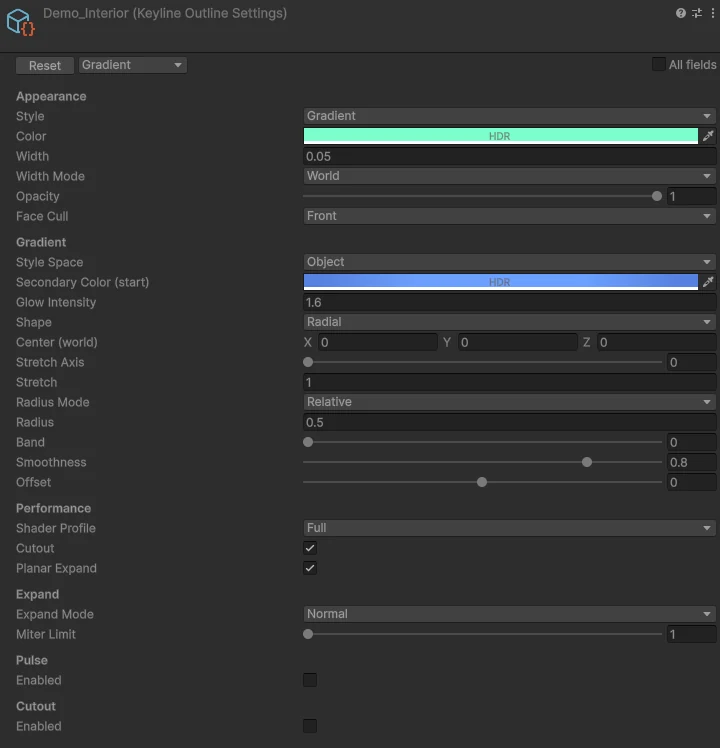
5.1 Look
| Field | What it does |
|---|---|
| Style | Which of the fifteen looks this profile draws. See 6. |
| Color | HDR. Its alpha is part of the look, not a master fade — that is Opacity. |
| Secondary Color | Only for the styles that use two: Double, Gradient, Frost, Lava, Smoke, Crystal, Water, Fire. Under Gradient it is the start of the ramp and its alpha is the alpha at that end — a transparent start against an opaque main colour is what makes a gauge empty out instead of changing colour. |
| Width | Thickness of the rim. Hundredths of a unit (about a centimetre) in World mode, pixels in Screen mode, and a whole number of source texels in Pixels mode. The field's label and units follow the mode, and in Pixels it becomes an integer with a step button either side. |
| Edge Softness | World-space halo on a 3D rim (0–8). One tick is about a centimetre. Stays around the object as the camera moves — it does not spread in screen pixels. Zero is a hard edge. Main, X-Ray and their Overlays read it; the fills ignore it; a rim drawn from a distance field does not show it at all — sprites and Cutout soften through Rim Softness instead. Needs the Soft Edge pass — 4.4. Each profile uses its own value. |
| Halo Occlusion | Whether the halo obeys the same depth rule its hard rim obeys. Match Rim, the
default, keeps the glow behind whatever hides the rim, so a soft Main outline stops at an
occluder and a soft X-Ray outline is the mirror of that. IgnoreDepth lets the
glow lie over the scene — the pre-1.2 look, and still the right one for a lamp or an aura
that should wash over what is in front of it. Shown only while this profile's Edge Softness
is above 0. Not the same control as Glow Outside Only, which is about the object's
own body. See 4.4. |
| Width Mode | World keeps the outline in proportion to the object, so it thins with distance
and goes away with the thing it is on. ConstantScreen holds the same pixel
width at any distance — right for a marker on a far objective, wrong for a crowd, which
turns into a solid mass of outline. Pixels counts texels of the sprite's own
texture and is for 2D pixel art — see 12.3. |
| Opacity | Master fade for the whole pass, 0 to 1. This is the one to animate. |
| Single Layer | Paint each pixel once where this pass's hull covers it twice. Each pass reads its own profile — X-Ray Outline and X-Ray Fill honour the flag the same way Main does. Turning X-Ray on does not fence Main Outline. Hidden for Halo, Frost and Double, whose overlap is the look. See 5.6. |
| Face Cull | Which faces draw this pass. Rim passes: Both draws both walls of the hull. A hull has a near wall and a far wall, and
Fills honour it too. Width is 0 on a fill, so the geometry is the model's
own surface and nothing is extruded — the setting only picks which faces of it draw.
|
5.2 Style space
Styles that draw a pattern, a noise or a ramp need to know what that pattern is attached to. Style Space is that answer, and only those styles read it.
Ignore Object Stretch, directly under it and only while the space is Object,
decides whether a non-uniform scale is allowed to stretch the pattern. Object space is the model's
own local position, so scaling a transform (2, 1, 1) leaves that coordinate alone while
the mesh becomes twice as wide — noise cells and flow axes then come out elliptical. Smoke and Fire
show it most, because their flow axis turns the skew into a lean. On by default; turn it off for the
pre-1.2 behaviour, where the style stretches along with the mesh.
Scale does not change the look. In Object space everything that spans the model — Gradient's ramp and its Relative radius, Rainbow and Frost's height, the grain of Sketch, Electric, Frost, Lava, Smoke, Crystal, Water and Fire — is measured across the whole figure, in the figure's own units. A model scaled to 100, or built from parts scaled differently inside it (a mesh at 100 under a parent at 1, the way many imported models arrive), wears the same pattern as at scale 1.
A uniformly scaled object is untouched either way, and that is arithmetic rather than a promise: the correction is normalised so it comes out exactly 1 there. Only an object that was already being stretched can look different. The other three spaces do not measure in local units, so there is no stretch in them to remove and the row is not shown.
| Space | The pattern is anchored to | Reads as |
|---|---|---|
ObjectSpace | the mesh | painted on; it turns with the object |
WorldSpace | the scene | the object moves through a fixed field |
ScreenSpace | the screen | a filter over the image |
UVSpace | the mesh's unwrap | a texture on the surface — needs sane UVs |
A new profile starts in Object Space whatever its style, and Reset puts it back there: the effect sits on the object and travels with it. Profiles authored before Style Space existed keep the space they were saved with, so they look as they did.
Two styles offer three of the four. Pattern and Gradient both measure along a single axis from the object's pivot, which on an unrotated object is the same number in world space as in object space — a mode that duplicates its neighbour most of the time is worse than one fewer mode. So World is not offered for them, and a profile carrying it is moved back to Object.
5.3 Expand
Since 1.3.0 how the hull grows is set on the object, not in the profile: Miter Limit, Min Outline Triangles, Sheet Solidify and sheet detection are in the component's Geometry section. They describe the mesh rather than a look, so one profile can outline a crate and a leaf. A component saved with 1.2.0 takes the values its profile held the first time it runs (2.4).
5.4 Pulse
A cheap animated breath, computed on the CPU once per frame and pushed as two numbers — no coroutine, no animator, no per-object script.
| Field | What it does |
|---|---|
| Enabled | On or off. |
| Speed | Cycles per second, roughly. |
| Amount | How far it swings. |
| Brighten | How much brighter the outline gets at the top of the swing, scaled by Glow. 0 leaves the colour still. |
On a rim, Pulse drives the width and brightens the colour with it. On a fill it drives the colour only, because a fill has no width to swing.
A style's pattern holds still while the width breathes: the band grows over the pattern rather than stretching it, so Crystal facets, Lava cracks, flames and gradients stay where they are at every point of the swing.
5.5 Blend Mode
How the pass is composited over what is behind it — a rim, an interior fill, either of the X-Ray pair. It is a property of the profile, so each pass can be laid over the frame differently. In 1.0.0 the style decided this by itself and there was no field; Default is that behaviour kept intact, so every profile written before this existed looks the same as it did.
The mode matters most where there is something underneath for it to act on, which is why the picture below is a fill: an interior fill covers the model's own lit surface, and what a mode does to that surface is the whole of what separates the modes from one another.
| Mode | What it does |
|---|---|
| Default | The style decides. Neon, Halo, Electric and Rainbow add their colour to the frame; every other style blends with transparency. |
| Alpha | Ordinary transparency, and the only mode where Opacity covers what is behind it. Pick this to make a light style solid. |
| Additive | Light. Bright over dark; over a pale background it clips to white and the shape goes with it. |
| Screen | Light that cannot blow out — approaches white instead of hitting it, so a glow keeps its shape over bright scenery. Usually the safer of the two glows. |
| Multiply | Ink. Darkens and tints rather than covering: a contour, a coloured shadow, a stamped line. Opacity reads as how far towards the colour to go. |
| Subtract | The colour taken out of the frame. A hole cut in the light. |
| Darken / Lighten | Whichever is darker or brighter, channel by channel. Lighten is the glow that stops climbing however many outlines overlap. |
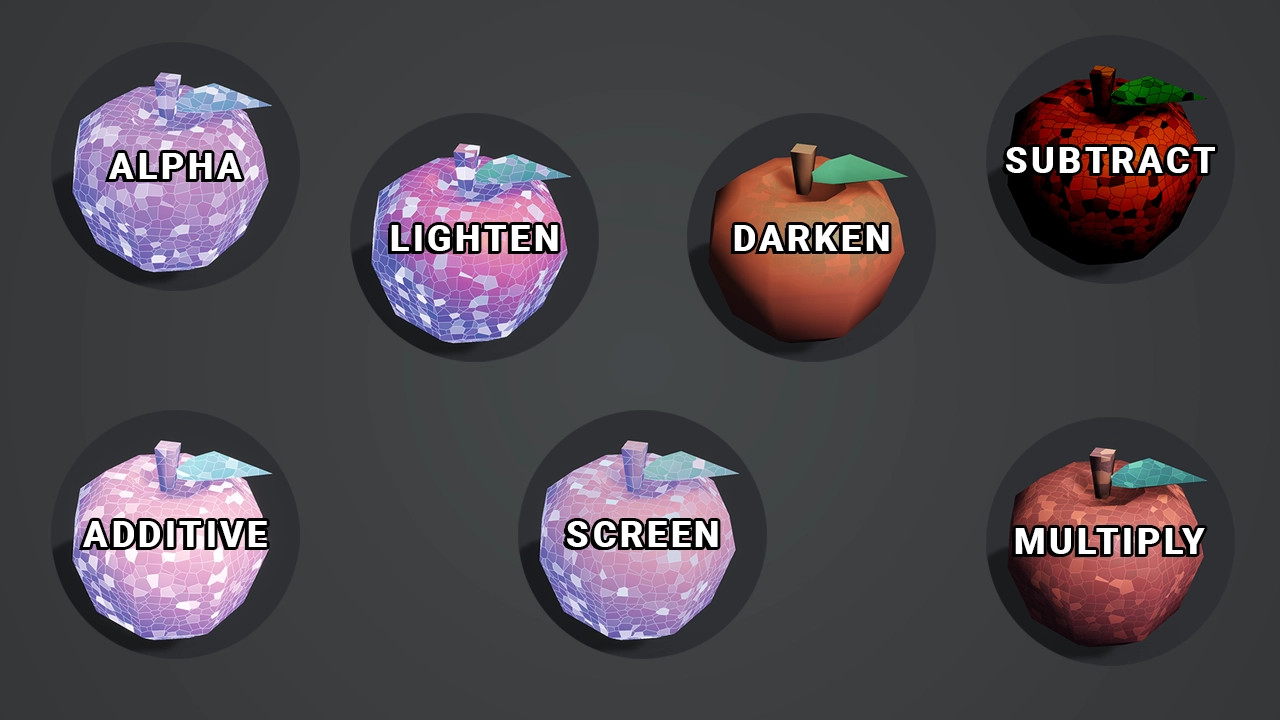
5.6 Single Layer
A hull covers some pixels twice — wherever the shape folds back on itself, and at every seam of an object built from several meshes. At full opacity that is invisible. Drop Opacity to about a half and the doubled places show as bright patches, because two half-transparent layers are not one half-transparent layer.
Single Layer paints each pixel once instead. Once per unit: the whole object with all its renderers, or the whole merge group. Two separate objects still draw over each other — that is what merging is for.
It is 3D only. A sprite outline is cut from a distance field on a quad, and a quad does not cover any pixel twice, so there is nothing to fence; the 2D inspector says so if a profile carrying the flag is assigned there.
Not available on Halo, Frost or Double. Those styles are built from stacked hulls whose overlap is the falloff — fencing them would leave one layer standing. The field is hidden for them, and the check is repeated in the code, because a profile outlives the style it was set up under.
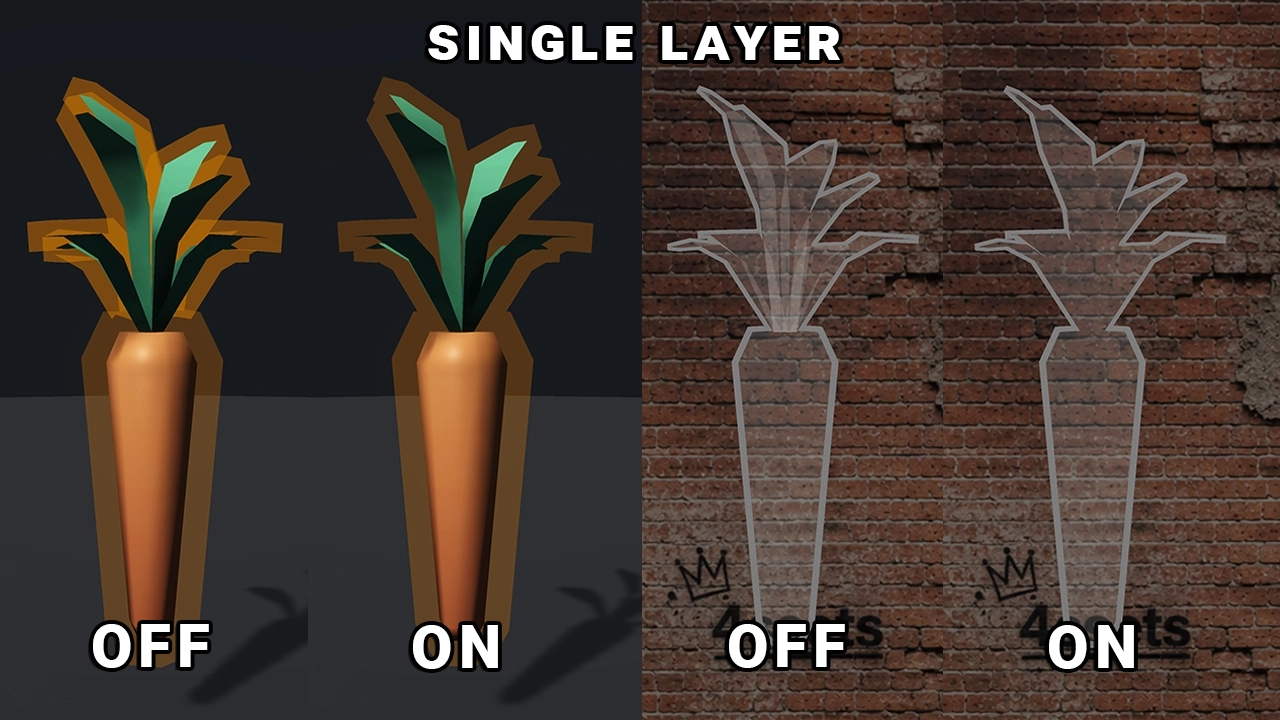
6 · Styles
Fifteen looks, one profile field. Switching the style in the inspector or in the demo brings that style's own defaults with it — colour, width and its own parameters — because a style is a specific set of numbers rather than just a branch in the shader.
Cost. Twelve of the fifteen are one hull and one draw call per object. Three are not, and it is worth knowing which before a crowd scene:
| Style | Hulls per object | Why |
|---|---|---|
| Solid, Sketch, Pattern, Electric, Rainbow, Gradient, Neon, Lava, Smoke, Crystal, Water, Fire | 1 | one band, drawn once |
| Frost | 2 | a soft shell around the core |
| Double | 3 on a mesh, 1 on a sprite | inner ring, outer ring, and a mask that keeps the gap empty — or all three cut from one distance |
| Halo | 2–8 on a mesh, 1 on a sprite | one per layer — or the whole falloff in a single draw, cut from a distance field |
All fifteen shots below are the same prop, the same camera and the same light. What differs is the style and its shipped defaults.
6.1 Solid
One hull, one draw call — the cheapest the asset gets, and the right default for anything that just needs to be picked out. Every other style is measured against this one.
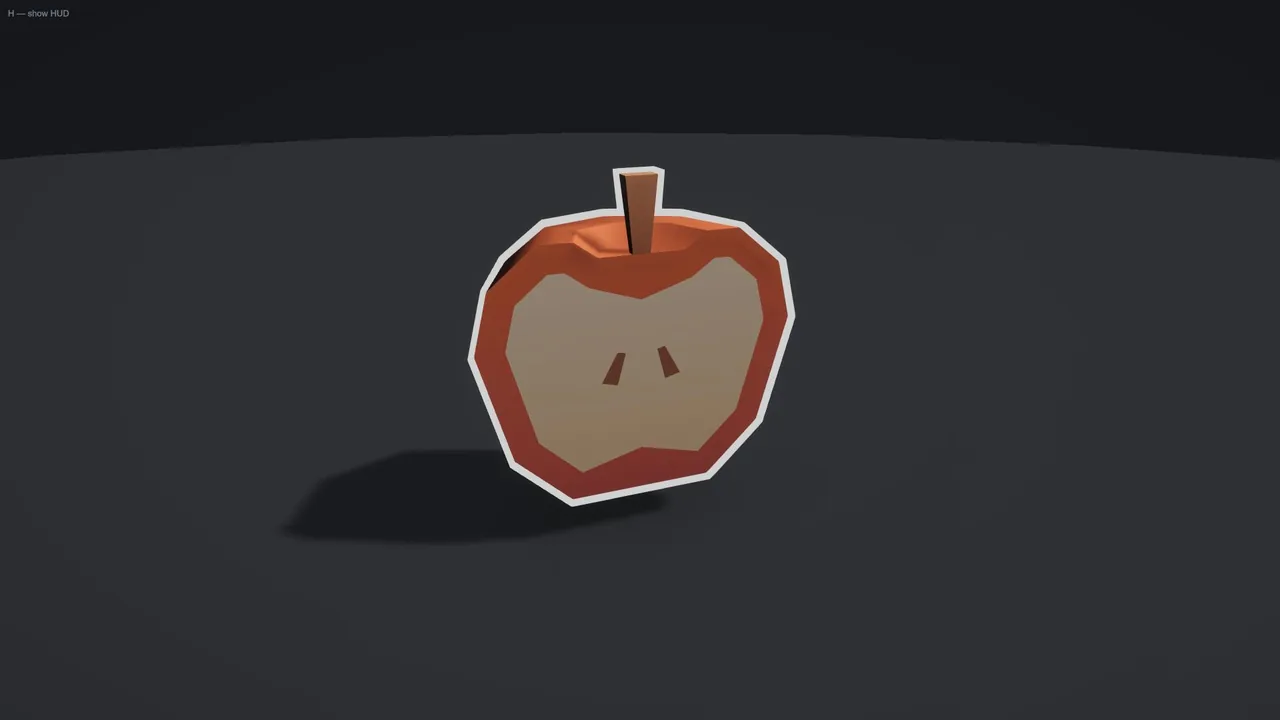
6.2 Neon
An additive core that reads as light rather than paint. Glow pushes the colour past white; the shipped profile also switches Pulse on, because a neon sign that does not breathe looks like a decal.
Additive blending means the background shows through the bright parts — over a dark scene it glows, over a bright one it washes out. That is the trade of the style, not a fault of it.
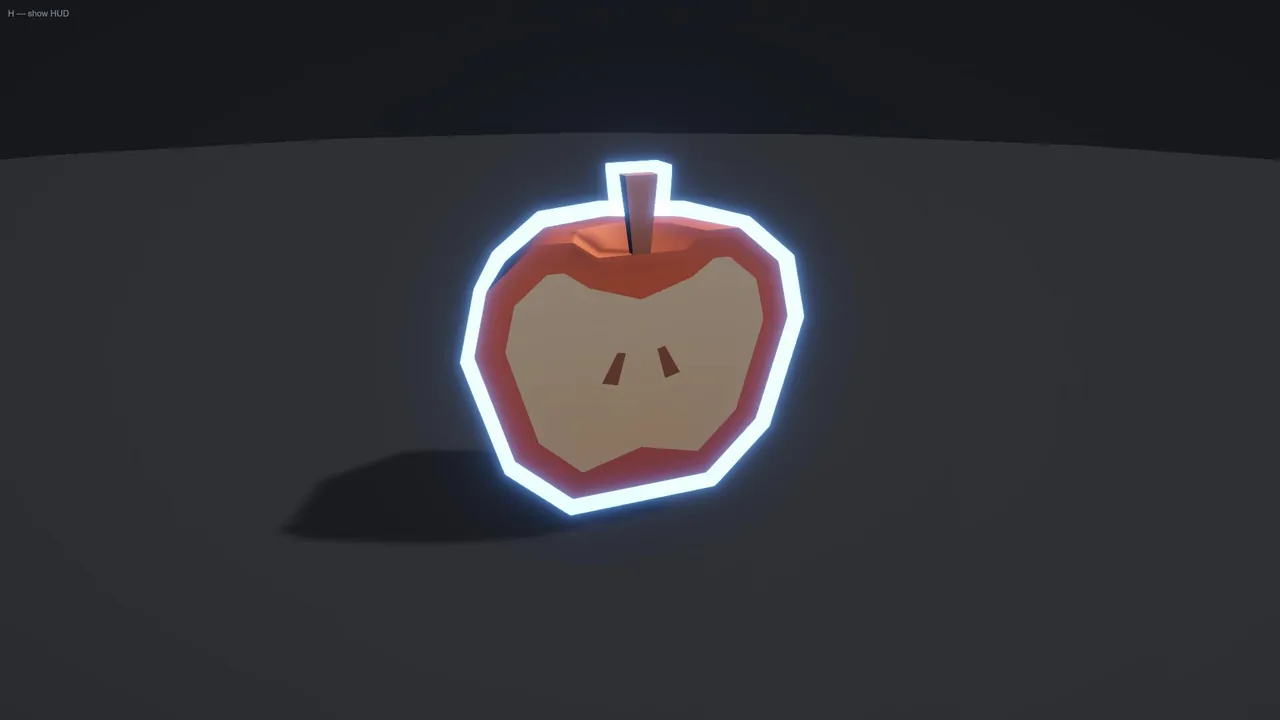
6.3 Halo
A falloff instead of a line: several concentric hulls, each slightly wider and slightly more transparent than the last. Layers is how many, and besides Glow it is the only control the style has. The ramp between them is a straight line from the object out to nothing and is not adjustable: because the layers add up, any curve control would change only a thin band at the inner edge. Width and Layers are the whole style.
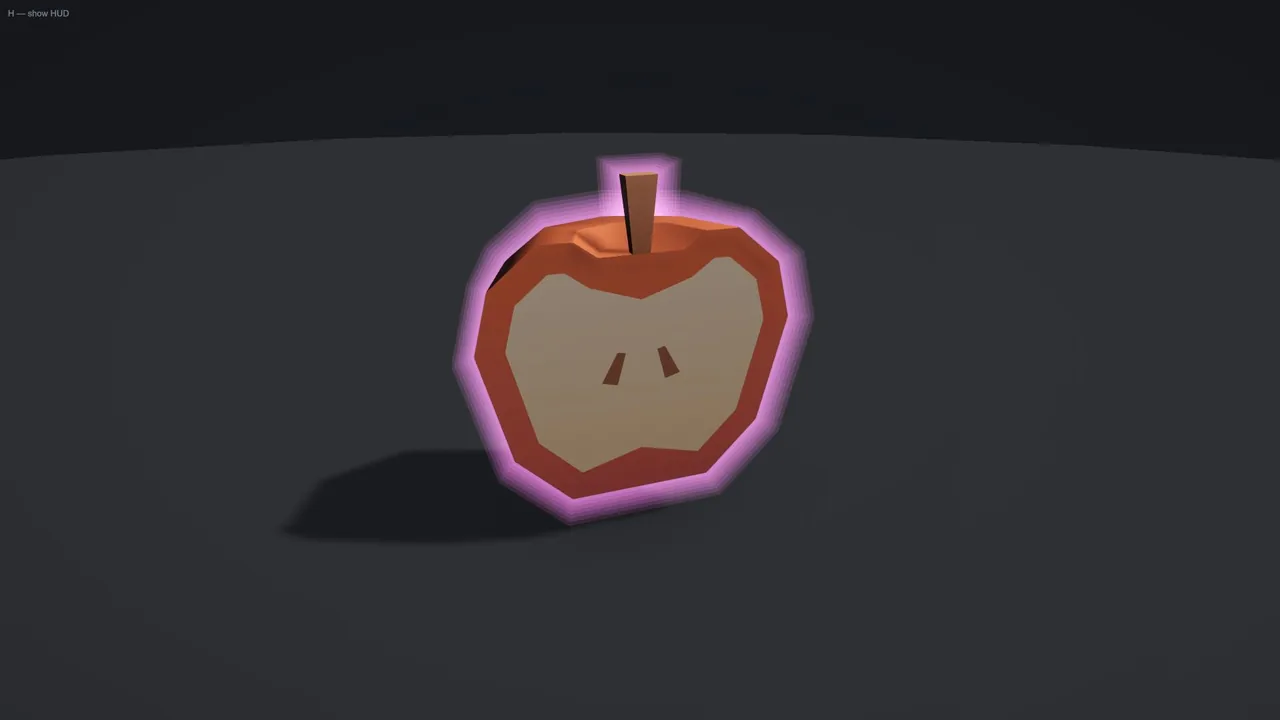
6.4 Sketch
Hand-drawn unevenness: the width is perturbed by noise, redrawn at a discrete rate rather than every frame, so it reads as a pen redrawing the outline instead of static jitter. Amount is how uneven, Speed is how often it is redrawn.
On an animated character the unevenness stays with the body: the noise is keyed on where each vertex sits on the model at rest, not on where the animation has put it, so it is redrawn at Speed and not on every frame of the animation. That key is recorded when the outline prepares the mesh, which needs the mesh readable — the same Read/Write that Smooth Normals asks for — or baked with Bake for Runtime. It applies in Object style space; Electric's bolts use it too. A seam of vertices that share a position and were never welded would open under Sketch and Electric; Join Coincident Vertices, on by default, closes it — see Geometry.
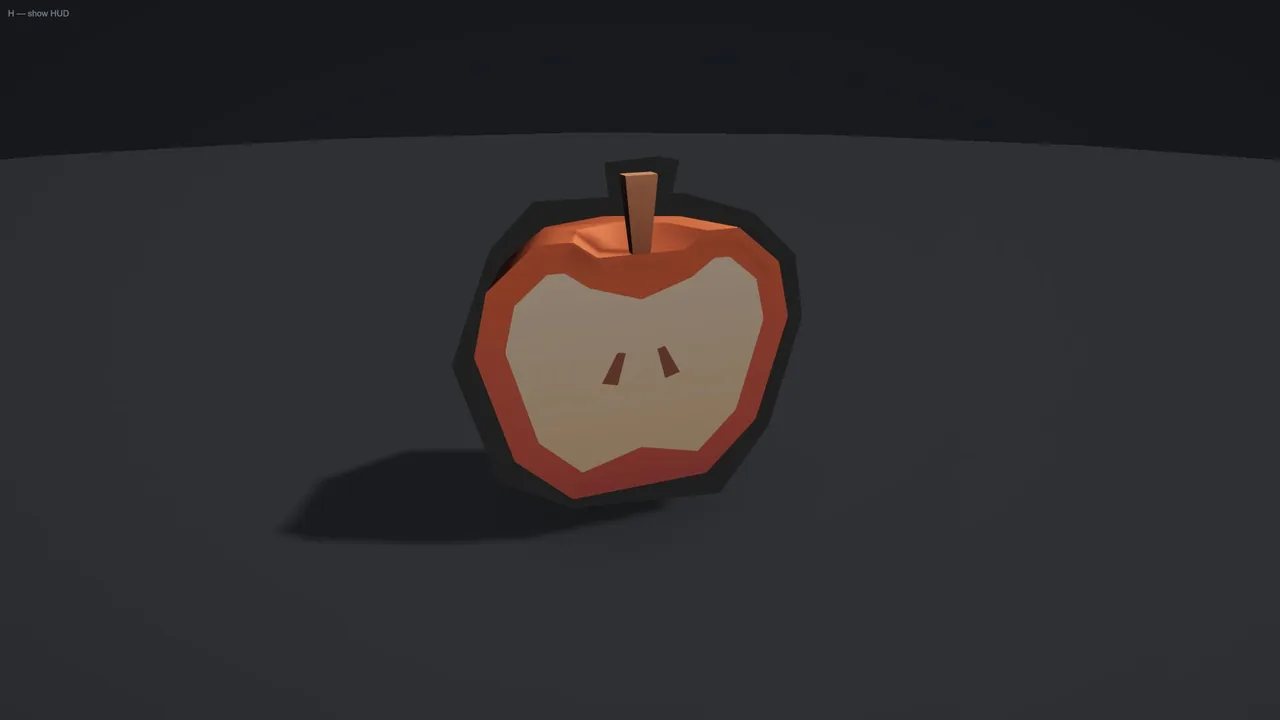
6.5 Pattern
A texture across the outline — dashes, dots, hazard stripes, whatever is in the 84 shipped PNGs or your own. Scale, Contrast, Threshold and Scroll shape it.
What the pattern is anchored to is Style Space: painted on the mesh, fixed on screen, or following the UVs. World is not offered here — measured from the pivot along one axis, it would repeat what Object already does.
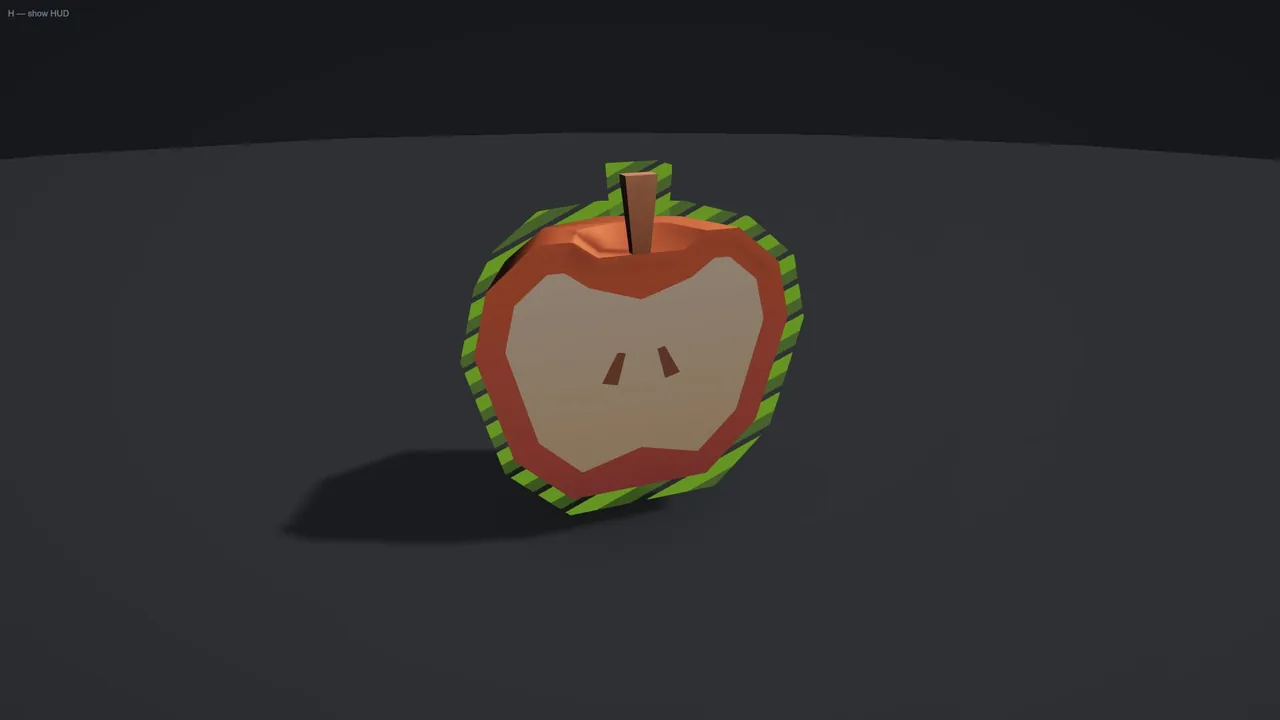
6.6 Double
Two concentric rings with a gap between them. Inner Width, Gap and Outer Width are all in the profile's width units. The profile's shared Width is not read by this style and is hidden for it — these three are the whole of the ring.
On a mesh this is three draws per object: the two rings, plus a mask that keeps the gap genuinely empty rather than filled by whatever is behind. A hull knows only its own radius, so the core and the ring cannot be told apart within one.
On a sprite it is one draw. Both boundaries are thresholds on the same distance, and the gap is simply where neither ring is — nothing is drawn there, so nothing has to be masked out.
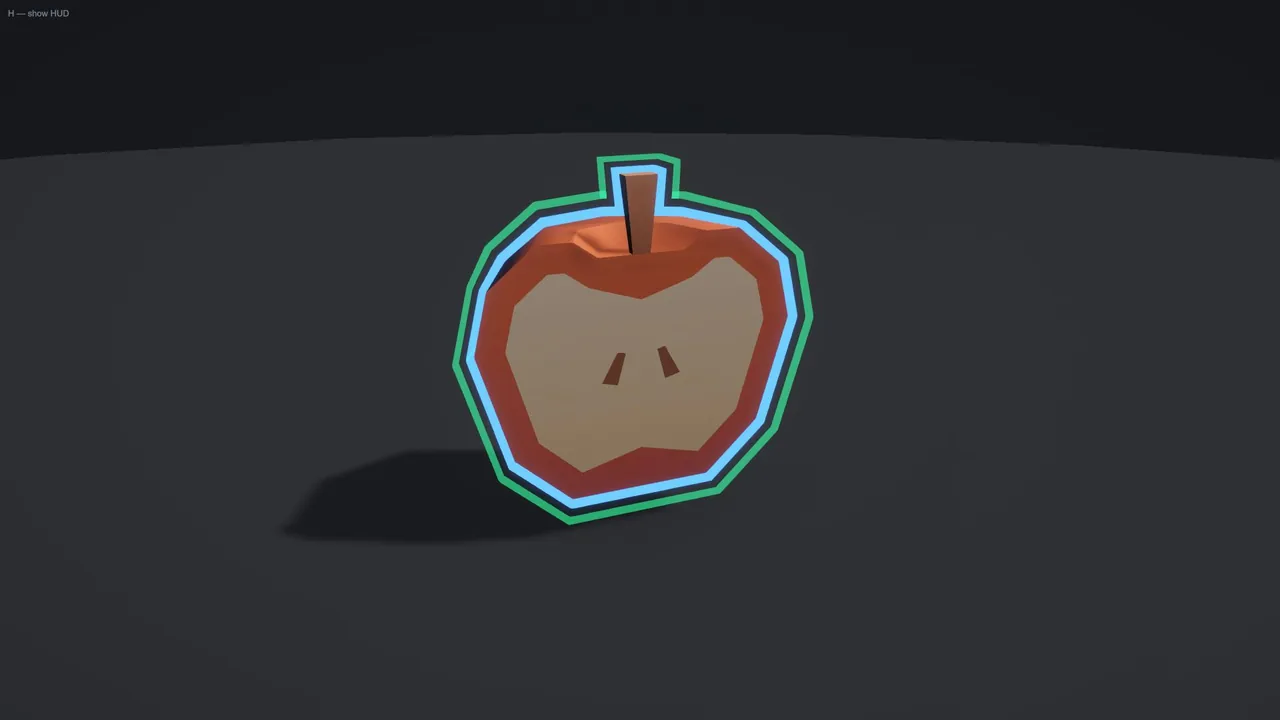
6.7 Electric
Sketch's noise driven harder and faster, with a floor under the width so the bolt cannot collapse to nothing between spikes. It shares Amount and Speed with Sketch, but the two do not mean the same thing here: Electric stacks three noise terms where Sketch uses one, so the shipped profile asks for less Amount — 0.5 against Sketch's 1.2 — and far more Speed, 2 against 0.35.
Speed sets the pace of everything that moves: the width spikes, the bright bolts along the line and the flicker of the whole outline. At the shipped 2 it crackles at full rate; lower values calm it down. On an animated character the bolts stay with the body in the same way Sketch's unevenness does — see 6.4.
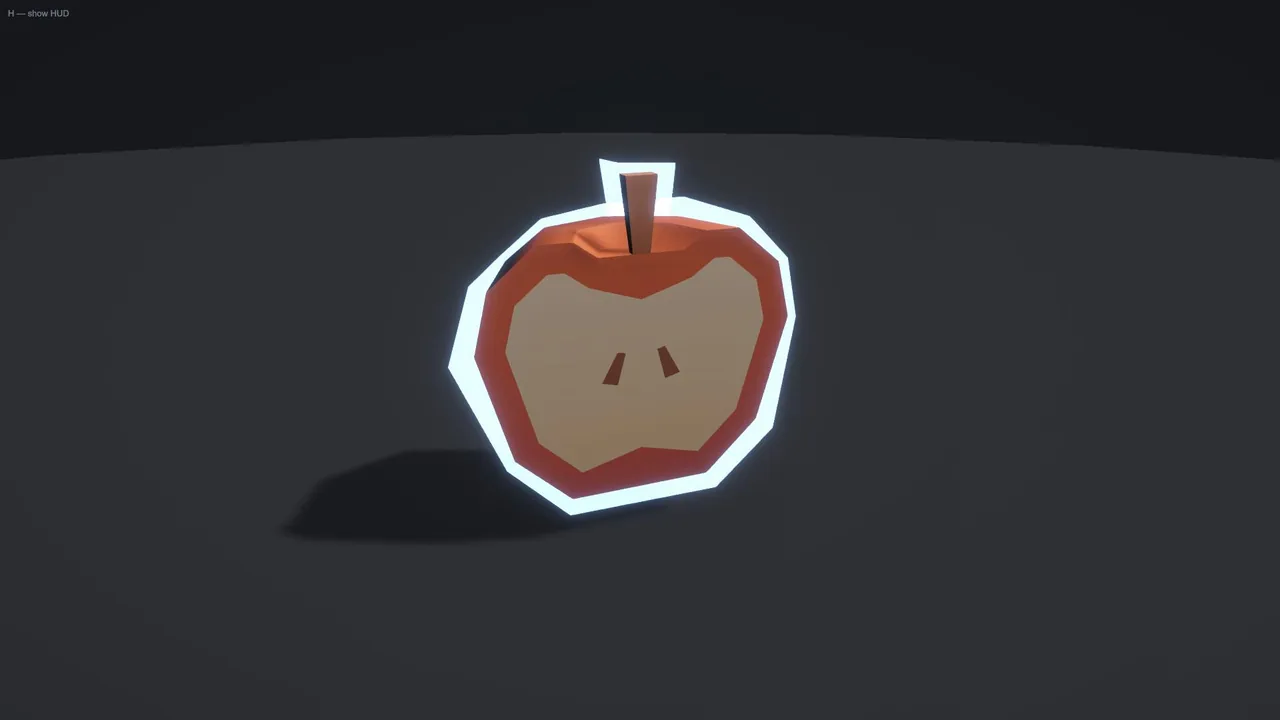
6.8 Rainbow
A hue sweep along the outline. Motion chooses whether the bands travel up the object or rotate around a centre; Scale is how many bands, Speed how fast — negative reverses it.
Saturation takes the ramp towards grey rather than towards white, so the bands stay readable as light and dark all the way down to zero. A desaturated Rainbow is a travelling shimmer that does not fight the scene's palette.
Rainbow is the one style that does not read Color: every channel comes from the hue ramp, so the field is hidden for it rather than left there doing nothing. Opacity and Saturation work as expected.
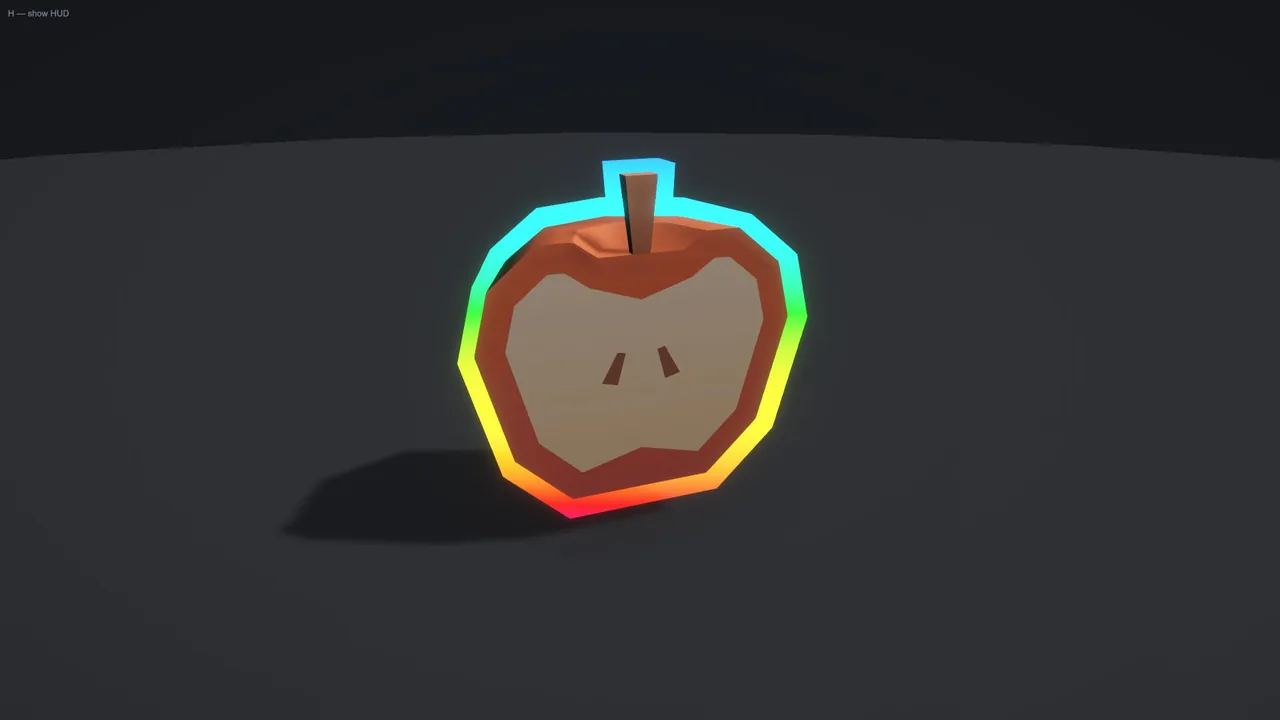
6.9 Gradient
The largest style in the asset, and the one everything else is built on: the waves, the gauges and the reveal all drive a Gradient underneath.
Two colours with independent alphas, three shapes and a set of controls per shape; the inspector shows only those the chosen shape reads. In short: Linear is a ramp in the object's own space; Radial and Planar measure from a point or a plane in absolute world space, which is what lets one front cross several objects in step.
Angle turns a Linear sweep within the style space's XY plane — 0 runs bottom to top. Tilt lifts that direction out of the plane, towards Z, for a sweep that runs at a slant through the model rather than across its front: 0 keeps the plane, ±90 runs straight along Z. Tilt is read on meshes in Object space; Screen and UV are flat and ignore it. Under Radial the same pair sets the axis Stretch acts along, as Stretch Axis and Stretch Axis Tilt.
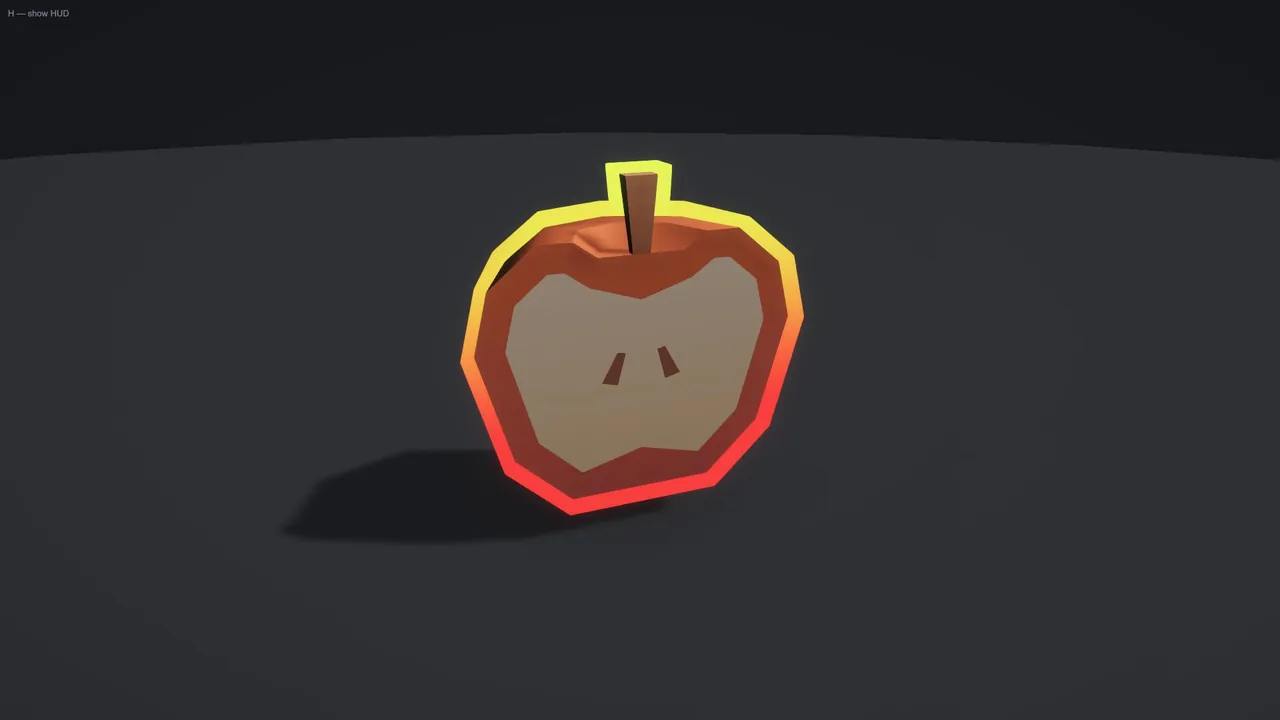
6.10 Frost
A soft, cold edge: a wide low-opacity shell around a core, with sparkle noise on top. Soft Falloff shapes the shell, Halo Width and Halo Opacity size it — the labels say halo because that is what the outer mirror reads as — and Sparkle is the noise. Band Fade is how large a patch of plain ice is left where the surface turns to face the camera; it is worth leaving alone, because the strata are keyed to a direction that stops meaning anything head-on, and at zero they spin into a cross there. Uses the secondary colour.
Two hulls per object — the core and the shell.
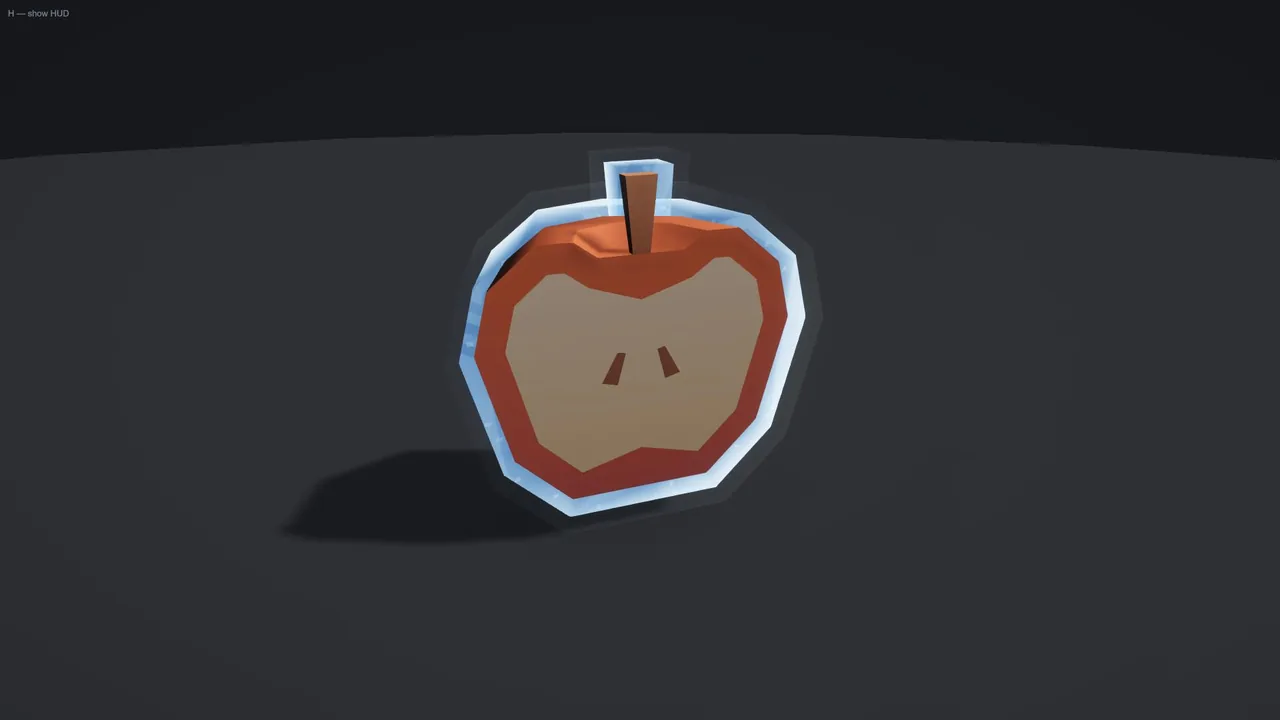
6.11 Lava
A dark crust broken open on a moving core. Cracks is how much of the crust has split — at zero it is unbroken and the style is a dark rim, at one there is no crust left and the whole band is molten. Heat is the brightness inside the cracks over the outline's colour; past one it goes white-hot, which is what sells it as emitting rather than merely being orange.
Flow and Flow Direction move the crust, Crust Scale sizes it, and Turbulence decides how much the flow folds rather than slides. Pulse Rate and Pulse Depth breathe the heat. Uses the secondary colour for the crust.
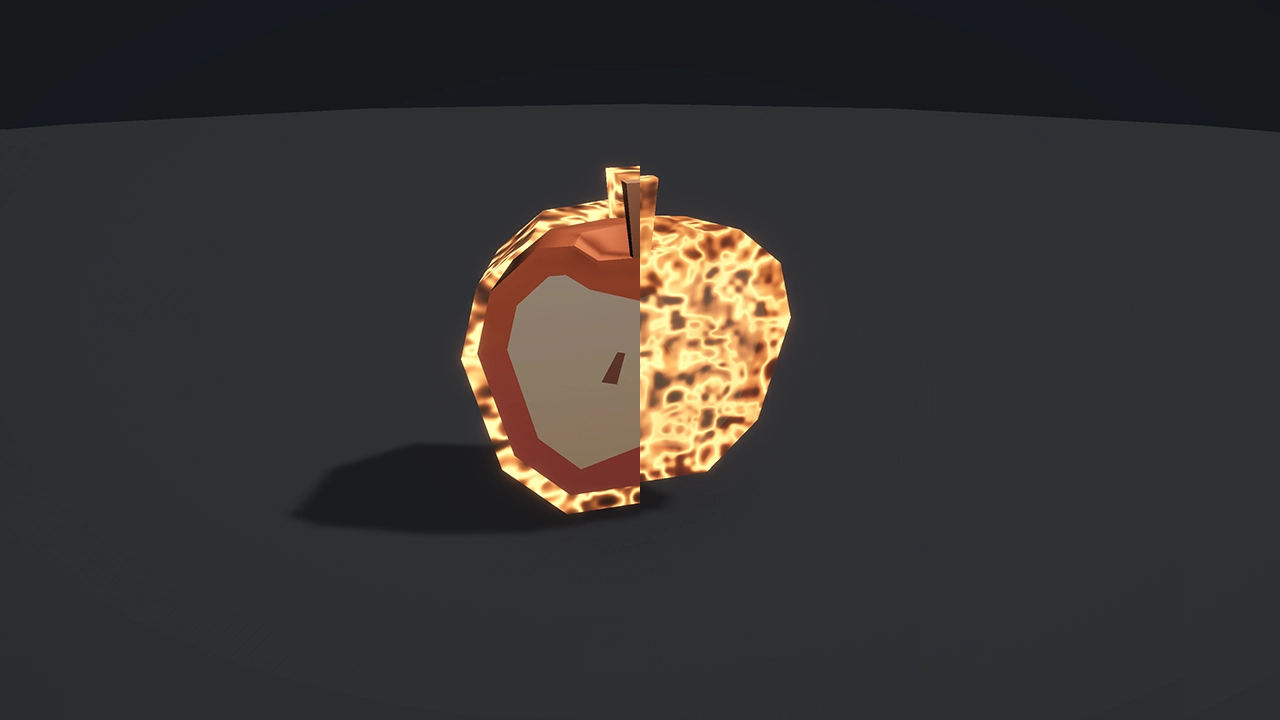
6.12 Smoke
A billowing cloud rather than a line. Density is how much of the band is filled, Billow Scale sizes the puffs, Drift, Drift Direction and Drift Tilt carry them — the tilt leans the drift out of the style space's XY plane, which is the only plane a single angle can point in — and Turbulence is how much the drift curls instead of sliding.
Height is how far along the drift the cloud lasts, as a fraction of the shape — the same control Fire calls Height, and it reads the same way. At 0.3 the cloud clings to where it started and is gone a third of the way along; at 1 it just reaches the far edge; past 1 it leaves the shape still thick, which is what smoke coming off a thing rather than sitting on it looks like. It is subtracted from the cloud rather than clipping it, so the smoke ends by having too little substance left to show — which is what stops it reading as a painted shape with an edge.
Fray is the manner of that ending, once Height has decided where. Low keeps what survives opaque and gives it a defined edge, closer to steam under pressure; high stretches the last of it into wisps that fade out over a distance. Uses the secondary colour.
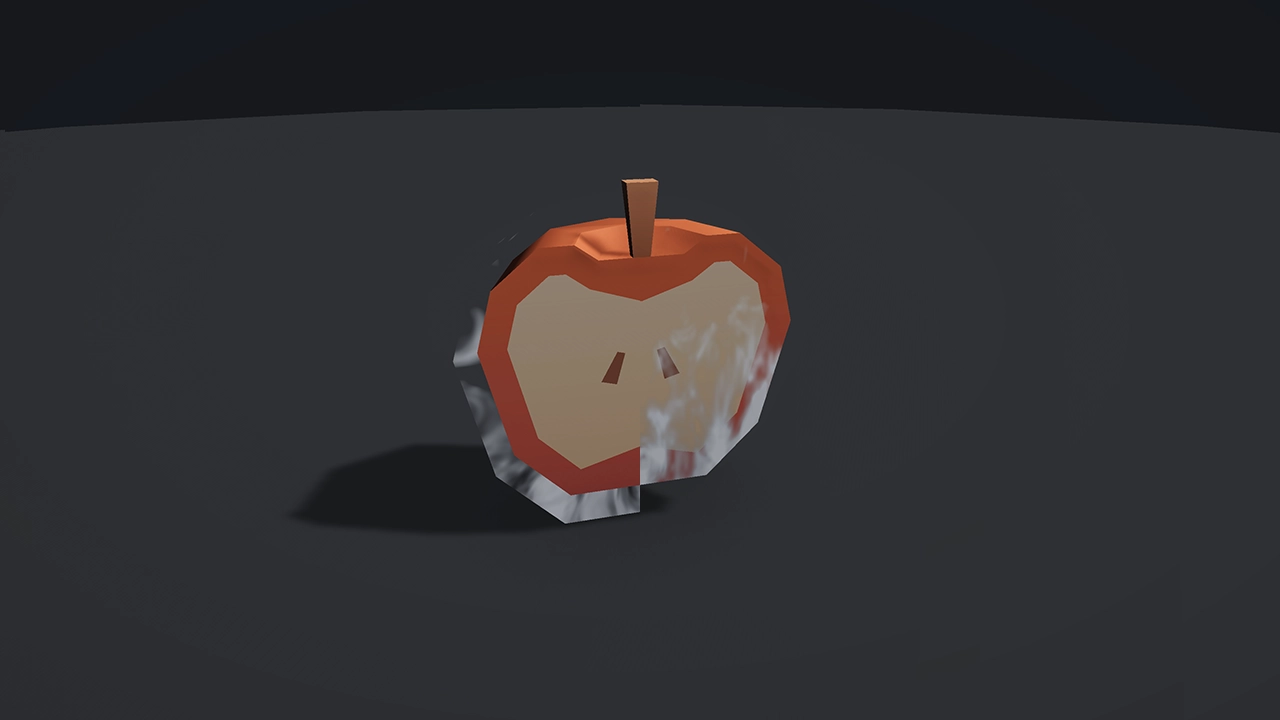
6.13 Crystal
A cut stone: the band is partitioned into facets, each one a flat plane catching the light on its own. Facet Scale is how large they are, Evenness how regular — low gives a rough rock, high a machine-cut gem. Cut Edges is the brightness of the lines between facets, and it is what makes the shape read as cut rather than as painted.
Glint is how much fire the stone has. Zero is a stone with none — not a dim one, none — and upward the highlight widens and brightens, so more facets catch the light at once. Low leaves one or two glinting while the rest stay dark, which is what reads as cut; high lights most of the stone, which reads as polished. Glint White is the ceiling on how far a lit facet washes out — at zero it keeps its own colour, which suits a coloured gem; at one it blows out like cut glass. Dispersion splits the colour between neighbouring facets, small amounts reading as a precious stone and large as a prism. Light Direction and Spin move the light; Facet Depth shades each facet by distance from its own centre, which trades flat panes for pebbles. Uses the secondary colour for the fringe the facets are split towards.
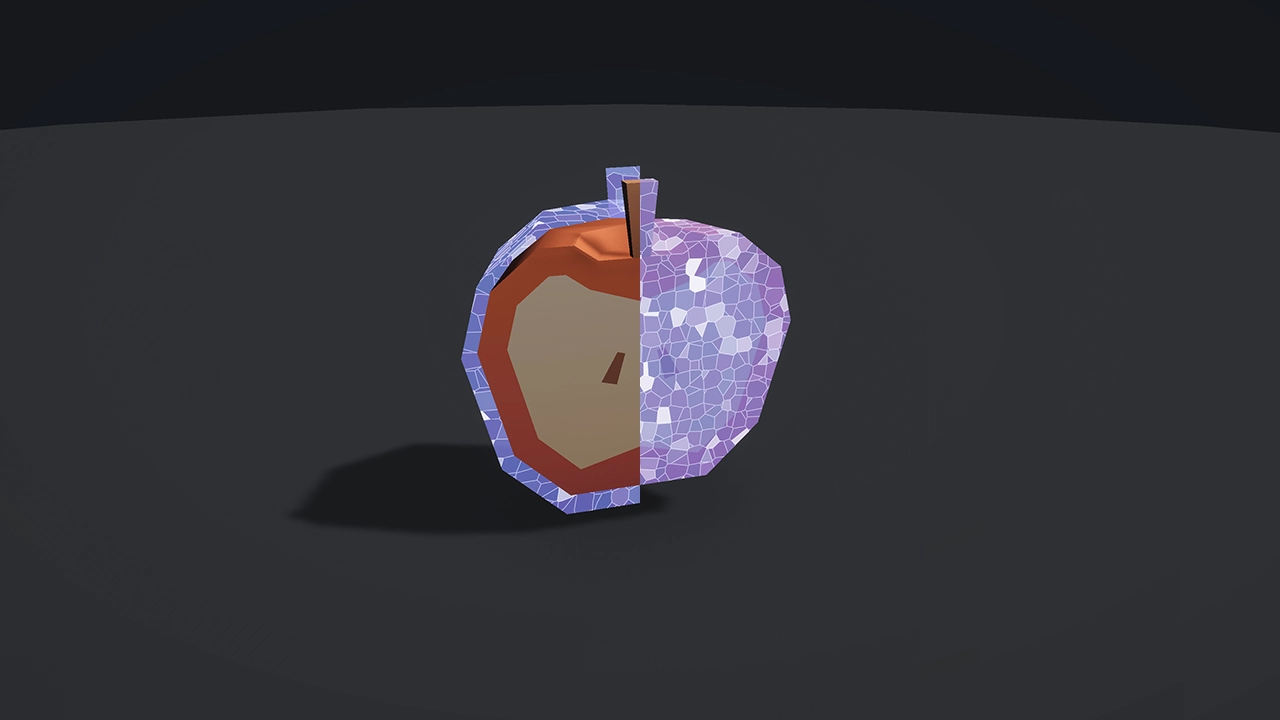
6.14 Water
A surface flowing around the object. Flow and Flow Direction carry it, Ripple Scale sizes the ripples, Turbulence folds the flow rather than sliding it.
Caustics is the bright lacing where the surface focuses light, and Sheen is the gloss along the crests where the surface turns towards the viewer. The two share one blend towards the crest colour, so together they reach it and stop rather than adding up into white. Uses the secondary colour.
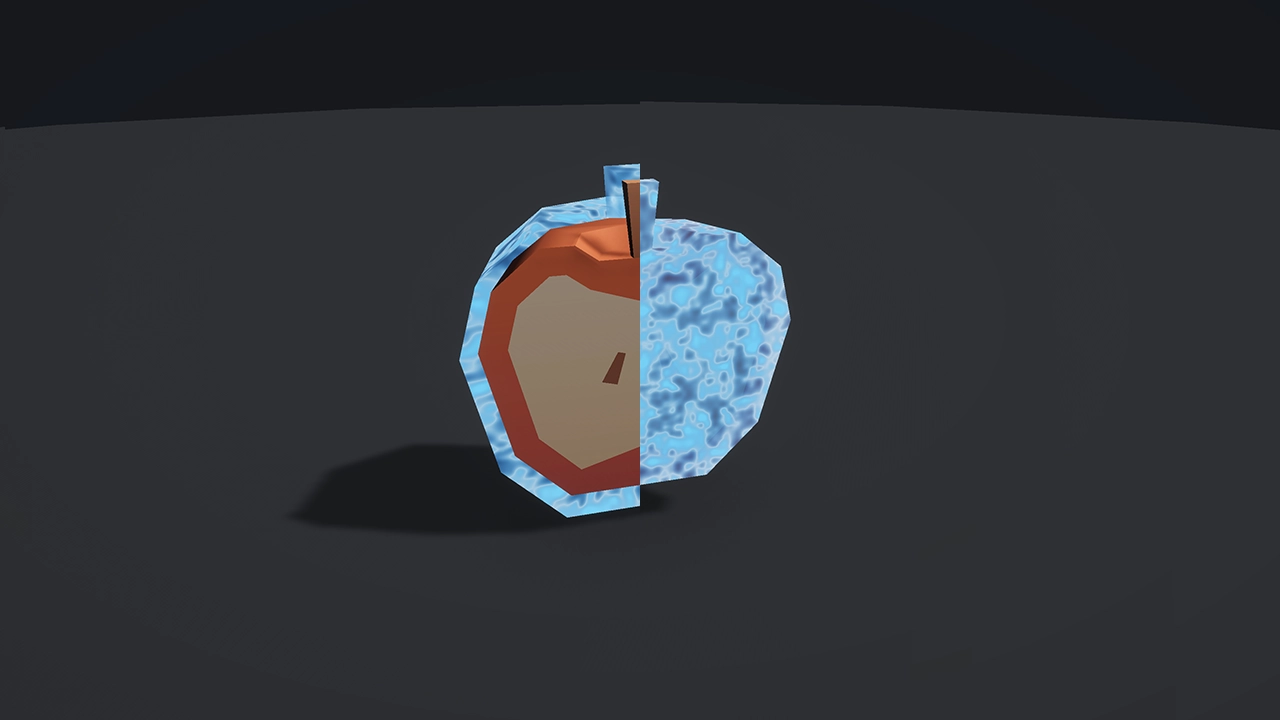
6.15 Fire
Tongues rising off the silhouette. Rise and Rise Direction are the speed and the way up. Height is how far the tongues reach as a fraction of the shape: at 0.3 the fire clings to the base and dies a third of the way along, at 1 it just reaches the far edge, and past 1 the tips run off the edge instead of dying inside it — which is what a fire that is over the thing rather than on it looks like.
Stretch is how many times longer a tongue is than it is wide. At 1 they are round — blobs of heat rather than flame — and raising it squashes the pattern along the rise direction, which is the whole difference between noise and fire. Tongue Scale, Rise Tilt, Turbulence, Heat and Flicker shape the rest — the tilt leans the climb out of the style space's XY plane, which is the only plane Direction alone can point in. Uses the secondary colour for the cooler tips.
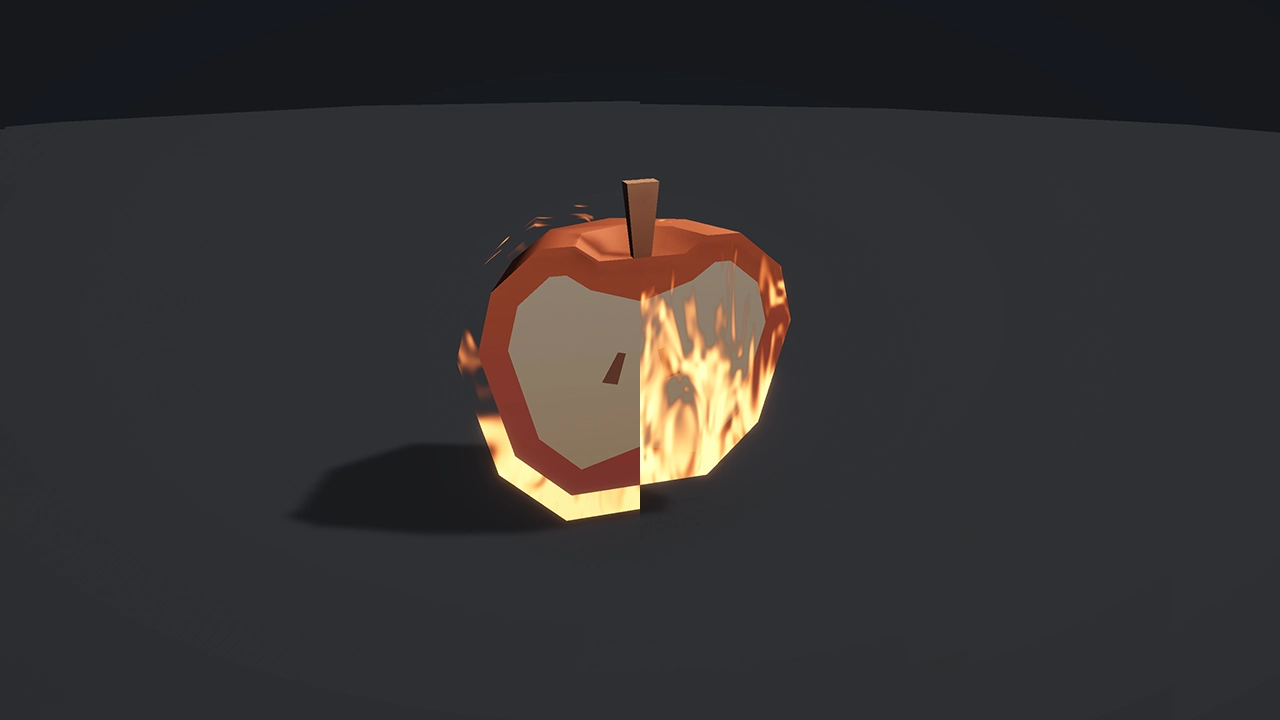
7 · Hard meshes
This is the section the asset exists for. Everything else here can be reproduced with a short inverted-hull shader from a forum post; this cannot.
Every setting in this section is on the component, in its Geometry section, because it describes the object's mesh rather than a look.
7.1 Why a normal-based hull fails
Pushing every vertex along its normal works while the mesh has volume. Where it does not — a leaf, a blade, a card, a thin prong — the normals on the two sides of the sheet point in opposite directions, so the two sides move apart. A flat leaf becomes a wedge. A fork's prongs, thin and close together, swell until they touch and the gaps between them close.
The three pairs below are the same prop, the same width and the same camera, with one switch between them.
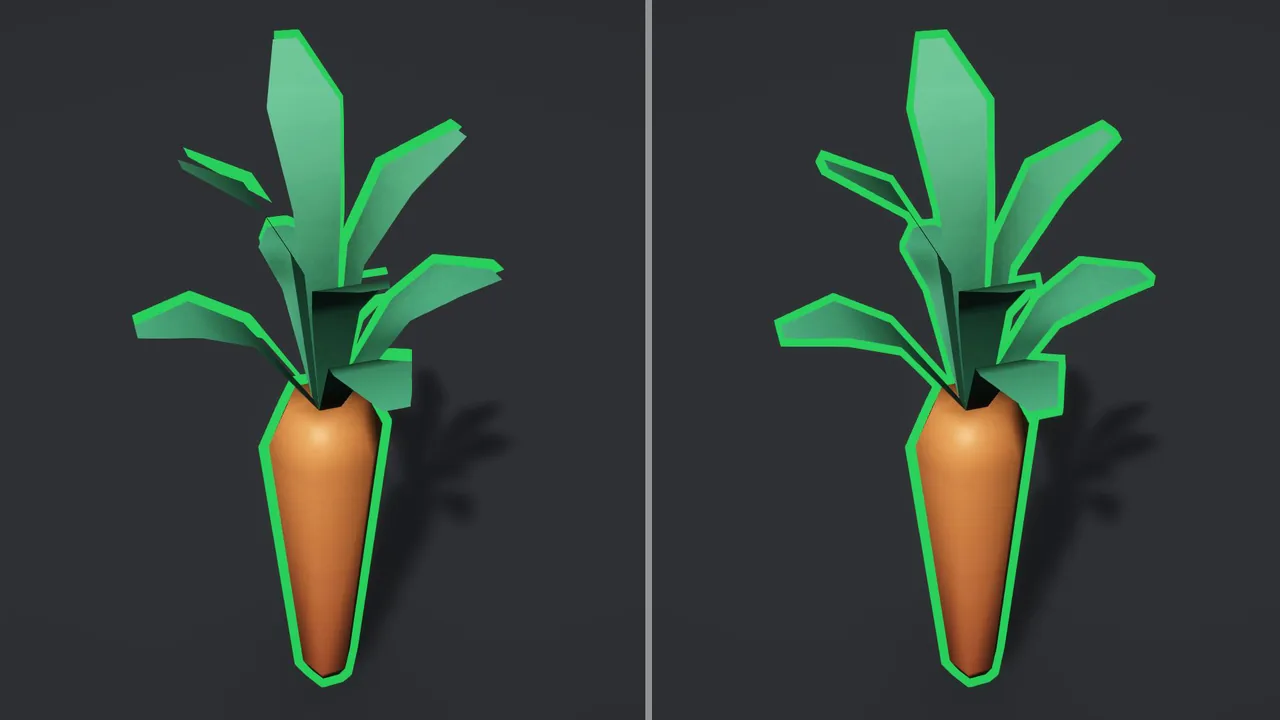
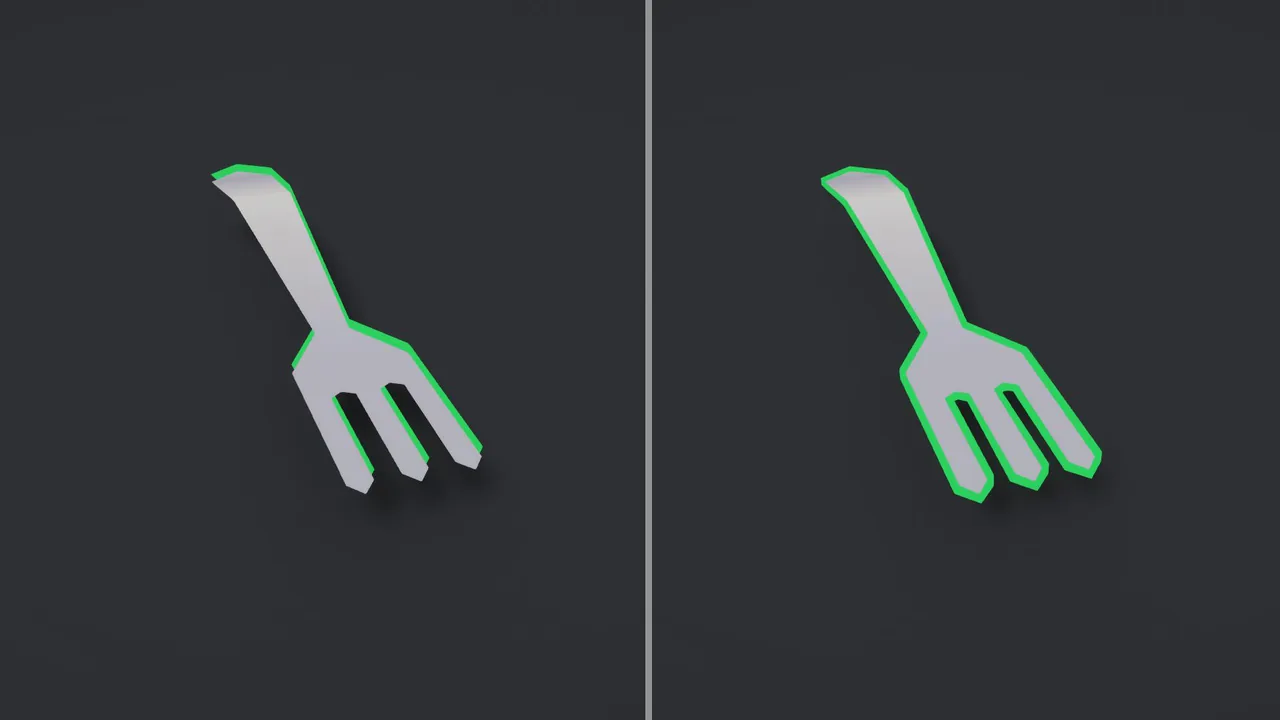
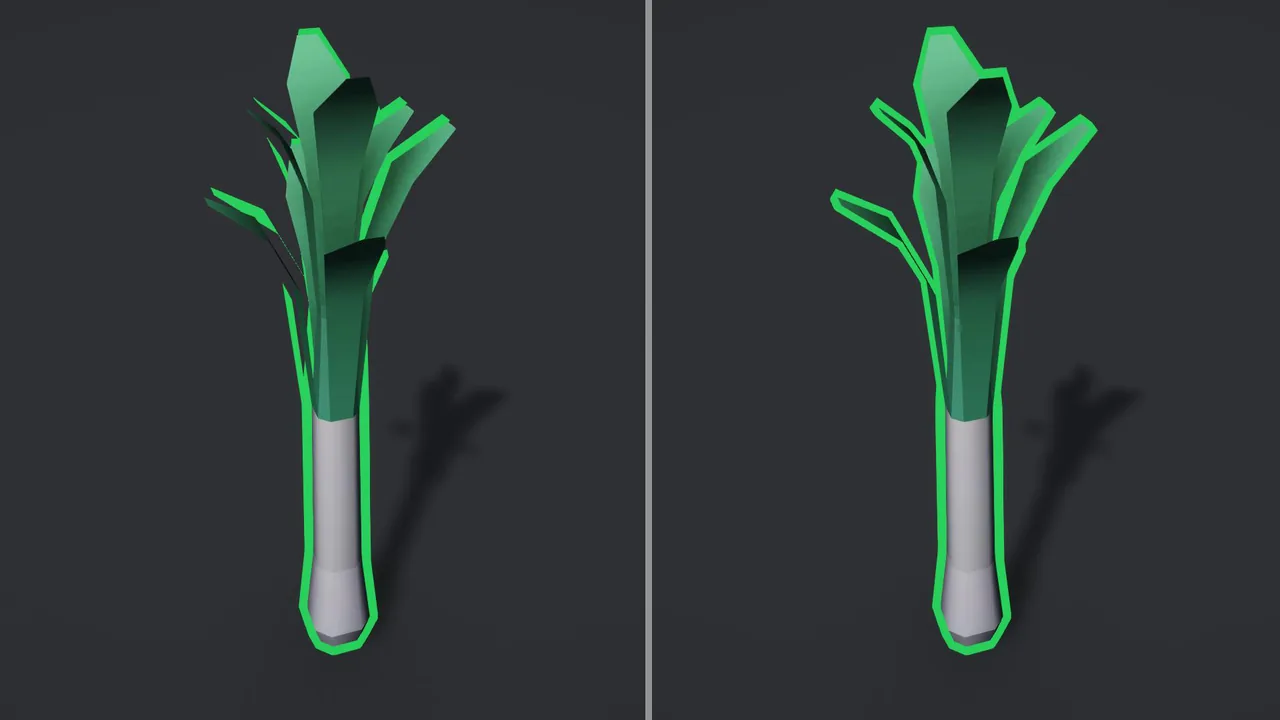
The quieter failure: hard edges come out thinner
The same mechanism has a second consequence, and this one shows up on models that are perfectly
solid. A vertex where several faces meet has one normal, averaged between them. Push along it
by Width and none of those faces actually travels Width — each moves out by
Width × cos θ, where θ is the angle between the shared normal and that face.
On a smooth surface θ is nil and the outline is exactly as wide as asked. On a hard edge it is not:
| Shape | θ at the silhouette | Outline you actually get |
|---|---|---|
| Sphere, capsule | ≈ 0° | 1.00 × Width |
| Cylinder — the rim between wall and lid | 45° | 0.71 × Width |
| Cube — corner normal (1,1,1)/√3 | 54.7° | 0.58 × Width |
So one profile on four primitives draws four different thicknesses, with the box at little more than half the sphere. Nothing is misconfigured; it is what pushing along an averaged direction does.
Smooth Normals measures the correction each vertex needs — 1 / cos θ — and
Miter Limit caps it, because on an acute spike that figure runs away and the point would
shoot out into a needle. At 1, the default, there is no correction at all, which is the
behaviour in the table above.
To correct it, raise Miter Limit to 1.45, just above the 1.41 a right-angled
edge asks for. That is a deliberate line to draw: an edge is corrected exactly, and a
point is not.
| Feature | Correction it wants | At Miter Limit 1.45 |
|---|---|---|
| Sphere, capsule, any smooth surface | 1.00 | 1.00 × Width |
| Cube edge, cylinder rim — two faces at 90° | 1.41 | 1.00 × Width |
| Cube corner — three faces at 90° | 1.73 | 0.84 × Width |
So the long edges that make up almost all of a box's silhouette come out at exactly the Width asked for, and only the corner points themselves stay slightly tucked in — which reads as the outline easing round the corner rather than shooting past it. Raise it to 2 if you want the corner geometrically exact as well.
That is the vertex itself. Past the miter, Corner Topology on the component decides what fills the corner: Rounded, the default, builds a bevel from each face's own offset, so the band stays even all the way round a cube's corner; Simple keeps the one vertex and its Sharp Limit reach — fewer triangles, a slightly narrower band at the point (Geometry).
Surfaces modelled with both sides
A card, a leaf, a paper carton, the wires of a whisk: modelled with a front and a back on the same points, they have no inside, and the two sides' normals cancel wherever they meet. The hull reads each surface on its own — the front, the back, two parts that merely touch at a corner, a triangle wound against its neighbours — and gives each its own offset rather than an average of all of them. The band is then wrapped round the edge where front and back meet — in an arc under Rounded, square with its corners cut under Simple — so such a surface is outlined face-on and edge-on alike. At a corner of the rim, Rounded joins the two wraps row for row, as a lune of a sphere. That is all it needs: a surface with both sides is never a sheet, gets no shell and no in-plane push, and where it meets a part grown along its normals — the flange of a cookie cutter on its wall — the two join without a step. A back is recognised as the same triangles wound the other way, which is how modelling tools and exporters write one. A triangle wound the wrong way round, which a material that draws both sides hides, is turned to match its neighbours in the outline's copy, so it no longer dents the outline.
7.2 Deciding per face
Every hull classifies each part of the mesh once, when the outline is built, and then grows solid parts along their normals and sheet parts in their own plane. The classification is a measurement, not a guess: rays are cast from each face to find how far it is to the other side of the surface, and anything thinner than the threshold is a sheet. The same detection decides what Sheet Solidify gives a shell, and what Face Cull Both turns toward the camera, so the settings below apply there too. A part smaller than Min Sheet Faces always stays solid.
Only material counts. A ray that leaves the face through air and meets another part — the next fry in the carton, the gap between two fingers — has found a gap, not a thickness, and is not read. A surface no ray finds anything behind is a sheet when it ends in an edge of its own — a card, a paper flap, a leaf folded along its rib — and stays solid when it closes a volume off, as the lid of an open box does. A surface modelled with both sides is not measured: it is never a sheet (7.1).
| Setting | What it does |
|---|---|
| Detect Mode | Thickness casts one ray each way per face — cheaper, coarser.
Multi Ray casts a small cone round it as well and keeps the thinnest reading,
which is what a mesh with noisy normals needs: a single ray can slip past the far side. |
| Sheet Thickness (cm) | 0.01–1 cm, default 0.65. Thinner than this counts as a sheet. Above about 1 cm solid parts start to get a shell. |
| Separate Part (cm) | 0.01–2 cm, default 0.5. A flat piece whose border sits farther than this off the solid is a separate part and, if flat, gets a shell; closer, it is a hard edge of the solid. |
| Sheet Flatness | 0.5–0.995. Read only when a ray misses the face: a neighbour steeper than this stops the face counting as an open sheet. |
| Multi Ray Samples / Ray Cone Degrees | Multi Ray only. 1–4 rays per face (2 is the step that changes the result) and the half-angle of the extra rays, 5–30°. |
| Min Sheet Faces | Raise it when a few stray triangles on a solid model get classified as a sheet: an island has to be at least this many faces to count. |
7.3 Sheet Solidify
Classifying a sheet is half the job. The other half is that a sheet has no thickness at all, so seen edge-on there is nothing for an outline to be. Sheet Solidify gives the detected sheets a shell: a thickness across the surface and a spread within it. Only a sheet with one side gets one; a surface modelled with both sides already has a back to grow from (7.1).
| Setting | What it does |
|---|---|
| Sheet Solidify | On out of the box. Off leaves sheet detection and in-plane growth doing their work unassisted. |
| Separate | Also on out of the box. On, the shell is sized by Thickness and Lateral; off, by the single Volume number. The inspector shows one pair or the other, never both — they are two ways of saying the same thing. |
| Thickness | How far the shell is pushed to each side of the sheet, as a multiple of Width. 1 out of the box, so a sheet seen edge-on gets the same band as one seen face-on. |
| Lateral | How far it grows within the plane — the outline's width on the flat part. Also 1 out of the box. |
| Volume | The one number that drives both, when Separate is off. |
| Thicken X / Y | Push the shell to one side instead of both — a leaf growing off a stem should thicken away from it, not swallow it. |
The shell is closed: a lid on each side copied from the sheet's own triangles, and walls only along the sheet's real rim, so a gentle fold in a leaf does not grow a wall. Under Simple the wall is square. Under Rounded it is rounded from lid to lid, the way a hull grown round a thin slab is: the round is as wide as the shell's Thickness, the lid reaches out to where it starts, and the band has its full Lateral at the sheet's own plane. With Thickness and Lateral equal, as out of the box, the round is a half circle and the band keeps one width from every side. Across a crease sharper than 60° — a slice of cheese with its corners folded down — each side's lids lie flat on their own face. Inside the fold they meet where their planes do (under Rounded; under Simple they cross), and outside it the shell is joined round the fold: stepped round it under Rounded, a flat bevel under Simple. The band keeps an even width along the rim, the walls face outward, and connected sheets agree which side is up. With Corner Topology on Rounded, the shell's corners are rounded by the component's Round Angle, Round Strength, Corner Bias and Concave Limit (Geometry), and with the rim rounded too each becomes a dome. A corner left sharp reaches at most twice the band — or Miter Limit, where that is more — so a narrow tip is held back a little rather than growing a spike. A skinned mesh never gets a shell.
7.4 Baking
The analysis is deterministic, so on shipping content it can be done once instead of on every
load. Bake for Runtime on the component — or
Tools ▸ Keyline ▸ Bake All Outlines In Scene for the whole scene — writes the
prepared hull meshes to assets and points the component at them.
Worth doing once the content is final. Not worth doing while the look is still being tuned: a baked mesh is a snapshot, and changing the settings that produced it means baking again.
An object that can be picked up is baked on its own. A bake belongs to the component that made it, and it is stored against the meshes that component outlines. When AdoptChild folds a sword into a character, the sword's renderers become part of the character's hull — so the character needs a prepared mesh for them, and the sword's bake is on the sword. Bake the sword, and the character borrows it.
Borrows it when the two agree on how the mesh is prepared. A bake is stored against every input the preparation reads: Smooth Normals (where it applies), Miter Limit, Sheet Solidify on or off, sheet detection, Min Outline Triangles, Corner Topology with the corner setting it uses, Join Coincident Vertices and Join Distance, and Cutout Padding. Nothing about colour or style is in it, and width only through Corner Bias on a rounded Solidify shell. Where the carrier and the thing carried match on those, the bake is reused exactly; where they differ the two really do want different geometry, and Keyline says so in the console rather than handing over the wrong mesh. Matching them on the two components is usually the shorter path — otherwise the part falls back to preparing at load, which needs Read/Write Enabled on its model.
An adoption arranged in the editor needs none of this: bake the carrier while the child is attached and the child's meshes are in the carrier's own bake, because baking walks the adopted tree the same way drawing does. It is the runtime pickup that has to borrow.
8 · Cutout
With Cutout on, the outline follows the shape the object's texture leaves behind rather than the shape of its mesh. A fence plank whose alpha punches holes in it gets an outline around the holes; a leaf card gets an outline around the leaf, not around the quad it is painted on.
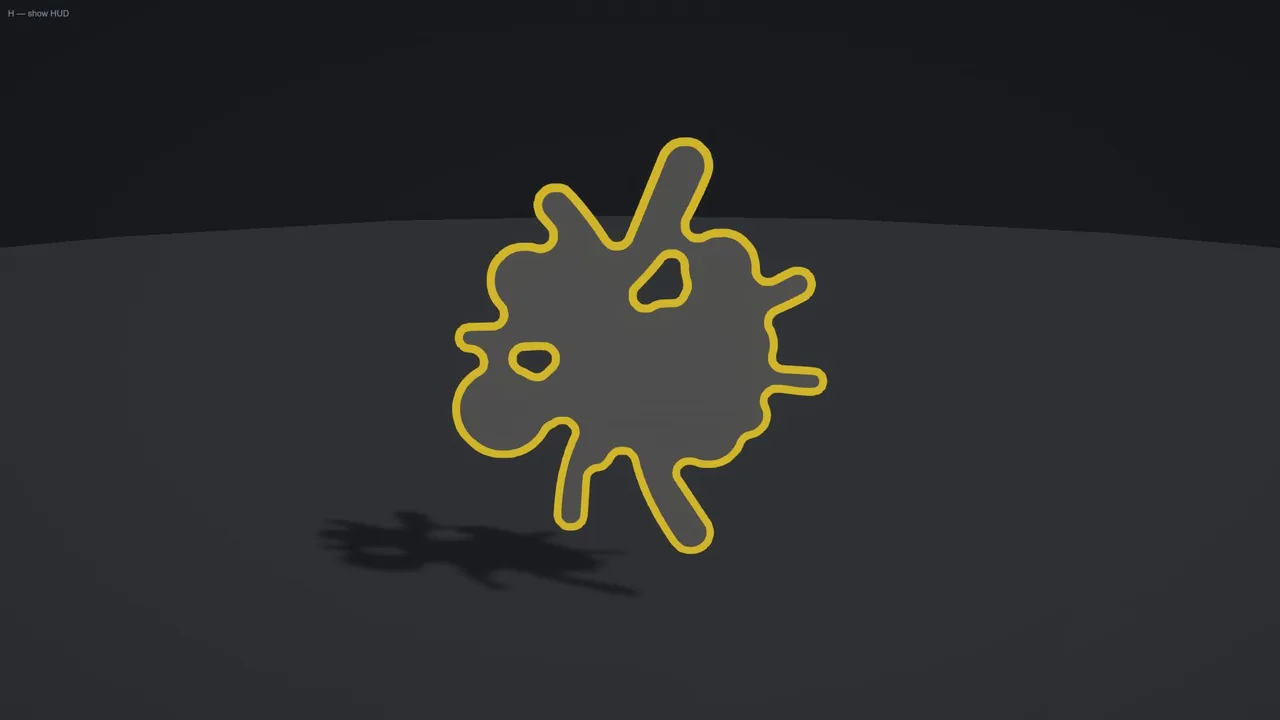
8.1 Setting it up
- The source material needs alpha clipping on, with a texture that has an alpha channel. That is the object's own material, not the outline's.
- Switch Cutout on in the profile. The outline reads the same texture off the source
renderer —
_BaseColorMap,_BaseMapor_MainTex, whichever the material has.
There is no threshold to set on the profile. The outline is cut where the material is cut —
_AlphaCutoff on an HDRP Lit material, _Cutoff on anything else — and the
distance field is built at that same level, because the two have to agree. Move the material's
cutoff and press Rebuild Distance Field: the field records the level it was built at, and the
inspector asks for a new one when the two no longer agree.
8.2 The distance field
A hull widens edges the mesh has, and a punched contour is not one of them: no vertex sits on it. So the rim has to be drawn by widening the alpha itself — and an alpha cannot be widened well.
It is very nearly binary: a texel is opaque or it is not. Sampling it in a ring around each pixel and keeping the pixel if anything solid was found does widen the shape, but every sample answers yes or no and none of them answers how far. The boundary cannot be resolved below one texel, so the edge steps. Worse, a ring of N samples is an N-gon — the widened shape has as many flat sides as there were samples — so the count has to climb with the rim's size on screen, making a wide rim both the most expensive case and the ugliest.
Keyline builds a signed distance field from that same alpha instead, once, at author time. The field stores what the alpha does not: how far each texel is from the edge, to a fraction of a texel. Drawing then costs one texture fetch per pixel at any width, the edge is smooth at any zoom, and corners come out round because the distance to a corner really is round.
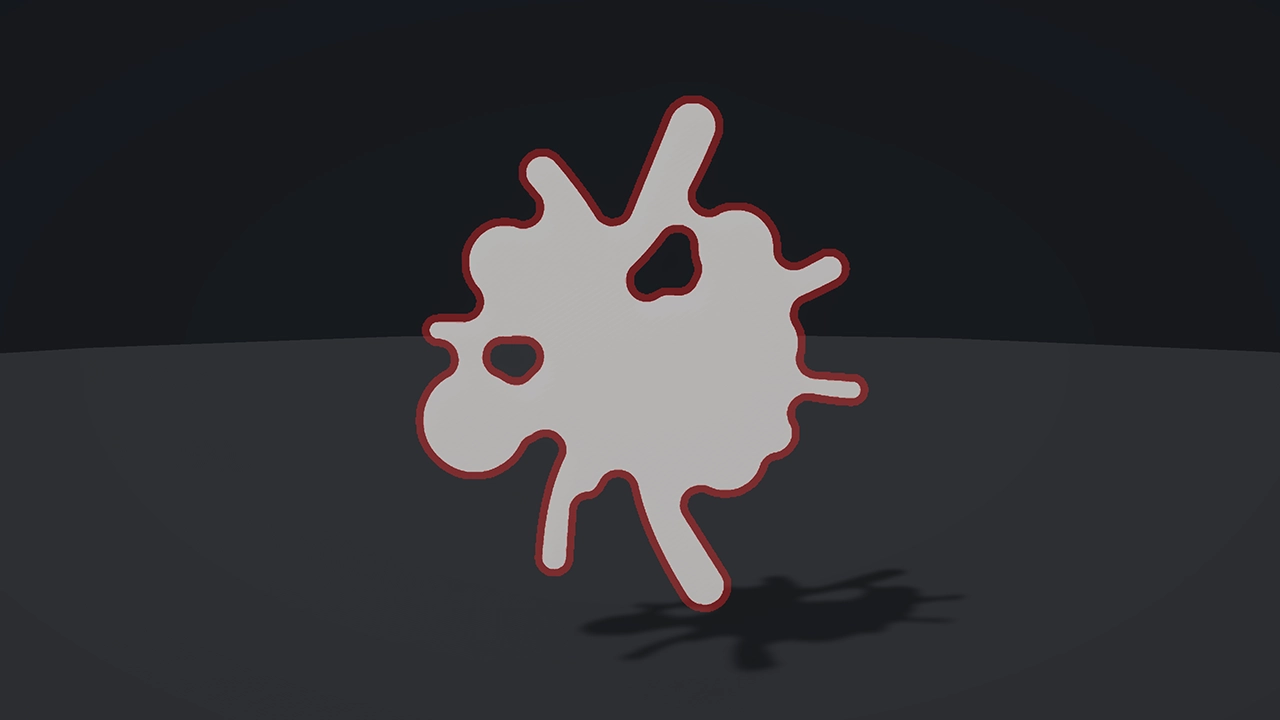
The field also carries the whole profile of the rim to every pixel, which is what lets Halo compute its falloff as a curve and Double cut its gap directly, instead of stacking one draw per concentric layer.
Where the fields come from
Nobody has to make them by hand.
- Cutout meshes: a Generate Distance Field button under Tools on the component. Keyline finds the textures the object's materials draw with, builds a field beside each, and stores the references on the component. It is a button rather than something that happens on selection because building writes files and imports them, and neither should follow from clicking on an object. It reads Rebuild Distance Field once the fields exist — press it when the artwork changes, because nothing notices on its own and a stale field traces the shape the texture used to be.
- Sprites: Generate Distance Field on Keyline Outline 2D. A field already sitting beside the sprite is picked up automatically.
The reference matters as much as the file. A build includes what something points at, and nothing else points at these — a cutout mesh's texture is found by reading its material at run time, which a build has no way to anticipate. That is why the field is stored on the component rather than looked up by name.
Range
Range is how far the field can describe, in texels, and it is a hard ceiling on rim width: past it the field only says "at least this far", which cannot place an edge, so the outline stops there. Reach is paid for in memory, not precision: the field is padded by its range on every side, so a 512×512 texture at Range 32 is written as 576×576. Sixteen bits of distance put a step far below anything a rim can show, whatever the range — see 12.2. Pick the smallest that covers your widest outline.
Rim Softness is how far the edge fades out, as a fraction of the rim's own width. 0 is as crisp as an edge can honestly be — one screen pixel, which is what antialiasing needs and no more — and 1 fades across the whole band, which reads as a halo rather than a drawn line. A fraction rather than a pixel count so that one setting looks the same on a two-pixel rim and a forty-pixel one.
It is also part of how far the rim reaches: the band fades to nothing across the feather, so the last visible thing sits about half a feather past the width. Set To Max on Width and the minimum Padding both allow for it, which is why raising Softness lowers the width the two of them suggest.
Under Width Mode: Pixels the same slider is drawn as Rim Falloff. It is still a fraction of the rim's own width — 0.5 fades the outer half of its texels and leaves the inner half solid — but the fade steps by whole texels, because that is the only unit a pixel rim has: the outermost ring is dimmest and each one inward is brighter. See 12.3.
Layers
Layers is how many steps the falloff is built from, and it means the same thing on both subjects — which is the point. A mesh draws that many concentric hulls, and because they blend additively the brightness at any radius is the level of the nearest hull outside it: a five-layer halo really is five bands, not a ramp. A sprite quantises its distance the same way and gets the same five bands out of one draw.
What differs is the price. On a mesh every layer is a draw call, so the count stops at 8. On a sprite it costs nothing, so it goes to 32 — which is smooth enough to stop looking like steps at all.
8.3 What Cutout changes elsewhere
Two more consequences worth knowing before shipping it:
- Cutout on a mesh is a Full-profile feature. A Mobile Solid mesh has no Cutout control and its material never takes the cutout branch, which is part of what makes it light. A sprite is the exception rather than a limitation: every sprite rim is a distance field rather than a hull, so Mobile Solid draws it from the same shared code Full uses, and Rim Softness and Rim Inset apply there exactly as they do on a Full profile.
- It costs the SRP Batcher. The texture is resolved per source renderer and bound through
a
MaterialPropertyBlock. Cheap on a fence, worth measuring on a forest.
8.4 Flat meshes
Cutout wants a flat mesh — fences, foliage cards, decals, a sprite texture on a quad. Single- or double-sided makes no difference; flatness does.
SpriteRenderer. Cutout reads the alpha of the material on a MeshRenderer, so a
quad wearing a sprite's texture works exactly like a foliage card. A
SpriteRenderer is a different renderer type and has its own component,
Keyline Outline 2D — it measures the rim from the artwork's alpha instead of extruding a
hull. Put Keyline Outline 3D on a sprite and the Inspector offers a button to swap it over. See
Sprites.On a solid mesh the alpha rim sits on the surface; the outer silhouette is a normal hull outline, or a Cutout Overlay on the same pass. Padding that widens a flat card in-plane is skipped on volumes — Cutout still traces alpha.
9 · Merge groups
Two objects side by side get two outlines, and where they overlap you see the seam between them. Sometimes that is right — two enemies are two enemies. Sometimes it is not: a character and the weapon in their hand are one thing, and a contour running through the middle says otherwise.
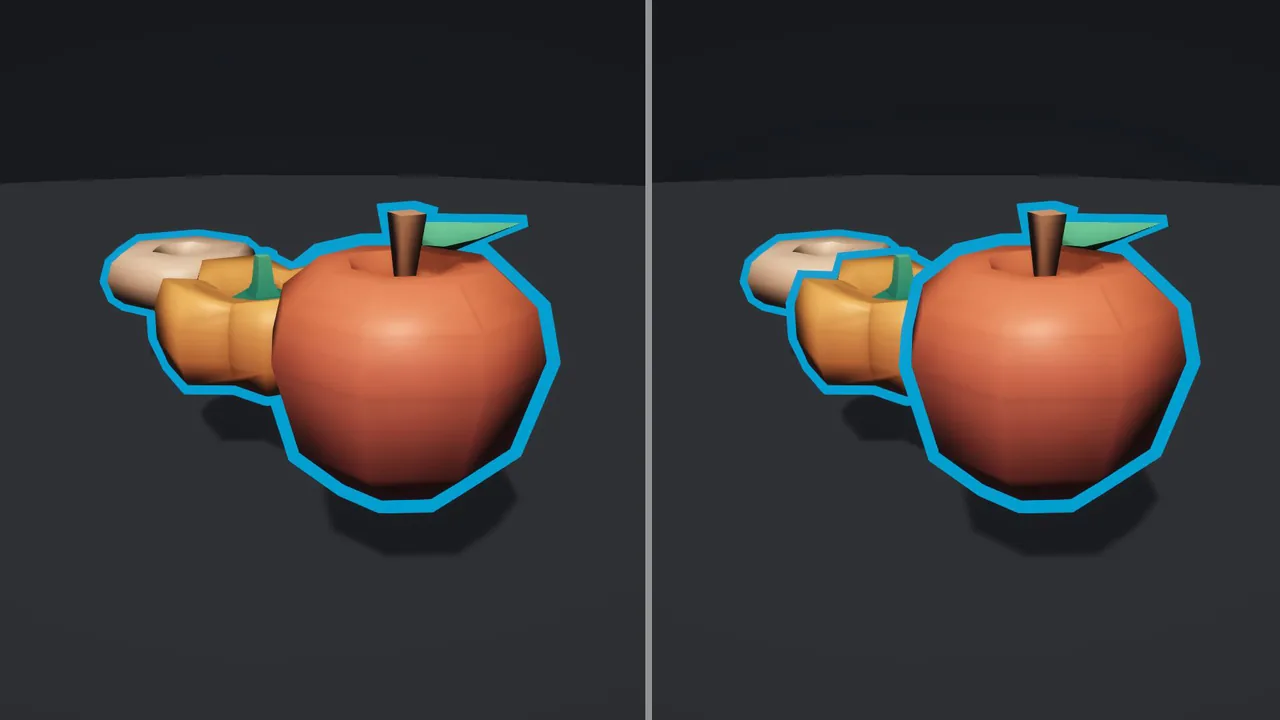
9.1 On the outline itself
Two switches under Objects on both outline components, on out of the box:
| Setting | What it joins |
|---|---|
| Merge Child Outlines | The children, drawn inside this silhouette rather than beside it. It applies to any child that has an outline — one of its own, or one generated for it by Include Children. It is a statement about the children: whether this outline joins the one above it is that one's decision, taken with its own copy of the switch. |
| Merge When Overlapping | Whatever this outline's bounds touch. Tested between figures, not between objects: a model that has taken its children into one silhouette merges on contact as a whole, so this switch covers those children too and something touching a child merges with the model rather than with the part it brushed. A figure merges when any part of it is willing, so two separate objects both need it on. The outline counts, not only the object — see the note below. Re-tested a few times a second, not every frame. |
A third switch sits with them and is off out of the box, because unlike the two above it can change what the scene looks like:
| Setting | What it shares |
|---|---|
| Share Stencil With Others | The stencil pair, and nothing else. Outlines with this ticked draw from one shared pair so they can batch, while staying separate silhouettes — this is not a merge. The price is that two of them overlapping on screen clip each other's rims. It is for crowds of separated objects; see 14.1 for the measurement, the cases and the warnings. |
Both work identically on Keyline Outline 3D and Keyline Outline 2D.
Overlap on a sprite is measured from the renderer's bounds, which is a rectangle: two sprites whose
artwork does not touch can still have overlapping bounds.
A Width Mode of Constant Screen is the exception: its width is a different
distance in the world at every camera position, so counting it would make merging a property of
where the camera is standing — silhouettes fusing and splitting as somebody walks towards
them. Those bodies still merge on overlap; only the rim's own reach is left out. World
on a model, and World or Pixels on a sprite, are all counted.
9.2 Explicit — Keyline ▸ Keyline Merge Group
For what automatic merging cannot see: things that stand near each other without touching, and things that must read as one unit however far apart they drift.
Put the component on a parent and, with Group Children on as it ships, every outlined object beneath it belongs to the group. Membership is then the hierarchy — reparent a member in or out at runtime and its controller notices by itself, with nothing to be told. The group's stencil pair is allocated and released by enabling and disabling the component.
Two lists qualify that, one for each setting of Group Children. With it on, Ignore List keeps a child out: it keeps its own outline instead of joining the silhouette. Switch Group Children off and the group becomes a list rather than a subtree: Members names outlines one at a time, wherever they are in the scene, and unnamed objects underneath are no longer swept in.
9.3 How it is decided
Not "which rule wins" — all of them apply at once. Belonging to a silhouette is transitive: if A is with B and B is with C, then A is with C. Each rule adds a link, the links combine, and every outline in one resulting set is drawn as one silhouette.
| Rule | Links |
|---|---|
| Merge Group | every member of one active group |
| Merge Child Outlines | an outline and the one above it, when that one takes its children |
| Merge When Overlapping | two outlines whose bounds touch, when both are willing |
Because links combine rather than compete, the order they are found in does not matter — which is what makes the result predictable. A model inside a group brings its children in with it: the child is linked to its parent, the parent to the group, so all of them are one silhouette and all of them wear the group's stencil.
Overlap is vetoed where somebody has already spoken. A parent that does not take its children walls that branch off, and a group that names its members by list keeps two unnamed objects under it apart. A Merge Group and a parent are statements a person made; overlap is a guess from geometry, and a guess does not overrule a person. The ignore list takes an object out of all three.
Log Pass Diagnostics on an outline and
it prints the silhouette it resolved to. Two outlines showing the same value are one silhouette; two
showing different values are not.None of the merge settings can repair that, because it happens below them. Give the sprites different Order In Layer values, or put them on different Sorting Layers. Their Sorting Order Offset counts too: two sprites on the same order whose offsets differ do not collide, because the offset is what moves each rim off its own sprite.
Duplicating a sprite is the usual way into this — a copy inherits both numbers exactly. The component and the Merge Group both say so in the Inspector when they see it.
9.4 What it costs
A group spends one stencil pair for the whole group, however many members it has — see 3.4. On a crowd that is the cheaper option, not the more expensive one: eight soldiers in a squad cost what one object costs, so the 126-pair budget starts counting squads instead of soldiers.
What it does not change is how much is drawn. Merging decides how many silhouettes there are, not how many hulls: every renderer in the group still extrudes its own. On a figure assembled from dozens of parts that is the number worth looking at, and 14.3 is about nothing else.
10 · Skinned meshes
A skinned mesh needs no special handling: add the component and the outline follows the animation.
The hull is a second SkinnedMeshRenderer pointed at the same bones and the same
root. Unity skins it in exactly the same pass it skins the original, so there is no per-frame work
of Keyline's own — no baking a mesh every frame, no copying vertices, nothing that scales with the
animation's complexity. What it costs is one more skinned draw per pass, which is what any second
renderer costs.
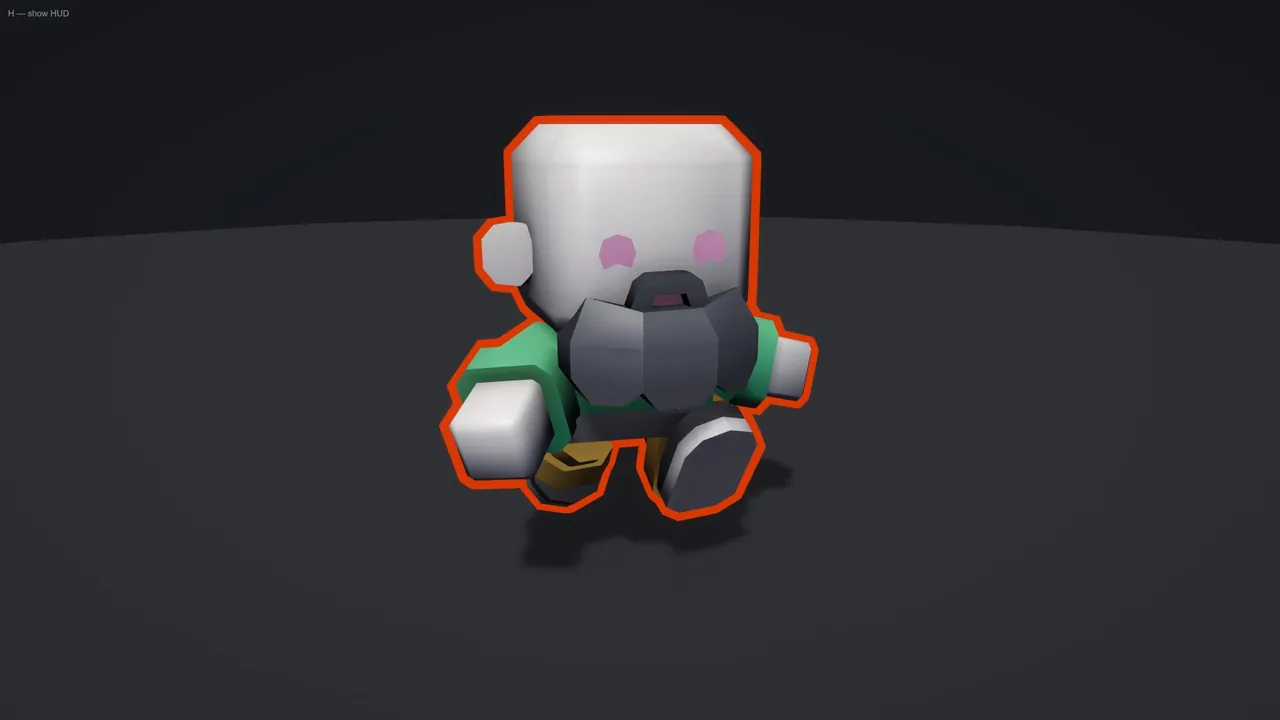
In practice this rarely matters: characters are volumes, and the flat-sheet machinery exists for props. Where a character does carry a genuinely flat part — a cloak, a cape, a paper charm — give that part its own renderer and its own profile.
11 · Recipes
Fourteen entries under Add Component ▸ Keyline ▸ Recipes, from the files in
Runtime/Recipes/ — thirteen recipes plus the arbiter that keeps them from fighting
over the same object. They are ordinary components written against
the same public API you have — nothing in them reaches into the outline through a back door — and
they exist because the same five or six arrangements get written from scratch by everyone who buys
an outline asset.
Every one of them but Distance Fade is shown in the demo's Interaction chapter, one mini-scene each.
| Component | Solves |
|---|---|
KeylineHighlight | several sources wanting the outline at once |
KeylinePointerHighlight | hover |
KeylineClickSelection | click to select, shift to add |
KeylineTriggerHighlight | entering a volume |
KeylineProximityHighlight | getting close |
KeylineDamageFlash | a hit landing |
KeylineFillGauge | a level painted on the model |
KeylineImpactWave | a ring from the point of impact |
KeylineScanWave | a front crossing the scene |
KeylineReveal | an object materialising or dissolving |
KeylineGroupHighlight | a squad answering as one |
KeylineXRayWhenHidden | through-walls only while actually hidden. Was KeylineOccludedXRay, which still compiles as a deprecated subclass |
KeylineBlink | attention, briefly |
KeylineDistanceFade | outlines that fade with distance |
KeylinePointer | one pointer API over both input systems |
KeylineTriggerRelay | trigger callbacks reaching a parent |
IKeylineHighlightTarget | one object or a group, told apart by nobody |
11.1 What every timed recipe shares
Five of them run for a while and then stop: Blink, Damage Flash, Impact Wave, Scan Wave and Reveal. They answer to the same three members and raise the same two events, so code that drives several of them does not have to remember which is which.
| Member | |
|---|---|
Play(...) | starts it. Every recipe also keeps the name that describes what it actually does — Emit for a wave, Ping for a scan, Flash for a hit. Neither name is preferred: Play exists because it is the first thing most people type, the specific name because it reads better in your own code |
Stop() | ends it early and puts the slot back. Calling it when nothing is running does nothing |
IsPlaying | true while it runs. Damage Flash also answers to IsFlashing, which is the same value |
Started | UnityEvent, fires on every start — including one that restarts an effect already running |
Finished | UnityEvent, fires when it ends by any route: ran its course, Stop, or the object being disabled. It does not fire for a Stop that had nothing to stop |
Both events are on the component in the Inspector, so a designer can wire the next step — a sound, a spawn, another recipe — without writing anything.
Stop() means
finish, not cancel: a reveal aborted halfway would leave the object half
materialised, which is a state nobody asked for. It completes and raises Revealed
exactly as it would have on its own. Finished always fires after
Revealed or Dissolved, never instead of them.11.2 Highlight — the arbiter
Three scripts writing the same colour is the bug everybody writes once. Hover the object, select it, move the pointer away — and the hover release clears the selection, because the last writer wins and nobody agreed who the last writer should be.
KeylineHighlight holds named states with priorities. Anything can push a
state and pop it later; the highest priority wins, and releasing it falls back to the next one
still held rather than to nothing.
var highlight = target.GetComponent<KeylineHighlight>();
highlight.Push("Hover"); // priority 10
highlight.Push("Selected"); // priority 50 — this is what shows
highlight.Pop("Hover"); // still selectedEach state carries its own colour, width multiplier and fade time. Every highlight recipe below speaks to this component rather than to the outline, which is why they compose.
Who holds a state. Several sources can hold the same state, and it stays held until every
one of them has let go. The highlight recipes hold as themselves, so Pointer Highlight and Proximity
Highlight both holding Hover on one object no longer cancel each other: leaving the
proximity range with the cursor still on the object keeps the hover. From your own code, pass the
component doing the holding — Push("Hover", this) and Pop("Hover", this) —
and your release leaves everyone else's hold alone. The one-argument Pop releases the
state whoever holds it, as it always has, and Clear() releases everything.
11.3 Pointer Highlight and Click Selection
Both live on one object in the scene, not on the props. One raycast per frame answers for everything, where a script per prop would cast one ray per prop to answer a question that has a single answer.
A prop takes part by having a collider and a KeylineHighlight. Nothing is
registered, nothing is wired, and the ray looks past colliders with no highlight on them — so a
hitbox in front of the model does not swallow the hover.
| Pointer Highlight | |
|---|---|
Camera | empty uses Camera.main |
State Id | which state to push; default Hover |
Layers, Max Distance | what the ray may hit and how far |
Blocked By UI | ignore hovers while the pointer is over uGUI |
Prefer Groups | resolve to the group a prop belongs to, not the prop |
| Click Selection | |
|---|---|
State Id | default Selected |
Max Selection | 1 is classic single select; 0 is unlimited |
Clear On Empty Click | clicking nothing clears |
Toggle With Modifier | shift or ctrl adds and removes |
Selection is a held state, not a colour written into the object — which is why selecting something the pointer is also over does not fight with the hover.
11.4 Trigger and Proximity Highlight
Trigger Highlight lights the object while something is inside a trigger collider — a zone, a doorway, a pickup radius. Filter by layer and by tag.
OnTriggerEnter to the collider's own GameObject, not
to a parent. KeylineTriggerRelay is added automatically when the zone sits on a child,
and forwards the callbacks up. Worth knowing because it is the reason a trigger on a child works at
all.Proximity Highlight needs no collider: it measures distance to a target — assigned, or found by tag — and can fade the highlight between a near and a far radius rather than switching it. The check runs on an interval, not every frame.
11.5 Damage Flash
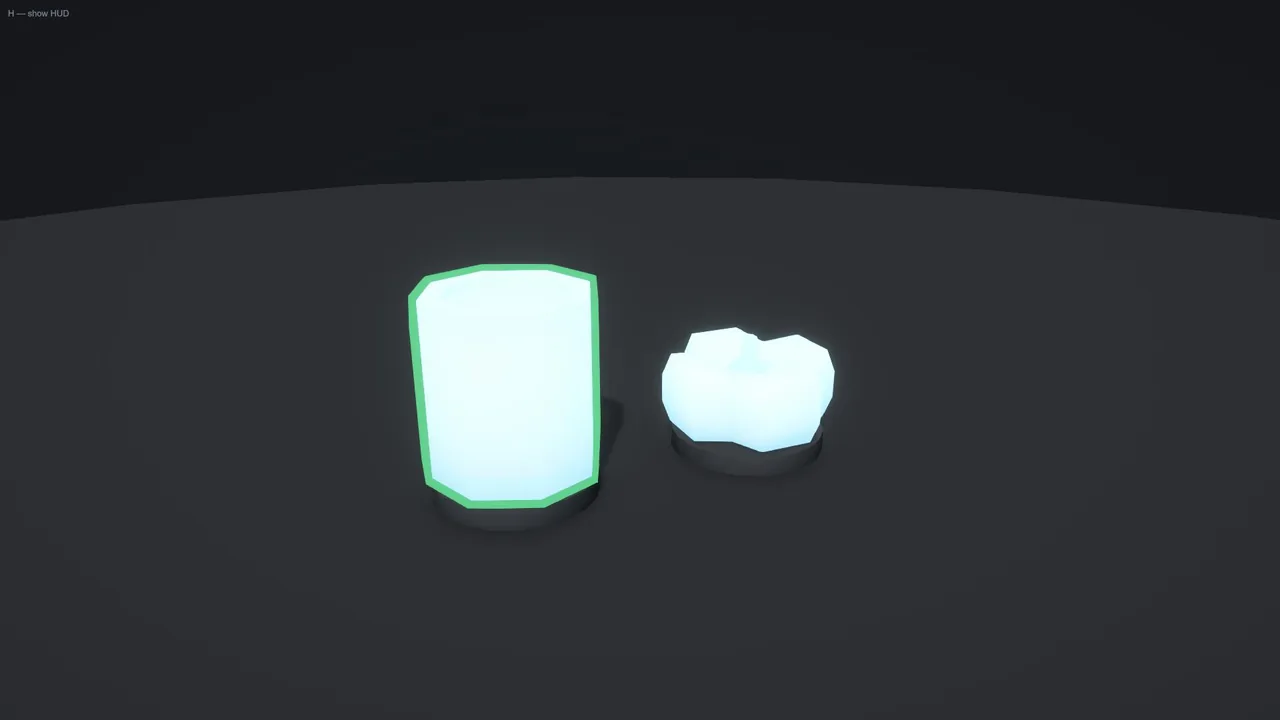
A hit, drawn on the model through the interior fill. Two intensities out of the box —
Flash() and FlashCritical() — with their own colours and glow.
var flash = enemy.GetComponent<KeylineDamageFlash>();
flash.Flash(); // ordinary hit
flash.FlashCritical(); // heavier colour, brighter
flash.Flash(hit.point); // the flash starts where it was struckThe directional form takes a world point and has two shapes: a falloff spreading from the point of impact, or the struck half of the object lit and the other half left alone. The axis is built from the outline's bounds centre rather than the transform, because a prop's pivot is usually at its feet.
| API | |
|---|---|
Flash() · Play() | ordinary hit at full strength |
Flash(float strength) · Play(float) | pass damage over max health and a scratch reads differently from a heavy hit for free |
Flash(Vector3 worldPoint, float strength = 1f) · Play(Vector3, float) | directional — brightest where it landed |
FlashCritical() · FlashCritical(Vector3) | the heavier colour and glow. Its own name because it is a different effect, not a different signature |
Stop() | cut the flash and restore |
IsFlashing · IsPlaying | the same value under both names |
Directional, Falloff, FalloffSoftness | shape of a directional hit, at runtime |
Started, Finished | UnityEvents |
Default pass: Main Fill — the fill is what reads as the body being hit, and it leaves your rim profile alone.
11.6 Fill Gauge
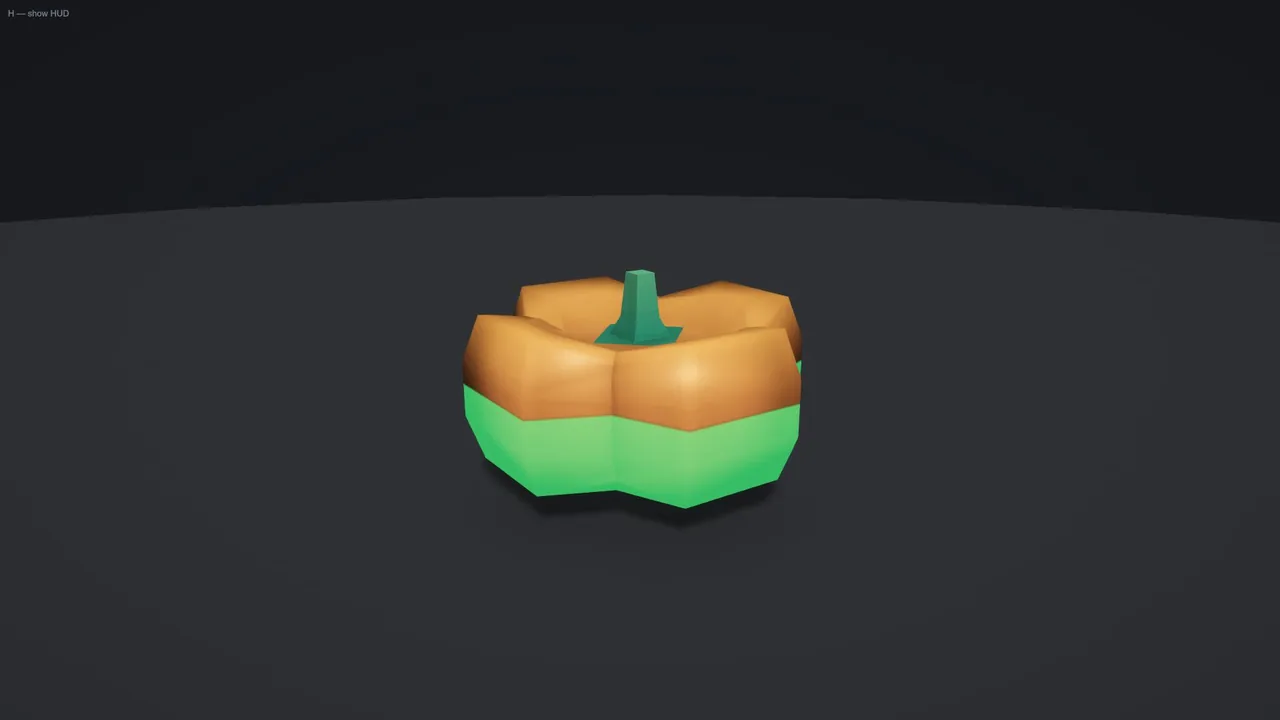
Health, charge, build progress — drawn on the object rather than over its head. Nothing is masked, clipped or re-meshed: the level is one shader parameter, so it costs the same at any value and animates for free.
var gauge = enemy.GetComponent<KeylineFillGauge>();
gauge.SetValue(health, maxHealth); // or SetValue(0..1)
gauge.SnapTo(1f); // no animationCalibration is the part to read. The sweep runs across the mesh's bounds, and a model
that does not fill its bounds evenly — greens on top, a tapering root below — reaches empty and
full well away from the theoretical −0.5 and 0.5. Set the level to 0 and drag
Offset At Empty until the fill just vanishes, then the level to 1 and
Offset At Full until it just covers the model.
Tint When Low shifts the fill towards a warning colour below a threshold — a level
and a warning are different pieces of information, and a bar that is only shorter makes you work
the second one out. Smoothing is how long the drawn level takes to catch up: 0 snaps,
and a quarter of a second turns a number changing into a hit landing.
| API | |
|---|---|
Value | the target level, 0 to 1. The drawn level eases towards it |
SetValue(float) · SetValue(float current, float max) | the same thing as a method, for UnityEvents and for raw health numbers |
SnapTo(float) | set and draw immediately, no easing — for spawning at full health |
DisplayedValue | what is actually on screen this frame, which lags Value by Smoothing |
Angle | direction the gauge fills, 0 to 360. 0 fills bottom to top |
FillColor, EmptyColor, EdgeSoftness | look, at runtime |
TintWhenLow, LowColor, LowThreshold | the warning shift |
OffsetAtEmpty, OffsetAtFull, CurrentOffset | calibration, described above |
Default pass: Main Fill. This is the one recipe that holds its pass continuously rather than for the length of an effect, which is why it is the one most likely to be disturbed by another recipe sharing the pass.
11.7 Impact Wave and Scan Wave
Both are built on the Gradient style's world-space shapes, and both use the same two colours: Core at the middle of the front and Edge everywhere else.
Impact Wave is per-object: a ring spreading from a point you give it, with its own speed, reach, thickness and a fade in / hold / fade out envelope.
Scan Wave lives on one object in the scene and drives a list of controllers: a sphere growing from a point, or a plane travelling along an axis, crossing everything in its path in step. It writes only to the objects the front is actually touching, so a scan across a room does not cost anything on the objects it has already passed.
Leave its target list empty and it collects every controller in the scene the first time it
runs. InvalidateTargets() makes it collect again — call it after spawning.
| Impact Wave | |
|---|---|
Emit(Vector3 worldPoint) · Play(Vector3) | from a point — usually where the hit landed |
Emit(RaycastHit) · Play(RaycastHit) | straight from a raycast |
Emit() · Play() | from the object's own centre |
Stop(), IsPlaying | as in 11.1 |
Speed, Reach, Thickness, EdgeSoftness | the front, in metres and metres per second |
FadeInSeconds, HoldSeconds, FadeOutSeconds | the envelope, in seconds. Total life is the three added up |
CoreColor, EdgeColor, Glow | look, at runtime |
| Scan Wave | |
|---|---|
Ping(Vector3 origin) · Play(Vector3) | send a front out from a point in world space |
Ping() · Play() | from this object's own position |
Stop() | ends it and puts every object it touched back as it was |
Distance | how far the front has travelled, in metres |
Shape, Axis | sphere or plane, and which way a plane faces |
Speed, Range, Thickness, EdgeSoftness | the front, in metres |
InvalidateTargets() | rebuild the target list from the scene on the next ping |
Default pass for both: Main Fill.
if (Physics.Raycast(ray, out RaycastHit hit))
{
var wave = hit.collider.GetComponentInParent<KeylineImpactWave>();
if (wave != null) wave.Emit(hit); // or wave.Play(hit)
}11.8 Reveal
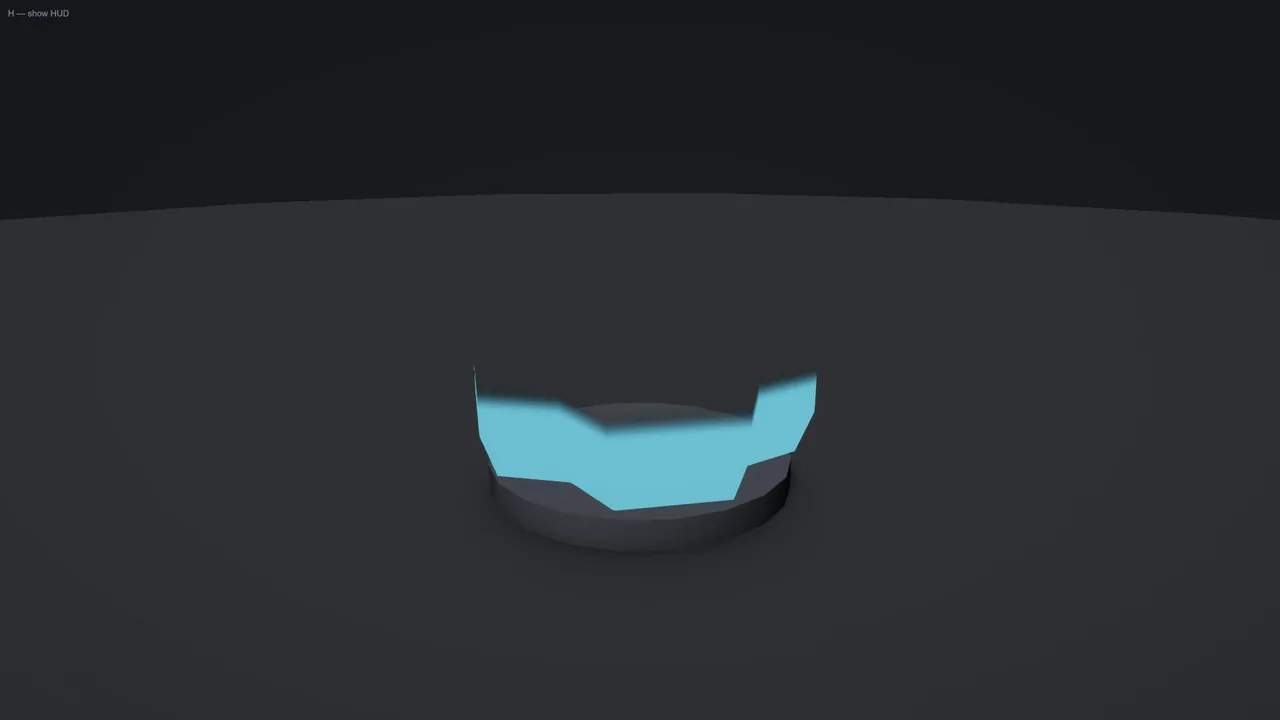
An object arriving. The mesh starts hidden, the fill climbs the silhouette, and when it reaches the top the outline flares and the real mesh appears under the flare.
var reveal = spawned.GetComponent<KeylineReveal>();
reveal.Play(); // materialise
reveal.PlayReverse(); // dissolve, flash firstThe flare is not decoration. Drop it to zero and the swap becomes visible: the fill vanishes and the lit mesh appears in its place, and the two never quite match. Hiding that is the only reason it is there.
| API | |
|---|---|
Play() | materialise |
PlayReverse() | dissolve. Its own name because it is the opposite behaviour, not another signature |
Complete() · Stop() | end now, with the object present. See the note in 11.1 |
IsPlaying | true during either direction |
Revealed, Dissolved | UnityEvents, one per direction |
Started, Finished | UnityEvents, either direction |
ClimbSeconds, FlareSeconds, FlareGlow | timing and the flare |
FillColor, EdgeSoftness | look of the climbing fill |
OffsetAtEmpty, OffsetAtFull | calibration, same idea as Fill Gauge |
Default pass: Main Fill. Play On Enable is on by default, so a prefab dropped into the scene materialises by itself; turn it off if you want to trigger it yourself.
Reveal hides the body by switching its renderers off, and switches back on only the ones it switched off: a renderer that was already off, such as a spare variant mesh or a trail waiting for its moment, stays off. When every renderer of the body is off before the first reveal — a prefab spawned that way so the mesh cannot show early — Reveal brings all of them in. An outline with Hide With Renderer on still draws while Reveal runs: Reveal tells it those renderers are hidden on purpose, so nothing needs switching off for the two to work together.
Start, not in Awake, so that code which
adds the component and then configures it is not racing a run that already began. Spawn the prefab
inactive if a single frame of visible mesh matters.11.9 Group Highlight
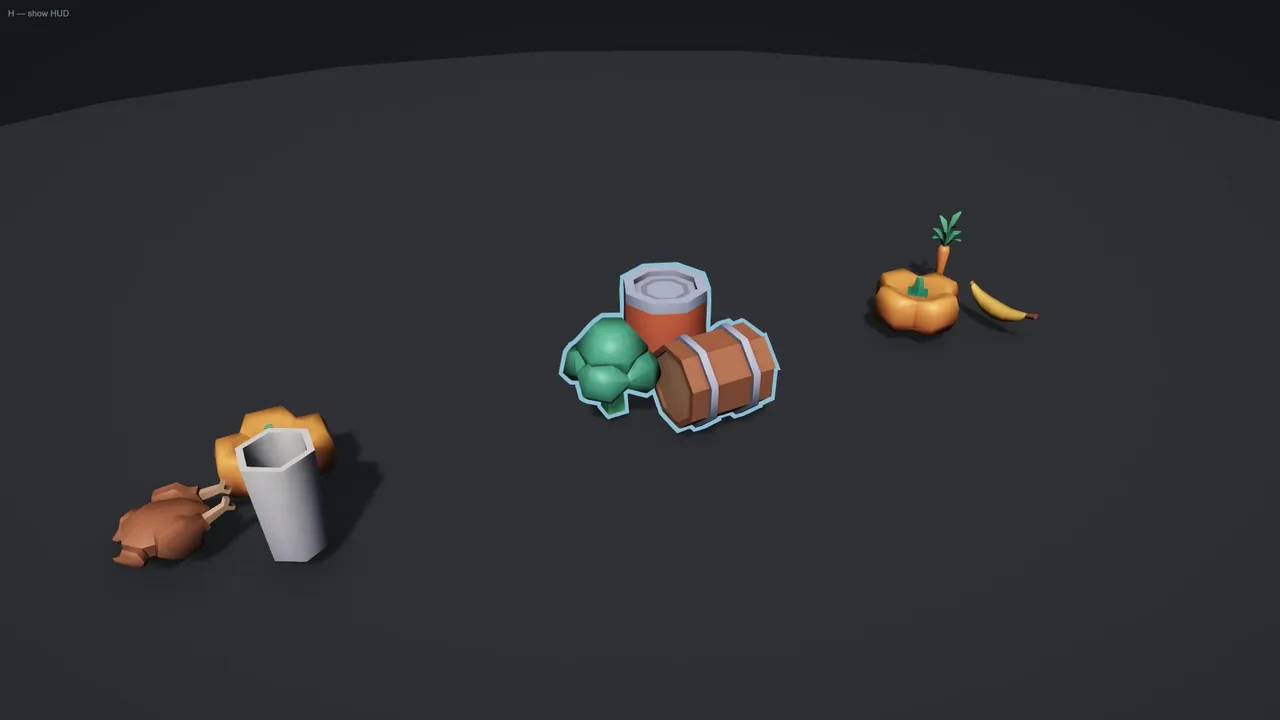
Put it on the parent of a group and the members answer together: point at one, the squad
lights up. With Merged on, the group draws as a single silhouette with no seams where
the bodies overlap — and spends one stencil pair for the whole squad rather than one per
body, so the budget in 3.4 counts squads instead of soldiers.
The silhouette follows the hierarchy: reparent a member in or out at runtime and its controller
notices by itself. Which members light up is a list gathered when the group first runs — call
Add, Remove or InvalidateMembers() after spawning or
reparenting one.
11.10 X-Ray When Hidden
Left on permanently, a through-walls outline stops meaning anything: it looks the same when the objective is in plain sight and when it is behind a building, so the player learns to ignore it. This component ties the X-Ray pass to real occlusion — the marker appears exactly when the thing it marks disappears.
Occlusion is tested with a line cast from the camera, on an interval, and the object's own colliders are skipped. There is a short clear delay so walking past a railing does not make the marker strobe, and separate fade-in and fade-out times, because appearing is the information and disappearing is only the absence of it.
Include Interior Fill switches the X-Ray fill on with the rim: a filled silhouette
reads across a level, a rim alone is quieter and scales to more objects at once.
This was KeylineOccludedXRay in 1.0.0. Updating breaks nothing:
components already in scenes and prefabs keep working, and the old name still compiles — it lives
on as a subclass of this one, so it is this component under either name rather than a
wrapper around it. The compiler marks each use as obsolete so you can rename at your own pace. New
objects should be given X-Ray When Hidden; the old name is hidden from Add Component.
11.11 Blink
Pushes and pops a state on a timer — on for so long, off for so long, so many times, or until stopped. For a quest object that should be noticed once rather than outlined forever.
blink.Play(); // the authored count
blink.Play(3); // three times
blink.Stop(); // and release the state| API | |
|---|---|
Play() | start with the count set in the Inspector. 0 means until stopped |
Play(int count) | start with a count given here, whatever the Inspector says |
Stop() | stop and release the state |
IsPlaying, StateId | state of the run, and which highlight state it holds |
Started, Finished | UnityEvents |
Unlike the other four, Blink drives the arbiter rather than a
pass of its own — it pushes and pops a named state. That is what lets a blinking object stay
selected underneath, and it is why Blink needs a KeylineHighlight on the same object
while the others need a Keyline Outline 3D or 2D.
Hover, most often. The pointer leaving the object pops that state and
cancels the blink. Give the cue a state of its own, and give it a priority above the states it has
to show through.11.12 Distance Fade
Fades an outline out with distance from the camera, or from any object you name, and switches its passes off where it has faded away. For pickups and props that should be outlined near the player and not across the map.
var fade = pickup.GetComponent<KeylineDistanceFade>();
fade.SetReference(player); // measure from the player instead of the camera
fade.FadeStart = 8f;
fade.FadeEnd = 15f;| Field | Default | What it does |
|---|---|---|
| Camera / Reference | main camera | What the distance is measured from. A Reference object wins over the camera |
| Measure To | Pivot | The object's position, or the centre of its outline's bounds |
| Passes | Main + X-Ray Outline | Which passes fade |
| Fade Opacity / Fade Width | on / off | What fades. Min Width is the width left at the far end |
| Fade Start / Fade End | 10 / 20 m | Up to Fade Start the passes draw as authored; at Fade End the fade is complete |
| Falloff | ease in-out | Visibility across the fade |
| Hide Beyond | on | Switch the passes off past Fade End, which saves their draws |
| Hysteresis | 0.5 m | Slack around that edge, so an object there does not flicker on and off |
| Invert | off | Show only from afar — for markers |
| Smoothing, Check Interval | 0.15 s, 0.1 s | How quickly it follows, and how often it measures. Objects start at random points of the interval, so a scene of pickups does not measure all at once |
| API | |
|---|---|
SetCamera(camera) · SetReference(transform) | measure from somewhere else; both jump to the new value at once |
Snap() | measure now and jump, for a camera cut or a teleport |
FadeStart, FadeEnd, FadedPasses, Invert | the settings above |
Visibility, Distance, IsInRange | where it stands |
EnteredRange, ExitedRange | UnityEvents: the outline starts to show, or has faded out |
It writes into the object's own copy of the profile, never the shared asset, and gives the authored values back when it is disabled.
12 · Sprites
A SpriteRenderer has its own component, Keyline Outline 2D. Everything about
the look is shared with meshes — the same profile assets, the same styles, the same four passes —
but the outline is made a different way, and that difference decides most of what follows.
A mesh outline is an inverted hull: the geometry is pushed outwards and the silhouette does the rest. A sprite has no hull to push. Instead the rim is measured against a distance field built from the artwork's alpha, so the outline follows what is drawn rather than the quad it is drawn on — a hole in the middle of a sprite gets an outline, and so does every notch along its edge.
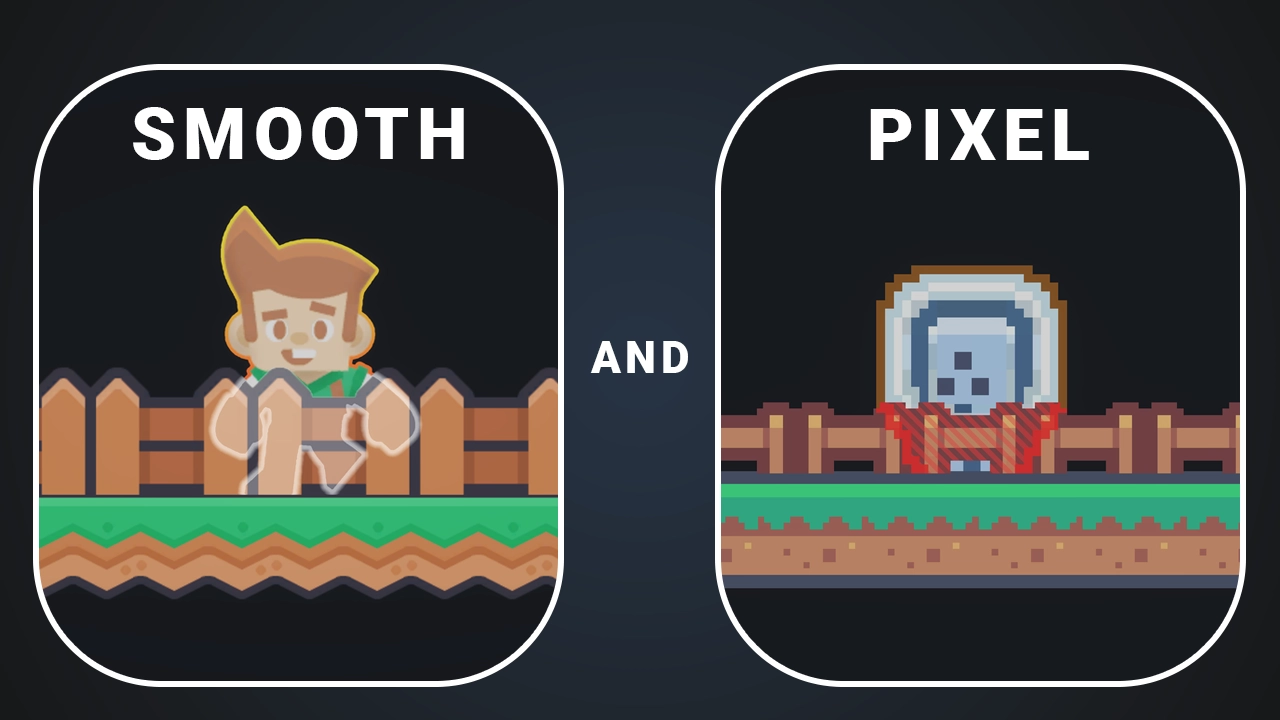
12.1 The component
Add Keyline Outline 2D to the object, press Add pass, and assign a profile to Main Outline. Extra passes — Main Fill, X-Ray Outline, X-Ray Fill — are added the same way as on the mesh component, and the × on a card hides the row and turns the pass off while leaving the profile assigned. If you added the mesh component by mistake, its Inspector offers a button to swap it over.
The pass rows, the profile slots and everything under them are the mesh component's, unchanged; so are the General, Objects, Visibility and Geometry sections (see 4.2), apart from the fields below. What follows is only what a sprite has instead of a hull, in section order: Instance Override in General; Include Children and Follow Changes in Objects; Padding and Sorting Order Offset in Geometry; and the sprite's own Distance Field section.
| Field | Default | What it does |
|---|---|---|
| Instance Override | on | Runtime writes fork the profile into a copy this object owns rather than editing the shared asset — the same rule as on meshes. See 3.3. |
| Include Children | off | Outlines every sprite under this transform, so a multi-part character reads as one object.
Off out of the box, unlike the mesh component: a 2D figure is usually several sprites drawn
in a deliberate order, and quietly taking them all over is a larger decision than it looks.
Ignore Children List is the exceptions. To attach a sprite that already has its own
Keyline Outline 2D — or one that is not under this transform — call
AdoptChild / AttachTo at runtime; ReleaseChild /
DetachFromParent makes it independent again. |
| Follow Changes | on | Rebuilds when the sprite, its sorting or its flip changes — a sprite swapped by animation, a flip for facing. A few comparisons per frame; turn it off for sprites that never change. |
| Padding | 0.25 | Empty room around the sprite for the rim to be drawn on, in the sprite's own units. The rim can only appear where the quad has surface, so too small a value cuts the outline off in a straight line wherever it would have gone further — which reads as a corrupted outline rather than as a number being too small. Set Minimum beside the field works out exactly enough for the widest pass this object draws. |
| Sorting Order Offset | 1 | How many sorting orders away from the sprite the passes are placed. The main outline is drawn under the sprite as a solid silhouette, so the artwork covers its middle and no seam can appear along an antialiased edge. Two overlapping sprites that share a Sorting Layer, an Order In Layer and this offset cannot merge — see 9.3. Give one of them a different order. |
| Field | found | The distance field the rim is measured against. Filled in automatically when one is sitting beside the sprite; built with the button below when there is not. It is a serialized reference rather than a name looked up at run time, because that reference is what pulls the texture into a player build. |
| Field Mode | Smooth | What the field is measured with. Smooth for painted and vector artwork, Pixel Art for artwork meant to be seen texel by texel. Changing it needs the field rebuilt — the rounding is in the numbers, not in how they are read. See 12.3. |
| Range (texels) | 32 | How far the next field can describe, and a hard ceiling on rim width: past it the field only says "at least this far", which cannot place an edge, so the outline stops growing while Width goes on rising. Reach costs memory, not precision or speed — the field is padded by its range on every side, so a 32×32 sprite at Range 32 is written as 96×96. |
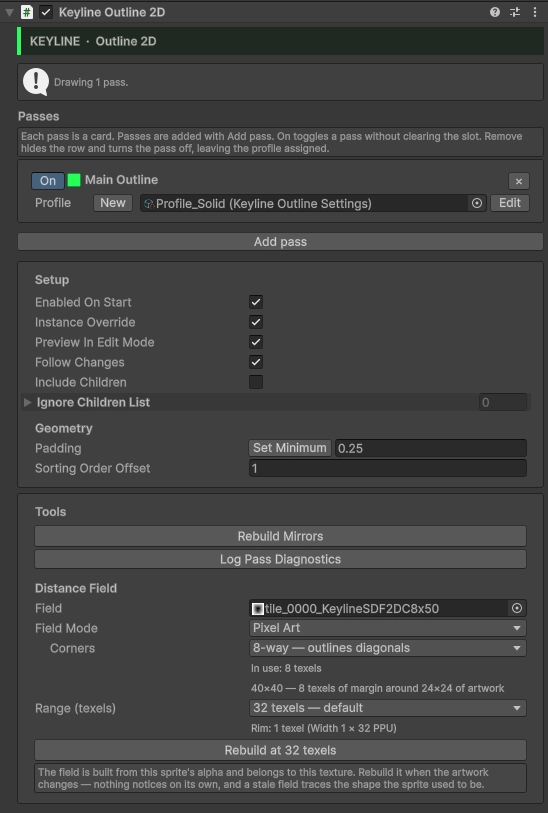
The Inspector reports what it knows rather than leaving it to be discovered: the range and metric the assigned field actually holds, the resolved rim width in texels, and a warning with a fix button for each of the handful of settings that quietly undo an outline.
12.2 The distance field
Under Distance Field, press Generate Distance Field. Nothing is built automatically: the file is written next to the sprite's texture and named after it, and writing into somebody's project is a decision rather than a side effect of selecting an object. One field is built per texture and shared by every sprite using it, so a sheet holding sixty frames is one file.
The range, the threshold, the metric, the precision and the scale it was measured under all travel in the file's name. A field is a table of distances scaled by one number, and read back with a different one every distance in it is wrong by that ratio — while the picture still looks perfectly well-formed. Nothing about the pixels reveals the mistake, so the numbers live where they cannot drift away from the file.
Padding
Every field is baked on a canvas larger than the artwork, padded on each side by the range. The rim is drawn outside the sprite by definition, and a field that stopped where the artwork stops has nothing to say about the ground the rim is standing on. Where the drawing runs to the edge of its own texture there is no honest answer to extrapolate — the distance travelled past the border is added as a radius, so a wide outline grows a round bulge along what is a perfectly straight side in the artwork.
So a 32×32 sprite at Range 32 produces a 96×96 file. Lower the Range before generating if that matters; an outline of one or two texels does not need thirty-two.
Power Of Two beside the range grows the canvas to the next power of two on each axis. It makes the file larger, not smaller — a source already at a power of two crosses to the next one as soon as any margin is added, so 128 becomes 256 where the plain padding would have stopped at 192 — and it is off by default for that reason. Tick it where something downstream requires the guarantee. Block compression is not that something: it needs sides that are multiples of four, which these already are, and it would ruin a distance field anyway, since it works by discarding exactly the small local differences the field is made of.
Precision
Fields are written with sixteen bits of distance, split across two channels — the high byte in red, the low byte in alpha. One byte gives 256 steps across twice the range, so at Range 32 a step is a quarter of a texel and at 128 it is a whole one; a whole texel of error is the size of the detail the field exists to resolve, and it shows on a wide smooth rim as faint terracing. The second byte removes it.
The low byte swings across its whole range every quarter texel, which is why it is in alpha rather than in a colour channel: in green it turned the file's thumbnail into static, and a texture that looks corrupted is one that gets reported as corrupted. Fields written before this carry no marker in their name and are read back as the eight-bit fields they are.
Stretched sprites
A sprite scaled (2, 1, 1) has texels twice as wide as they are tall in the world. A
field measured on the texel grid knows nothing about that, so a rim of three texels is three texels
in both directions — which is twice as thick down the sides as it is across the top. Nothing
downstream can undo it: the shader reads one number per texel, and the direction that number was
measured in is exactly what a distance field throws away.
So a smooth field is measured on the sprite's own stretched grid instead, automatically, and the rim comes out even. Width keeps its meaning — the arithmetic is normalised so that a Width of W is still a world radius of W, rather than the rim becoming thicker or thinner as a side effect of being evened out.
Only the ratio of X to Y matters. A sprite at (3, 3, 1) has square texels
exactly as one at (1, 1, 1) does and needs nothing done to it. The Inspector says which
ratio the next build will be measured for, and warns when a field's ratio and its sprite's have
drifted apart — change the scale after baking and the field has to be rebuilt, which it says rather
than leaving a rim that is subtly uneven.
Animation
An animation whose frames all live on one sheet needs nothing extra. One whose frames are spread across several textures needs a field per texture, and the Animation section takes the clip and builds them all: its sprite keyframes name every texture the animation will ever show, so the set is a read rather than a search. The outline swaps fields as the frames change, so the rim is always measured against the picture actually on screen.
Sprite Atlas
Supported for Full Rect packing without rotation. The sprite draws from the packed page while the field still covers the source sheet, and the mapping between the two is measured from the sprite's own rectangle. Tight packing or rotation leaves no rectangle to map through: the rim falls back to the silhouette and says so once in the console. An animation that jumps between source sheets swaps fields with the frame, packed or not, as long as a field has been generated for each sheet — Generate for Animation Clip records them.
12.3 Pixel art
A smooth field measures real distances and resolves its edge below a texel. That is the right answer for painted and vector artwork and the wrong one for pixel art, where the boundary between two texels is the artwork and rounding a corner is a mistake rather than a nicety.
Set Field Mode to Pixel Art and rebuild. The field is then measured on the texel grid, so the edge lands on texel boundaries and corners come out square — an outline drawn the way the artist would have drawn it by hand.
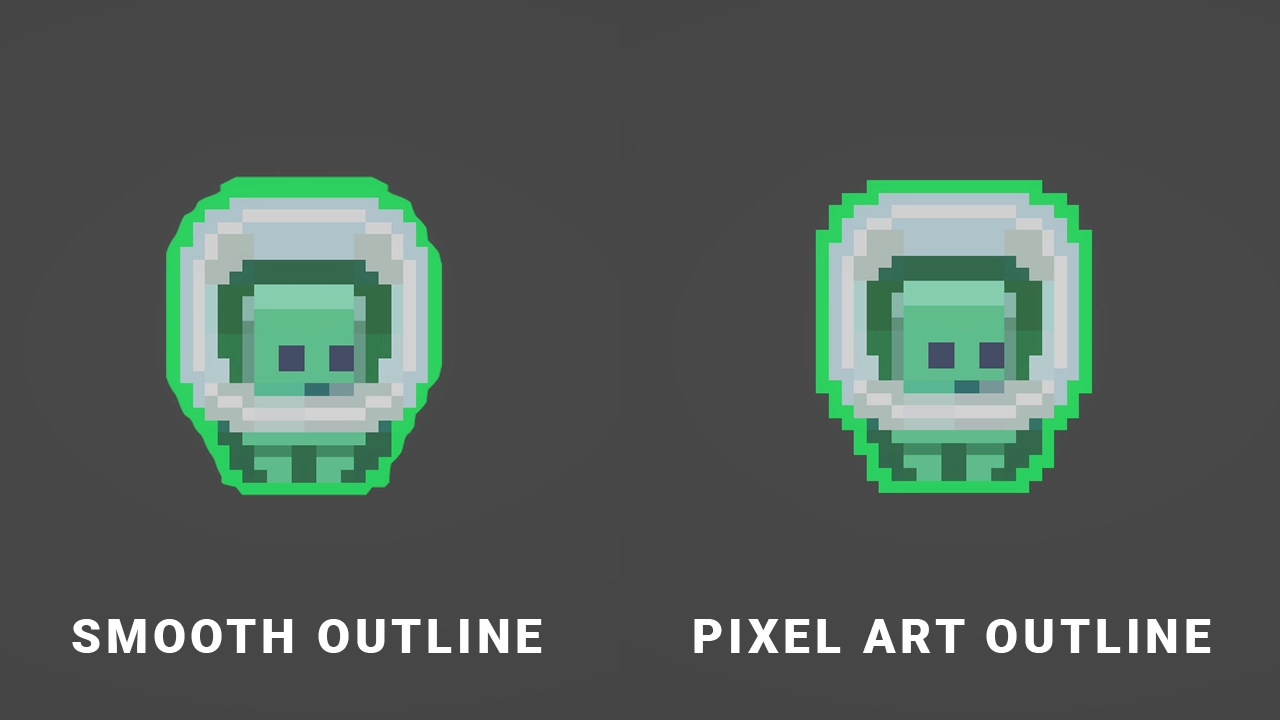
| Corners | A diagonal step costs | Reads as |
|---|---|---|
| 8-way | one | the outline follows staircase edges and closes around single-texel corners. What most pixel art wants, and the default. |
| 4-way | two | no outline across a diagonal join and outer corners cut back by one texel — a thinner contour, useful on small sprites where 8-way reads as heavy. |
Both are baked to their own file, so a sprite can carry one of each and the Corners switch moves between them without rebuilding anything.
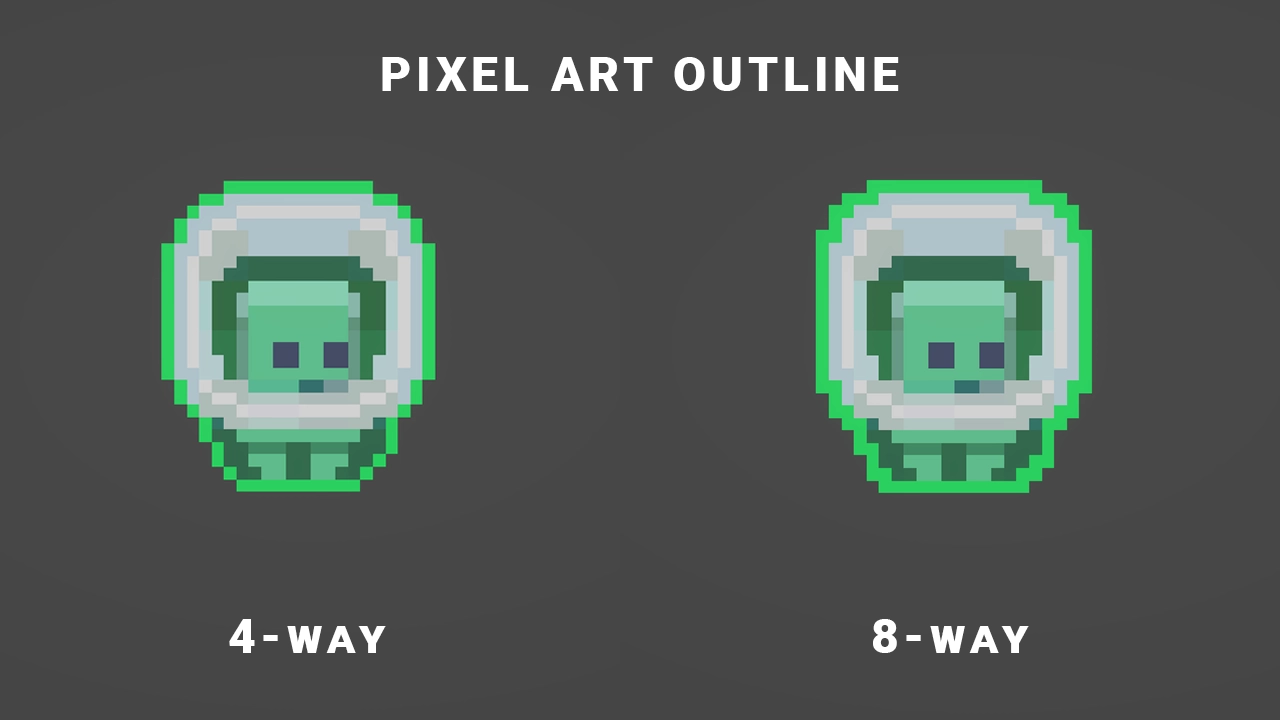
Width is counted in texels
Set the profile's Width Mode to Pixels. Width is then a whole number of source texels: 1 is a one-texel outline, on every sprite and at every zoom.
Neither of the other two modes can express that. Metres go through Pixels Per Unit, so the same profile draws three texels on one sprite and ten on another and the number in the field means nothing on its own. Screen pixels go through the camera, so an outline authored as two texels is two and a bit at one zoom and one and a half at the next — which is the definition of not being pixel art.
Switching the mode does not convert the number. The factor is a sprite's Pixels Per Unit and a profile is worn by however many sprites happen to wear it, so converting against one of them would rewrite the width for all the others. The Inspector says what it did and leaves a sensible value. Pressing Edit on a profile from a sprite that is drawing a pixel rim is the one exception: a particular sprite is in hand there, so the width is converted and the profile opens showing the outline already on screen.
What the artwork needs
- Filter Mode: Point on the sprite's own texture. The field can be perfect and the result still soft, because the blur happens afterwards to both at once.
- Whole-number scale on the object. A fraction spreads a texel across a fraction of a screen pixel and the outline's steps land between pixels.
- Equal X and Y scale, so that a texel is square in the world. Any value will do —
(3, 3, 1)is as good as(1, 1, 1); it is the ratio that stretches a texel and not the size. A smooth field absorbs a stretch, a pixel one cannot — see Stretched sprites. - No rotation, for the same reason: the outline is built on the sprite's own grid, and once rotated its steps no longer line up with the screen's.
The component checks all of these and says which one is in the way. It also offers the switch when it sees point-filtered artwork under a smooth field — an offer rather than a change, because an import setting is not a statement of intent.
Rim Falloff
Under Width Mode: Pixels the profile's softness slider is drawn as Rim Falloff and does something a grid can honestly do: it fades the outline a whole ring at a time, dimmest on the outside, brightening inward. The value is the share of the outline's own width that fades — 0 is a solid rim, 0.5 fades the outer half of its texels, 1 fades across all of them — so one setting reads the same on a two-texel rim and a twenty-texel one.
A one-texel rim has nothing to be dimmer than, so it simply takes the value as transparency.
Pulse
Pulse works on a pixel rim, and it steps. A smooth rim's edge is placed by a threshold on a continuous distance, so the geometry breathing is the effect; a pixel rim's edge is placed by a texel count, and a count can only move a whole texel at a time.
Two controls shape what that reads as, and both appear on the profile when Pulse is on:
- Step Fade eases the outline down to its faintest as it reaches full stretch and back to solid as it returns — once per pulse, in time with the width. The steps do not disappear; they stop being the loudest part of the effect, because the ring is at its faintest exactly where they come thickest. That is what makes a discrete rim read as a breath rather than as a stutter. It is deliberately tied to the wave and not to the texel boundaries: keyed to those it fires once per step, which on a wide rim is several times a beat and reads as flicker.
- Brighten scales how much the colour lifts at the top of the swing. The pulse widens and brightens together, and on a pixel rim — where the width can only step — the brightening is often the part that actually reads, and can easily be more than is wanted. 0 holds the colour still and lets the width do all the work.
12.4 X-Ray needs an occluder
In 3D the depth buffer answers "is this pixel behind something", and X-Ray is built on that question. A 2D scene leaves that buffer empty, so Keyline supplies the missing input: an occluder writes a depth value derived from its place in the sorting order, and the existing machinery works unchanged.
Nothing else writes it. Without an occluder in the scene, X-Ray has nothing to draw against — the pass is configured, costs nothing and shows nothing. There are two ways to declare one:
- Keyline Occluder 2D on the sprite itself, when you know which objects hide things.
- Keyline Occluder Layers 2D, one component in the scene, naming whole sorting layers. Every sprite on those layers becomes an occluder without a component of its own.
Both of these say who occludes, and that stays a decision for the whole scene. It has to be: the depth an occluder writes is shared, so a proxy built for one sprite hides everything behind it, not only the sprite that asked for it. A per-object "which occluders apply to me" would be describing something it cannot control.
Which of those occluders a given outline can be seen through is a separate question, and that one is per outline. It is answered by X-Ray Sees Through on the sprite's own component, using GameObject layers rather than sorting layers — see 3.5. So a sprite can be an occluder for the scene and still let one particular character's X-Ray through, which sorting layers cannot express: a sorting layer is one number shared by everything drawing against it.
The registry sweeps the scene on an interval. A project that knows when its occluders appear can switch Auto Rescan off and say so directly:
layers.Add(spriteRenderer); // one sprite, no scene sweep
layers.Remove(spriteRenderer); // let one go
layers.Rescan(); // sweep nowAn occluder must rank above the sprite it hides. The depth value comes from sorting position — sorting layer first, then order within it — and the comparison is strict: an occluder sharing a sprite's layer and order does not hide it. Duplicating an occluder is the usual way to meet this, because a duplicate inherits both numbers. Give it a higher order, or a sorting layer further along. Both Occluder inspectors have a Log Occluder Diagnostics button that prints every live occluder, its rank, and whether each X-Ray sprite shows through it.
12.5 Limitations worth knowing
- Draw Mode must be Simple. Sliced and Tiled draw a nine-patch or a repeat whose mapping from surface to texture is piecewise; the outline is one quad measured through a single mapping. The component says so in its status line when it finds one.
- Sorting orders beyond ±512 within a layer are clamped to that layer's edge, so two sprites out there share a depth value and X-Ray between them cannot be resolved. The clamp is deliberate: a sprite compared at the wrong depth, in the neighbouring layer's range, is a worse outcome than one compared at the edge of its own. Negative orders are fine — every distinct position in the scene claims a depth slot of its own, whatever its sign.
- Edge Softness is a mesh control. A rim drawn from a distance field softens through Rim Softness instead, which needs no extra pass. Under a pixel field neither applies: the same slider becomes Rim Falloff and fades a whole ring at a time, which is the only kind of fade a grid edge can honestly have.
13 · Scripting
Everything below is in namespace FourSsets.Keyline; the recipe components and
KeylinePointer are in FourSsets.Keyline.Recipes. Code written against
IKeylineOutline works on Keyline Outline 3D and Keyline Outline 2D alike.
13.1 The everyday API
using FourSsets.Keyline;
var outline = target.GetComponent<KeylineOutline>();
outline.OutlineEnabled = true; // the master switch
outline.Color = Color.red; // Main Outline's colour
outline.Width = 0.04f; // metres, in World width mode
outline.EdgeSoftness = 2f; // 0–8, about 1 cm a step. Needs the Soft Edge pass.
outline.XRayOutlineEnabled = true; // show it through walls tooColor, Width, Opacity, Pulse and
SetStyle write the pass being edited — Main Outline unless an
edit scope names another. SetPassColor,
SetPassWidth and SetPassOpacity name the pass in the call. The mesh
component also has a property for every other profile field (glow, gradient, halo and so on); on a
sprite, reach those through ForkSlot. All of them write through Instance Override —
13.4.
KeylineOutline. KeylineOutlineController
is its base class, where the implementation lives; you can type against either. Add
KeylineOutline, though — ExecuteAlways and the other component
attributes are on the concrete class.13.2 Recipes
Short, complete answers to the usual jobs. Each is the body of a MonoBehaviour;
the ones that read the pointer use KeylinePointer, which works with either input
system. Where a ready-made component in 11 does the same job, it is named.
Hover highlight
IKeylineOutline _hovered;
void Update()
{
Ray ray = Camera.main.ScreenPointToRay(KeylinePointer.Position);
IKeylineOutline hit = null;
if (Physics.Raycast(ray, out RaycastHit info))
KeylineOutlineRef.TryGetFrom(info.collider, out hit);
if (hit == _hovered) return;
if (_hovered.IsAlive()) _hovered.OutlineEnabled = false;
_hovered = hit;
if (_hovered != null) _hovered.OutlineEnabled = true;
}Leave Enabled On Start off on the props. TryGetFrom looks on the hit object
and its parents, and resolves a generated or adopted child to the outline that controls the figure,
so a collider on an arm finds the character. The first show builds the outline; after that,
showing and hiding is a flag per renderer. When hover shares an object with selection or damage, drive
Highlight states instead of the switch — that is what
Pointer Highlight (Scene) does.
Click selection with a profile swap
[SerializeField] KeylineStyleProfile selectedProfile;
IKeylineOutline _selected;
KeylineStyleProfile _normal;
void Update()
{
if (!KeylinePointer.PrimaryPressedThisFrame) return;
if (_selected.IsAlive())
_selected.SetPassStyleProfile(KeylinePassKind.MainOutline, _normal);
_selected = null;
Ray ray = Camera.main.ScreenPointToRay(KeylinePointer.Position);
if (Physics.Raycast(ray, out RaycastHit hit)
&& KeylineOutlineRef.TryGetFrom(hit.collider, out _selected))
{
_normal = _selected.SharedPassStyleProfile(KeylinePassKind.MainOutline);
_selected.SetPassStyleProfile(KeylinePassKind.MainOutline, selectedProfile);
}
}SharedPassStyleProfile is the asset, even while the slot draws with a private copy,
so deselecting restores the authored look. Putting a different profile in a slot rebuilds — fine on
a click, not every frame. For a colour-only selection, SetPassColor is a material
write.
Damage flash
Damage Flash is the finished version:
GetComponent<KeylineDamageFlash>().Flash(hit.point). By hand, a flash is a
colour and an opacity written over time, then handed back:
IEnumerator Flash(IKeylineOutline outline, Color color, float seconds)
{
const KeylinePassKind fill = KeylinePassKind.MainFill;
KeylineStyleProfile asset = outline.SharedPassStyleProfile(fill);
if (asset == null) yield break; // Main Fill needs a profile
outline.SetPassColor(fill, color);
outline.SetPassEnabled(fill, true);
for (float t = 0f; t < seconds; t += Time.deltaTime)
{
outline.SetPassOpacity(fill, 1f - t / seconds);
yield return null;
}
outline.SetPassEnabled(fill, false);
outline.SetPassColor(fill, asset.color); // the authored look again
outline.SetPassOpacity(fill, asset.opacity);
}The first time a pass is switched on it is built; after that, with Keep Mirrors While Hidden on, it is only hidden and shown. Only one script should write a pass at a time — 11.1.
Hint through a wall
// Once, when the object spawns: filling a slot rebuilds.
target.SetPassStyleProfile(KeylinePassKind.XRayOutline, hintProfile);
target.MainOutlineEnabled = false; // nothing in plain view
target.XRayOutlineEnabled = false;
target.OutlineEnabled = true;
// While the quest is active: a rim only where the object is hidden.
target.XRayOutlineEnabled = true; // same as SetPassEnabled(KeylinePassKind.XRayOutline, true)The X-Ray pass draws only where something is in front of the object. X-Ray Sees Through chooses which occluders count; X-Ray When Hidden adds a line-of-sight test and a fade. A sprite needs an occluder — 12.4.
Highlighting a group
readonly List<IKeylineOutline> _squad = new List<IKeylineOutline>();
void SetSquadSelected(bool selected)
{
KeylineOutlines.SetOutlineEnabled(_squad, selected);
if (selected)
KeylineOutlines.SetPassColor(_squad, KeylinePassKind.MainOutline, squadColor);
}KeylineOutlines also has SetPassEnabled and
SetPassStyleProfile. It takes any IReadOnlyList — a list, an array of
KeylineOutline — skips destroyed entries and allocates nothing. To draw the squad as one
silhouette with one stencil pair, add a Keyline Merge Group on its
parent; to have it answer the pointer as one, Group Highlight.
Pooling
void OnReturnedToPool() { _outline.OutlineEnabled = false; } // hide, keep everything
void OnTakenFromPool() { _outline.OutlineEnabled = true; } // the same mirrors, shownKeep the component and its slots: removing it or emptying a slot throws away the mirrors the pool exists to reuse. With Keep Mirrors While Hidden on (the default, 16.4) a hidden outline keeps its generated objects, so taking it out again costs a flag per renderer. Deactivating the pooled object keeps them as well: on enable the outline is shown again as it was, provided nothing it was built from changed while it was off — its settings, its profiles' shape, its renderers, their meshes and materials. If anything did, it builds, as a fresh one would. An outline that hands its look on to child outlines, or has adopted or been adopted, always builds on enable. A value set while the object is inactive is stored, applied on enable, and wins over Enabled On Start. 14.5 has the numbers.
Changing the style at runtime
using (outline.EditScope(KeylinePassKind.XRayOutline))
{
outline.SetStyle(KeylineStyle.Neon); // SetStyle names no pass; the scope does
outline.Color = new Color(1f, 0.55f, 0.1f);
outline.Width = 0.03f;
} // at most one rebuild, hereWith Instance Override on, the slot is forked first and the asset is untouched. A style switched off in Project Features draws as Solid.
Temporary override
With the arbiter, a temporary look is a state: authored on the object's Highlight component with its own profile, colour, width and X-Ray, and held for as long as it is needed.
var highlight = target.GetComponent<KeylineHighlight>();
highlight.Push("Alarm"); // wins while its priority is highest
// ...
highlight.Pop("Alarm"); // back to the next state held, or the object's own lookWithout it, fork the slot, write the copy, and drop the copy afterwards:
KeylineStyleProfile copy = outline.ForkSlot(KeylinePassKind.MainOutline);
copy.color = Color.red;
copy.glowIntensity = 3f;
outline.RefreshAppearance(); // values only; call Rebuild() after a style change
// ...
outline.RevertSharedPassStyleProfiles(); // every copy dropped, the assets drawn againOutside play mode ForkSlot returns the asset itself, so the same code edits the
asset. RevertSharedPassStyleProfiles drops the copy on every slot, including one a
recipe is using; to give back a single pass, see 13.8. For one
runtime profile shared by many objects, profile.CloneForRuntime() makes an unsaved copy
that you destroy yourself.
Blending to another profile
BlendTo moves a pass to another profile over time, on meshes and sprites alike:
outline.BlendTo(KeylinePassKind.MainOutline, hoverProfile, 0.25f);
// ...
outline.BlendTo(KeylinePassKind.MainOutline, idleProfile, 0.4f);- Two profiles that draw alike — same style, same shells and layers, same Width Mode — blend smoothly: colours, widths and every other number slide from one to the other.
- Two that do not — Solid to Halo, World to Constant Screen — have nothing in between. The outline fades out over the first half, changes over while invisible, and fades in as the new profile.
- The shared assets are never edited. The in-between look lives in the object's own
copy, and at the end the target profile itself is in the slot, as if
SetPassStyleProfilehad been called. - Calling it again during a blend carries on from the current look. Any other write to the pass — a colour from code, a recipe, a new profile — ends the blend where it is.
IsBlending,CompleteBlendandCancelBlendcheck, finish or stop one. Outside play mode, or with zero seconds, the profile is assigned at once.
Adding an outline at runtime
IKeylineOutline outline = KeylineOutlineRef.GetOrAdd(spawned); // 2D on a sprite, 3D otherwise
outline.Configure(new KeylineSetup
{
MainOutline = hostileProfile,
XRayOutline = seeThroughProfile,
Enabled = true,
});GetOrAdd returns the outline already there, if any. Configure fills
every slot with one build — 13.7.
Events
void OnEnable() { _outline.OutlineEnabledChanged += OnShown; _outline.Rebuilt += OnRebuilt; }
void OnDisable() { _outline.OutlineEnabledChanged -= OnShown; _outline.Rebuilt -= OnRebuilt; }
void OnShown(IKeylineOutline o) => marker.SetActive(o.OutlineEnabled);
void OnRebuilt(IKeylineOutline o)
{
if (o.TryGetOutlineWorldBounds(out Bounds bounds))
marker.transform.position = bounds.max;
}OutlineEnabledChanged is raised only when the master switch actually changes.
Rebuilt follows every Rebuild(), including the ones a profile or style
change starts. PassStyleProfileChanged(outline, pass) is raised when a slot is given a
different profile, and not for private copies.
One script for a mesh or a sprite
if (go.TryGetComponent(out IKeylineOutline outline))
{
outline.SetPassEnabled(KeylinePassKind.XRayOutline, true);
}
// Later, on a stored reference:
if (outline.IsAlive()) outline.OutlineEnabled = false;Use IsAlive(), not == null, on an interface reference —
13.8 explains why.
13.3 What a call costs, and how it behaves
| Cost | What |
|---|---|
| Cheap | Reads. A write of the value already there — no work, no copy, no
event. Showing and hiding a built outline or pass: OutlineEnabled,
SetEnabled, SetPassEnabled, part targets. Safe every frame. |
| Material write | Anything the shader reads: Color,
Width, Opacity, SetPassColor /
SetPassWidth / SetPassOpacity, glow, gradient offset,
Pulse, RefreshAppearance(). Safe every frame. In Play mode on a mesh, also a
profile of the same shape put in a Main Outline, X-Ray Outline, Main Fill or X-Ray Fill slot
that already draws — the same style, Halo layer count, shader profile, feature set and mesh
preparation, and no cutout — through SetPassStyleProfile or a slot property. The
outline's Rebuilt event is not raised then, because nothing was rebuilt. On a
sprite, a different profile in a slot always rebuilds. |
| Rebuild | The generated objects are made again: a profile of a different
shape in a slot, or any slot change through Configure or an edit scope; a style of
a different shape (Halo, Double, Frost); Sheet Solidify switched on or off; the feature mask;
Rebuild(). Inside an edit scope it waits for the close and happens
once. |
A pass switch builds in three cases. The first time a pass is switched on it is built;
after that it is hidden and shown. With Keep Mirrors While Hidden off, every show builds.
And on a mesh, turning Main Outline or X-Ray Outline on or off while the other is running rebuilds,
because the two share a stencil arrangement whose extra stamps exist only when built.
RevertSharedPassStyleProfiles() refreshes, and rebuilds only when a copy's style had a
different shape (a sprite rebuilds whenever there was a copy).
| Situation | What a call does |
|---|---|
| Component disabled or object inactive | Stores the value and applies it on enable.
Rebuild() does nothing and IsPassDrawing is false. The master switch
set now wins over Enabled On Start. |
| Edit mode | No private copies: ForkSlot returns the asset and look
writes go into the profile asset, which is marked dirty so the edit is saved. Nothing is
recorded for Undo — an editor script calls Undo.RecordObject first. |
| Project Feature off | Stores the value and does not act on it. The first such call per feature logs one warning. Switching the feature on brings everything back. |
| Empty slot | A look write changes nothing. The mesh component reports it once. |
| Overlay pass on a sprite | Reads answer false or null; writes do nothing. |
Undefined KeylinePassKind | Throws
ArgumentOutOfRangeException. |
Reported mistakes
Two writes fail silently, so Keyline Outline 3D reports both, once per outline and pass. Switch the messages off with Project Settings ▸ Keyline ▸ Runtime ▸ Report API Misuse, which also silences the Project Feature warning.
- A look property written while the pass's slot is empty goes to a scratch profile and changes nothing. Put a profile in the slot first. Reported in the Editor and in development builds.
- A look property written with Instance Override off, while the slot holds a project asset, changes every object using that profile — and in the Editor the asset stays changed after play mode. Reported in the Editor only: telling a project asset from a ScriptableObject you created needs the asset database, which a player does not have.
13.4 Instance Override
Writing to a profile at runtime writes to a shared asset — see 3.3. With Instance Override on, the first write through a component property forks that slot into a copy this object owns. It is lazy: an object that only reads never allocates anything. Outside play mode nothing is forked and the asset is written.
// Safe: goes through the property, forks on first write.
outline.Color = Color.red;
// NOT safe: the profile is a plain object here and nobody is watching.
outline.MainOutlineStyleProfile.color = Color.red; // every object sharing this profile turns redFor a batch of fields, ask for the copy and write to it directly:
KeylineStyleProfile mine = outline.ForkSlot(KeylinePassKind.MainOutline);
mine.color = Color.red;
mine.width = 0.05f;
mine.glowIntensity = 3f;
mine.ValidateValues();
outline.RefreshAppearance(); // push it without rebuilding geometry| Member | Does |
|---|---|
InstanceOverride | on by default; turning it off does not drop copies already made |
ForkSlot(kind) | fork one slot now and return the copy; outside play mode, the asset itself |
ForkAllSlots() | every filled slot at once — six on a mesh, four on a sprite |
IsSlotForked(kind) | whether this slot is drawing with a copy |
SharedPassStyleProfile(kind) | the asset the slot returns to — the look to restore |
RevertSharedPassStyleProfiles() | put the shared assets back and destroy the copies |
RevertSharedPassStyleProfiles() undoes everything gameplay did to an object's look
without tracking which fields were touched.
13.5 Driving the passes
Switches and profiles, addressed by KeylinePassKind:
outline.SetPassEnabled(KeylinePassKind.XRayOutline, true);
bool on = outline.IsPassEnabled(KeylinePassKind.MainFill);
KeylineStyleProfile fill = outline.PassStyleProfile(KeylinePassKind.MainFill);
// Is this pass wearing the Hostile profile?
bool isThatAsset = outline.IsPassStyleProfile(KeylinePassKind.MainOutline, hostile);
bool looksHostile = outline.IsPassStyleProfile(KeylinePassKind.MainOutline, hostile,
includeForks: true);
outline.OutlineEnabled = false; // the master switch, above all of themIsPassStyleProfile and forks. Once a runtime write has forked a slot, the
slot holds a private copy, not the asset. includeForks decides whether that copy
counts. Off, the slot must hold that exact asset — what a save system recording assignments wants.
On, a copy made from it counts too — "is this enemy still showing the Hostile look, whatever has
been tinted on top of it".
KeylinePassKind names six passes: MainOutline, XRayOutline,
MainFill, XRayFill, and — on a mesh only —
MainCutoutOverlay and XRayCutoutOverlay. A sprite has no overlay pass: it
answers false for those two, and SetPassEnabled on them does nothing. A
value outside the enum throws rather than being treated as Main. KeylinePassKinds.IsDefined
and KeylinePassKinds.ProjectAllows(kind, sprite) answer the two checks generic code
needs.
Switch position or what is on screen
IsPassEnabled is the position of a switch. Set it and read it back and the two
agree, which is what a save system needs. A pass whose switch is on but whose slot is empty draws
nothing and still answers true.
bool switchedOn = outline.IsPassEnabled(KeylinePassKind.XRayOutline); // the switch
bool visible = outline.IsPassDrawing(KeylinePassKind.XRayOutline); // live, master, switch, slot, featureEditing a pass that is not the active one
Every member that changes a pass names it in the call, except SetStyle and the
Color / Width / Opacity / Pulse properties. An
edit scope tells those which pass they mean — and, because it holds the rebuild back until it
closes, a burst of changes costs one rebuild instead of one each:
using (outline.EditScope(KeylinePassKind.XRayOutline))
{
outline.SetStyle(KeylineStyle.Neon);
outline.Color = new Color(1f, 0.55f, 0.1f);
outline.Width = 0.03f;
} // one rebuild here, not threeScopes nest; only the outermost close does the work. BeginPassStyleProfileEdit and
EndPassStyleProfileEdit are the same pair by hand — prefer the using form,
because a throw between the two leaves a scope open and every later change deferred.
Refresh or rebuild
Writing to a forked profile directly bypasses the component, so you choose:
RefreshAppearance() for values the shader reads, Rebuild() when the
number or shape of hulls changed — the style, the feature mask. Through
the component's own properties the right one happens by itself. See
13.3.
One pass, some of the parts. A figure assembled with AdoptChild is one outline drawn by one component, so the switches above answer for all of it at once. Three calls narrow a pass to named parts instead:
// Move the named parts and leave every other part exactly as it was.
root.SetPassEnabled(KeylinePassKind.MainOutline, false, new[] { baseBlock.transform });
// exclusive: the call speaks for the whole figure. Only this section is lit.
root.SetPassEnabled(KeylinePassKind.MainOutline, true, new[] { breakBlock.transform },
exclusive: true);
// The other way round: only this section is dark, everything else is lit.
root.SetPassEnabled(KeylinePassKind.MainOutline, false, new[] { breakBlock.transform },
exclusive: true);
root.ClearPassOverrides(KeylinePassKind.MainOutline); // back to the plain answer
bool lit = root.IsPassEnabled(KeylinePassKind.MainOutline, someBlock.transform);exclusive decides what is said about the parts the call does not name, not
which parts move. Off — the default — they keep whatever they had, which is what combining several
rules needs: a base silenced for good must not come back when something else is lit. On, they get
the opposite of enabled, so the call means "exactly these and nothing else". Drive a
hover or a selection with exclusive: true; otherwise the previous highlight has to be
cleared by hand.
Naming parts switches the pass on, then narrows it. A call that can show something —
enabled true, or exclusive: true — sets the pass's own switch on first,
so one call is the whole answer even when the pass was off. Only a call that hides the named parts
and says nothing about the rest leaves the switch where it was.
Merge Child Outlines on or off, the same calls. With it off, the children draw through
outlines of their own, and each reads the list kept on the component you placed. Naming parts, the
plain SetPassEnabled(pass, on) and ClearPassOverrides answer for the whole
figure either way, with no rebuild. Asked of a part outline — an adopted child, say — the call is
passed up to the component that speaks for the figure.
A target names a block: the transform, everything under it, and everything it has adopted, all the way up the chain — so on a model chained by adoption, naming the block at the break names the whole section that comes away with it.
No rebuild: the mirrors stay built and only their visibility moves, so this can run every frame.
A part nobody has named behaves as before, and a plain SetPassEnabled(pass, on)
forgets what the pass was told about parts, in both directions — a call that speaks for the whole
outline ends the highlight.
What this cannot do is give the lit section a different colour: there is one profile per
pass per component. For that the section has to be its own figure, which is what
DetachFromParent makes it — at the cost of a rebuild on both sides.
None of it is serialized. It does not survive a scene reload; a rebuild keeps it.
13.6 InvalidateCutout
Cutout resolves the texture off the source renderer's material and caches it against that material's instance id. Swapping the whole material is noticed by itself. Writing a different texture into the same material is not — the id has not changed, and re-resolving on every appearance push would put a property lookup per renderer on a path that runs whenever anything moves.
// A damage state, a variant, a seasonal skin:
mat.SetTexture("_BaseMap", damagedTexture);
// Tell the outline to look again.
outline.InvalidateCutout();It clears the cache for every pass, the Cutout Overlays included, and refreshes: the X-Ray rim reads the same texture as the Main one.
13.7 Adding the component at runtime
Add the component and give it a profile, in either order:
var outline = enemy.AddComponent<KeylineOutline>();
outline.MainOutlineStyleProfile = hostileProfile;Any slot will do — an object that only ever shows a through-wall marker can fill
XRayOutlineStyleProfile and leave MainOutlineStyleProfile empty. The outline
comes up as soon as the first slot is filled, in the same statement or frames later. Enabled On
Start decides whether it comes up visible. KeylineOutlineRef.GetOrAdd(go) does the
adding for code that does not know whether go is a sprite.
OutlineEnabled = true (or call SetEnabled(true)) when the moment arrives.
Setting it before a profile is assigned is fine: it is remembered, and the outline appears when the
profile does. Set from code in play mode, it wins over Enabled On Start.Several passes at once
Filling four slots one at a time is four structural changes, and three of the four rebuilds are
thrown away by the next assignment — invisible in the inspector, very visible in code that spawns a
hundred objects. Configure does the lot in one build:
var outline = enemy.AddComponent<KeylineOutline>();
outline.Configure(new KeylineSetup
{
MainOutline = hostileProfile,
XRayOutline = seeThroughProfile,
XRayOutlineStyle = KeylineStyle.Neon, // optional; null keeps the profile's own
Enabled = true, // optional; null leaves Enabled On Start to decide
});Or, for the common case of profiles and nothing else:
outline.Configure(main: hostileProfile, xray: seeThroughProfile);A KeylineSetup describes the whole outline, not a patch on one. Every slot is
assigned exactly what the setup names, and a slot it leaves null is emptied; a pass draws when its
slot has a profile. Applying the same setup twice gives the same result. To change one thing, write
to that one thing. setup.StyleProfileFor(pass) reads a slot back by kind.
A style named in the setup goes through SetStyle, so it follows Instance Override
exactly as a direct call would — see 13.4.
Split vertices on a mesh
Two vertices that share a point, and are not one vertex, would each be pushed out along their
own faces and open a gap in the outline, so the outline's copy of the mesh always joins them.
Join Coincident Vertices, on by default, also joins vertices that only nearly meet — in the
Editor, in Play Mode and in a build alike (Geometry). A component
added from code joins too. To change the switch and the distance with one rebuild, call
SetJoinCoincidentVertices before Configure:
var outline = enemy.AddComponent<KeylineOutline>();
outline.SetJoinCoincidentVertices(true, 2f); // join within 2 mm
outline.Configure(new KeylineSetup
{
MainOutline = profile,
Enabled = true,
});false leaves near misses apart, for a gap the mesh keeps on purpose. Leaving the
distance out keeps the current one; it runs from 0, which joins only vertices on one point, to
10 mm. The same switch is
JoinCoincidentVertices, and the distance alone is JoinDistanceMm. The join
stays inside one mesh, children included when Include Children is on; two separate meshes are
not stitched together. The method is on the 3D component, not on IKeylineOutline:
sprites have no such seam.
13.8 One script for a mesh or a sprite
IKeylineOutline is what the two components have in common: the master switch and its
event, the passes and their slots, private copies, colour, width, opacity, style and pulse, the edit
scope, Configure, Rebuild and its event. Anything that drives outlines it
did not create — a spawner, a save system, a highlight of your own — can hold this instead of a
concrete type and work on both.
// On this object only:
if (go.TryGetComponent(out IKeylineOutline outline))
{
outline.Configure(new KeylineSetup { MainOutline = profile });
}
// From a raycast hit, walking up to the outline that controls the figure:
if (KeylineOutlineRef.TryGetFrom(hit.collider, out IKeylineOutline target))
{
target.SetPassEnabled(KeylinePassKind.XRayOutline, true);
}== null and ?? do not work on an interface
reference. Unity fakes a destroyed or missing component's null-ness by overloading
== on UnityEngine.Object, and the overload is chosen from the static type
of the operand — so through an interface it is never chosen. A destroyed component reads as present
and the next member access throws; in the Editor, a GetComponent that found nothing
returns a placeholder that ?? never falls through. Use TryGetComponent or
KeylineOutlineRef.TryGetFrom to find one, and outline.IsAlive() to check a
stored reference.Adoption is not on it. AdoptChild, ReleaseChild,
AttachTo and DetachFromParent exist on both components with the same
names, typed to their own component: a mesh outline cannot adopt a sprite outline, and a mesh child
can be folded into its parent's hull while a sprite child never is. Reach them through the concrete
type:
if (outline is KeylineOutline mesh) { mesh.AttachTo(character); }
else if (outline is KeylineOutline2D sprite) { sprite.AttachTo(spriteFigure); }The interface also leaves out the look properties past colour, width, opacity, style and pulse:
hull extrusion means nothing on a quad and a distance field nothing on a mesh. Reach the rest
through ForkSlot, which returns the profile itself.
Handing a borrowed pass back
An effect that takes a pass over, writes a temporary look into it and later gives it back has an
ordering to respect, and getting it wrong fails quietly. KeylineSlotRestore.ToShared
does it correctly:
using FourSsets.Keyline.Recipes;
KeylineSlotRestore.ToShared(outline, KeylinePassKind.MainFill, myForkedProfile);
outline.RefreshAppearance();It restores the style and copies the values back; putting them on screen is the caller's call.
The order matters because SetStyle returns early when the profile already holds the
requested style: a plain value copy first would leave a Frost profile named Frost with its shell
mirrors gone, drawing a flat band until something else rebuilt it.
13.9 What is stable
Public members of KeylineOutline, KeylineOutline2D,
KeylineStyleProfile, IKeylineOutline, KeylineOutlineRef,
KeylineOutlines, KeylineSetup, KeylinePassKind,
KeylineStyle and the recipe components are the supported API. Anything added to
KeylinePassKind or KeylineStyle goes on the end, so serialized values keep
their meaning.
KeylineOutlineSettings is called
KeylineStyleProfile from 1.3.0. KeylineMobileSolidOutlineSettings
became KeylineMobileSolidStyleProfile with it.
Your profile assets are not affected. An asset names its script by that file's GUID, the files kept their GUIDs, and a profile authored in 1.2.0 loads as the renamed type.
Your scripts are, wherever they spell the old type out. Either accept Unity's API Updater when it offers to rewrite them on import, or put one line at the top of each script that spells the old name:
using KeylineOutlineSettings = FourSsets.Keyline.KeylineStyleProfile;That is a real alias, not a second type, so inspector references keep working. A deprecated subclass would not: it would compile your code and then leave every profile field in your scenes empty, because the assets are the base type.
[Obsolete] forwarders.
Code written against 1.2.0 compiles unchanged, with a warning naming what to write instead:
- the profile members —
SetSettingsisSetPassStyleProfile,SettingsisMainOutlineStyleProfile,XRaySettingsisXRayOutlineStyleProfile,InteriorSettingsisMainFillStyleProfile, and so on; - the pass switches —
XRayEnabledisXRayOutlineEnabled,InteriorEnabledisMainFillEnabled,XRayInteriorEnabledisXRayFillEnabled; KeylinePassKind.Primary,XRay,MainInteriorandXRayInterior— the same values asMainOutline,XRayOutline,MainFillandXRayFill;KeylineSetup.Main,XRay,Interior,XRayInteriorand their…Stylecompanions, andSettingsFor, which isStyleProfileFor;OwnedChildOutlineson the mesh component, which isOwnedChildrenas on the sprite one;FadeIn,HoldandFadeOuton Impact Wave, which areFadeInSeconds,HoldSecondsandFadeOutSeconds.
KeylineOutline2D.Toggle() is obsolete without being renamed: it flips Main Outline
only, where the mesh component's flips the master switch. Write
OutlineEnabled = !OutlineEnabled. CHANGELOG.txt lists every pair. The
serialized fields were not renamed, so no scene or prefab loses a value.
Types whose names say what they are for internally — the pipeline passes, the merge resolver, the
stencil pool, the runtime manifest — are public because assembly boundaries require it, not because
they are an API, and may change in any release. So may the generated objects: their names, the
__Keyline folder and the layout inside it are not something to find by path.
Anything that changes in a way a project can notice is listed under Changed,
Deprecated or Removed in CHANGELOG.txt, with what to do about it.
14 · Performance
Three things decide what an outline costs: how many hulls the style builds, whether the draws batch, and how many pixels they cover. The first two are measurable and are measured below; the third is fill rate and depends on your screen and your widths.
Soft Edge is extra only when it is actually drawing: the pass is in the pipeline and at least one rim has Edge Softness above 0. That frame pays for an off-screen colour target, a depth copy, a few Kawase blits and a composite. Softness 0, or no pass, costs nothing extra — those rims stay on the camera's transparent path.
14.1 The SRP Batcher
Outlines batch. Measured on a grid of the demo's props, URP, one Merge Group over the whole grid, style Solid — SetPass calls for the whole frame, the props' own included:
| The grid | SetPass calls |
|---|---|
| 400 objects, outlines built and hidden | 10 |
| 200 objects outlined | 24 |
| 400 objects outlined | 38 |
A SetPass call is the GPU being handed a new shader state; draws that share one are batched. Each of those four hundred outlines is at least four draws — the rim, the interior mask and the two Clip At Intersections stamps — so more than 1,600 draws add 28 SetPass calls to the frame, about one per fourteen objects.
What makes that possible is worth stating plainly, because it decides whether Instance Override is affordable: every object in that grid has its own profile and its own material instance, and they batch anyway. The SRP Batcher keeps material properties in a per-material constant buffer and switches a pointer rather than the pipeline state, so distinct materials on the same shader variant stay in one batch. The batches that do break report a device state change, not a material difference.
What gives the batcher up
Anything that needs a MaterialPropertyBlock, because a block is per-renderer data
the batcher cannot fold into its buffer. Four things ask for one, and three of the four only on an
object built from several renderers — a single-renderer prop writes the same values onto the
shared material and stays batched.
- Cutout. The source texture is resolved per renderer and bound through a block. This one applies however many renderers there are.
- A style that is told how big the model is — Gradient always, and Frost, Electric, Lava, Smoke, Crystal, Water and Fire in Object or World space. Their density is a proportion of the model rather than a measurement in metres, and on a figure of six meshes the six sizes differ.
- A style that places something — a pattern, a noise field, a ramp — in Object or World space. Every part's coordinates have to be read through the figure's own space, so the prop wears one copy of the effect instead of six.
- Sheet Solidify with Thicken X or Y set, which pushes the shell away from a centre measured on each mesh. Off by default.
With Cutout on, the Frame Debugger shows the outline leaving
RenderLoop.DrawSRPBatcher for plain RenderLoop.Draw, one event per draw,
and Unity gives the reason itself:
| Draw | Batch cause reported by Unity |
|---|---|
| the rim | Objects have different materials. |
| the interior mask | SRP: Node is not compatible with SRP batcher |
The object's own mesh keeps batching — it is only the outline that drops out. On a fence that is nothing; on a forest it is the first thing to measure. Solid, Neon, Halo and Double place nothing and read no size, so a crowd drawn in those stays batched whatever it is built from.
The list above is the rim's question. The stencil-only draws beside it — the interior mask, the X-Ray self-occlude, Double's gap mask and the two Clip At Intersections stamps — write no colour, so only the first and the last entry can reach them: a cutout, which decides which texels of the silhouette exist, and a per-mesh expand centre, which decides where the silhouette sits. A style that is placed across the figure or divided by the model's size costs the batcher on the rim and leaves the stamps in it. That matters most on a figure built from many renderers, where the stamps outnumber the rims — see 14.3.
A stencil reference is render state too
The grid measured above is one merge group, and that is not incidental to the numbers. A group takes one stencil pair for the whole group, so every outline in it carries the same stencil reference — and two draws can only share a batch when their render state matches. Outlines that are not in one silhouette each get a pair of their own, which is what keeps one object's rim from drawing over another object's body, and it is also why they cannot share a draw call. Measured on fifty separate objects, style Solid, nothing else changed — SetPass calls for the whole frame again:
| Fifty objects | SetPass calls |
|---|---|
| Outlines built and hidden | 8 |
| A pair each — the default | 193 |
| One pair between them | 14 |
Share Stencil With Others, under Objects on both outline components, is how an outline opts into the second row. Outlines that have it ticked share one pair with each other; outlines that do not keep their own and are unaffected by anything the rest of the scene does.
What it costs is exactly what the pair was buying. Such an outline is cut away wherever another sharing silhouette has been stamped, so two of them that overlap on screen clip each other's rims. Objects that never meet on screen lose nothing at all.
When it is the right answer
- A crowd of separated objects. Enemies across a level, pickups on a map, units in a strategy game — many outlined at once, spread out, rarely touching. Tick it on the prefab and the whole crowd batches.
- Objects that are outlined together but never overlap, such as icons or markers pinned to distinct positions.
- A hero among them stays out of it. Leave the switch off on the character the camera gets close to, and that one keeps a pair of its own while the crowd behind it batches. The setting is per outline precisely so this works.
When to leave it alone
- One to three outlined objects. Two outlines sharing a pair save about four SetPass calls, which no statistic will show. The usual highlight-one-thing case has nothing to gain.
- Anything that overlaps on screen. A character and the weapon in their hand, a stack of crates, a prop the camera passes behind another. Use a merge group instead when they should read as one silhouette, or leave both unshared when they should not.
- Any scene you have not looked at with it on. This is the only setting in the package that trades a guarantee for draw calls. Turn it on, move the camera through the scene, and watch the places where outlined objects pass each other.
14.2 Hulls per object
Draw count follows the style's topology, and it is the one cost you can predict without measuring:
| Style | Hulls per object |
|---|---|
| Solid, Neon, Sketch, Pattern, Electric, Rainbow, Gradient, Lava, Smoke, Crystal, Water, Fire | 1 |
| Frost | 2 — core plus shell |
| Double | 3 — two rings and the gap mask |
| Halo | one per layer, 2 to 8 — one on a sprite |
14.3 Objects with many parts
Everything above is counted per source renderer, and an outline over a figure built from many of them multiplies three numbers together: sources × roles × passes.
A robot whose every limb, panel and bolt is its own GameObject passes a thousand draws without anything being misconfigured. There is simply a lot of it. Each of the three multipliers is worth knowing separately, because each has a lever of its own.
Sources
Include Children collects every renderer under the object, and each one gets a hull of its own — the hull is built by extruding a mesh, and there are that many meshes.
Roles
Besides the rim, a source can carry stencil-only stamps, and every one of them is a draw:
| Role | Exists when |
|---|---|
| Outline | always |
| Mask | every rim pass — Main Outline and X-Ray Outline |
| SelfOcclude | X-Ray is on |
| ClipClaim and ClipRelease | Clip At Intersections is on — two of them, on Main Outline only |
| GapMask and OuterRing | style Double |
| HaloLayer 0…n | style Halo |
Passes
Each enabled pass carries its own set of the above, over every source. Main, X-Ray and two interior fills is four sets.
So a fifty-four part robot with those four passes and Clip At Intersections on carries eleven draws per part — five on Main Outline, three on X-Ray Outline, one on Main Fill, two on X-Ray Fill — which is close to six hundred draws for one character.
What to do about it
Fewer sources, and this is the one that matters. For a rigid figure animated by its transforms — a robot, a vehicle, a machine — the answer is one SkinnedMeshRenderer with a bone per part: each part bound to its own bone at full weight, the same animation, the same picture. Keyline treats a skinned renderer as a single source, so fifty-four become one. It is worth doing for its own sake as well: fifty-four MeshRenderers are fifty-four draw calls before any outline exists.
Where the model cannot be changed, Ignore Children List is the tool. It excludes a transform and everything under it. An outline is a silhouette, and a bolt inside the torso is not part of one — excluding the parts that never reach the edge usually removes most of them. A layer left out of Layer Mask does the same thing across the scene.
Fewer roles. Clip At Intersections is two of them on the Main Outline pass, and it earns its place only where something really does pass through the body. X-Ray adds one more, the SelfOcclude stamp, on the Main Outline pass as well as its own.
Fewer passes. Main and X-Ray answer most of what a character needs; a second interior fill doubles the set for a look that is often carried by the rim alone.
Keep the batcher. On a figure of many parts the two style entries in 14.1 are the ones that bite, and both are avoided in Screen or UV space. The stamps stay batched regardless unless a cutout or a per-mesh expand centre is in play.
And ask whether it has to be drawn at all. Most games show an outline on hover, on selection, or while something is hidden — not continuously. The mirrors are built once and kept; turning the outline off and on again does not rebuild them, so a character that carries its outline only while it is the one being pointed at costs nothing the rest of the time.
sources=, the mirror count broken down by role, and perSource /
perSourceStamps. It is the quickest way to see which of the three multipliers is the
large one before changing anything.14.4 The stencil budget
126 unique pairs per scene, and there are two ways to spend fewer: merging, below, and Share Stencil With Others, which hands one pair to every outline that asks for it without joining any of them into one silhouette.
Merging is the first: a merge group takes one pair for the whole group, and overlapping outlines cluster automatically. The grid measured above is one group, which is why every batch in it shares a single stencil reference. An Overlay on an object spends a second pair of its own — that cost does not fold into the group.
14.5 Frame time
Measured in a standalone release player at 1080p, VSync off, on a grid of the demo's props: one Merge Group, one profile per object, style Solid unless stated. Outlines are drawn at a constant screen width — each style's default at one pixel per centimetre, about 3 px — so every object count draws the same rim. Each case runs for a 3-second warm-up and is then sampled for 10 seconds; the player is run five times as separate processes with the cases in a different order each time, and every figure is the median of the five runs' means.
| The machine these numbers come from | |
|---|---|
| GPU | GeForce RTX 4070 Laptop |
| CPU | Intel Core i9-14900HX |
| Memory / OS | 32 GB · Windows 11 |
| Unity | 6000.3 · URP · Direct3D 12 |
What the outline itself costs
| Objects outlined | Outlines off | Outlines on | Difference |
|---|---|---|---|
| 64 | 1.47 ms | 1.77 ms | +0.30 ms |
| 200 | 1.56 ms | 2.21 ms | +0.64 ms |
| 400 | 1.68 ms | 2.83 ms | +1.14 ms |
"Off" builds the same outlines and switches them off, so the difference is what drawing them costs. It grows with the object count, by 3 to 5 µs per outlined object.
Where it goes
The main thread, the render thread and the GPU work side by side, so a frame is as long as the busiest of them. The same difference, split between the three:
| Objects outlined | Main thread | Render thread | GPU | Of a 60 fps frame |
|---|---|---|---|---|
| 64 | +0.30 ms | +0.04 ms | +0.21 ms | 1.8 % |
| 200 | +0.64 ms | +0.14 ms | +0.28 ms | 3.8 % |
| 400 | +1.14 ms | +0.27 ms | +0.48 ms | 6.8 % |
Almost all of it is on the main thread, 3 to 5 µs per outlined object. That is where Unity culls, sorts and prepares every draw — an outline is at least four of them: the rim, the interior mask and the two Clip At Intersections stamps — and where the merge clustering runs, ten times a second. Handing the draws to the graphics API costs under 1 µs per object, and the GPU's share stays small — half a millisecond at four hundred. The last column is the busiest of the three as a share of a 16.7 ms frame.
One profile for all four hundred objects instead of one each measured the same, 2.84 ms against 2.83: a profile per object costs nothing you can measure here.
What a style costs
200 objects, same scene:
| Style | Frame | Against Solid |
|---|---|---|
| Solid | 2.21 ms | — |
| Double | 2.42 ms | +0.21 ms |
| Halo, 5 layers | 2.76 ms | +0.56 ms |
Double draws three hulls per object and Halo five, but neither costs three or five times Solid: Solid's outlines cost 0.64 ms here, Double adds about a third as much again and Halo nearly as much again. The hull count in 14.2 predicts the order, not the multiple.
The Mobile Solid profile
| Profile | Frame, 200 objects |
|---|---|
| Full | 2.21 ms |
| Mobile Solid | 2.41 ms |
Not faster on a desktop GPU — on this machine it measured 0.2 ms slower, all of it on the main thread, with the same number of SetPass calls and the same GPU time as Full. Mobile Solid exists for build size and shader variant count, and for fragment cost on hardware where the fragment stage is the bottleneck, which a desktop GPU is not. Pick it for mobile, not for this.
The build pause
Building the 200-object grid, from the start of the build to the first frame drawn after it — the pause a player sees. Each run is a fresh process, so "first build" is the first analysis of these meshes that process ever did:
| Build | Run 1 | Run 2 | Run 3 | Run 4 | Run 5 |
|---|---|---|---|---|---|
| First build | 138 ms | 149 ms | 175 ms | 162 ms | 174 ms |
| Again | 61 ms | 61 ms | 71 ms | 67 ms | 75 ms |
The first build in a process costs about 90 ms more than the second on these props: that is the analysis — sheets told from solids, shells built — and it runs once per mesh. It costs build time, never frame time, but on a dense character mesh the first build is a pause worth hiding behind a loading screen, which is what baking is for.
What a game's own rebuilds cost
Timed the same way, on outlines that already exist:
| What happens | Run 1 | Run 2 | Run 3 | Run 4 | Run 5 |
|---|---|---|---|---|---|
| For scale: building 200 objects, meshes already analysed | 61 ms | 61 ms | 71 ms | 67 ms | 75 ms |
| 200 objects back from a pool (GameObject on) | 21 ms | 22 ms | 24 ms | 20 ms | 26 ms |
| 200 objects given a profile of the same structure | 11 ms | 12 ms | 13 ms | 12 ms | 14 ms |
| 120 objects of 12 meshes, first spawn | 104 ms | 135 ms | 136 ms | 131 ms | 161 ms |
| … destroyed and spawned again | 48 ms | 53 ms | 55 ms | 57 ms | 61 ms |
An object coming back from a pool shows the outline it had — its generated objects were kept when it was switched off — so it costs about a third of building it, and a profile of the same structure is a material rewrite rather than a rebuild. Spawning without a pool builds every outline again, but the prepared meshes are still held from the last wave, so the second wave skips the mesh analysis. See 13.3 for which calls rebuild.
14.6 Allocation
The outline runtime does not allocate per frame: no garbage from the mirrors, the property blocks or the merge clustering. Measured in the same player over every case above — fifty samples of ten seconds — there were no garbage collections, and the managed heap did not grow.
Profile the demo itself and you will see allocation in every frame. It is the demo's IMGUI panel, not the outlines, and it leaves with the demo.
14.7 Android
The demo was run on Android under both Vulkan and OpenGLES3, with the Full shader profile, and all ten chapters behave as they do on the desktop. Full is not a desktop-only setting and the mobile-facing features are not cut down there: Cutout, sheets and all fifteen styles are present.
Mobile Solid is still the faster profile, and the gap widens with the number of outlined objects. On one hero character it is not worth thinking about; on a crowd it is the difference you will measure. The profile decides how many shader variants exist and how much work each fragment does, so the cost it saves is per pixel covered by an outline — which is why object count, outline width and screen resolution all push in the same direction.
The sensible default on mobile is a Mobile Solid Style Profile, moving to an ordinary one only when you reach for something it does not carry — see 15.5 for what that is. On desktop there is no reason not to run Full.
Both kinds are made from Assets ▸ Create ▸ Keyline, and the New button on a
pass card copies whichever kind the slot already holds — so a Mobile Solid project stays that way without
anybody having to remember. If a bundled profile is deleted,
Tools ▸ Keyline ▸ Restore Bundled
Style Profiles
puts it back, Mobile Solid included.
15 · Troubleshooting
Every entry here is a real constraint of the shipped build rather than a defect: the asset behaves this way on purpose, and the surprise is worth documenting because the behaviour is not guessable.
15.1 Nothing is drawn at all
- The pass has no profile. A slot with no profile draws nothing and its switch has nothing to switch — see 4.1.
- Enabled On Start is off and nothing has switched the outline on since.
- Width is 0 on a rim pass. On a fill that is normal; on a rim it is invisible by definition.
- The renderer is excluded: Include Children is off, the renderer is in the Ignore Children List, or its layer is outside the Layer Mask.
15.2 Changing one object changed all of them
The profile is a shared asset and the write went straight to it. In the editor the change also
survives play mode, because a ScriptableObject edited at runtime is the object on
disk.
Write through the component (outline.Color = …), which forks the profile into a
copy this object owns, rather than through outline.MainOutlineStyleProfile.color, which does not.
See 13.4.
15.3 The cutout outline keeps the old texture
A new texture was written into the same material. The resolved texture is cached against
the material's instance id, which has not changed, so nothing signalled that anything did. Call
outline.InvalidateCutout() after the swap — 13.6.
15.4 Cutout on a solid model
Experimental — same status as Cutout Overlay. The alpha rim sits on the surface (extrusion is off while Cutout is on). The outer silhouette is a normal hull outline, or a Cutout Overlay (also experimental) on the same pass. Padding that widens a flat card in-plane is skipped on volumes — Cutout still traces alpha.
A flat mesh is still the cleanest card for padding: fences, foliage, decals, a sprite texture on a quad. Single- or double-sided makes no difference; the in-plane grow needs a plane.
15.5 A mesh Cutout or a layered style does nothing on a Mobile Solid profile
Mobile Solid draws Solid only, and it does not clip a mesh against a texture's alpha. That absence is most of where the saving comes from. The hull is not part of the trade: Mobile Solid builds the same one Full does, sheets grown in their plane and given a shell, with Thickness, Lateral and the Thicken axes.
A sprite is the exception, and it is not a limitation. Every sprite rim is a distance field rather than a hull, so Mobile Solid draws it from the same shared code Full uses and its Rim settings all apply.
For the rest, point the pass at an ordinary Style Profile, or accept the limitation deliberately rather than tuning against it.
15.6 Width does nothing on a fill
A fill is the object's own surface, not a hull around it, and the controller forces its width to zero. Colour, opacity and the style are what shape it — 3.2.
15.7 Edge Softness does nothing
The rim stays hard until the Soft Edge pass is in the pipeline. The profile says so beside the
Edge Softness slider and offers a button, which is the place it belongs — where the value
that needs the pass is being edited. The same switch project-wide is Pass In Pipeline
under Soft Edge in Project Settings ▸ Keyline ▸ Features. If Edge Softness is not
there at all, the Soft Edge feature is switched off on that page — 2.3.
The fills never read the value, and neither does a rim drawn from a distance field: with Cutout on, or on a sprite, softening is Rim Softness instead and the Edge Softness slider is hidden. If it disappeared from a profile you had already tuned, that is why — switching a profile to Cutout changes which of the two controls its edge.
15.8 The whole model is tinted while the wave is elsewhere
The gradient's band is symmetric. Its second colour is not a trailing colour — it is what the object looks like everywhere the front is not. Give it alpha 0 unless the tint is wanted.
15.9 Outlines interfere on a crowd
The stencil pool hands out 126 unique pairs per scene. Past that, further objects share a pair, and objects sharing a pair stop fencing each other off — where they overlap the result is decided by draw order, which reads as flicker.
Merge what belongs together: a group spends one pair however many members it has, and overlapping outlines cluster automatically. See 3.4.
15.10 The SRP Batcher broke
Any MaterialPropertyBlock takes a renderer out of the batcher. Cutout always asks
for one; a style told how big the model is, a style that places something in Object or World space,
and Sheet Solidify's Thicken X or Y each ask for one on an object built from several
renderers. See 14.1 for the full list and for what stays batched.
All of them are worth the cost where they are needed and worth avoiding on a crowd.
15.11 The demo scene is magenta
Its materials were authored against the other pipeline's Lit shader. The package retargets them
on load; if it has not,
Tools ▸ Keyline ▸ Fix Demo Materials For This Pipeline. The outline shaders
are never involved — they carry a SubShader per pipeline.
15.12 Sheet Solidify does nothing on a character
Topology is never rebuilt for a skinned source: the hull is a second
SkinnedMeshRenderer on the same bones, and rebuilding its triangles would break the
bone weights. Solidify needs to rebuild topology, so it is skipped there —
10.
15.13 The pixel art outline is soft, or its corners are round
- The field is still Smooth. Field Mode says what to draw; the file says what can be drawn. Rebuild after changing it — the rounding is in the numbers, not in how they are read.
- The sprite's own texture is filtered Bilinear. The outline is on the grid and gets blurred along with the artwork. Set its Filter Mode to Point.
- A fractional scale or a rotation. Either spreads a texel across a fraction of a screen pixel, and the steps land between pixels.
- Unequal X and Y scale. One texel is then not square in the world, so the outline comes out thicker on one axis. A smooth field absorbs this; a pixel one cannot — Stretched sprites.
The component reports each of these; see 12.3.
15.14 Width does almost nothing on a pixel art sprite
The profile is in World or Screen mode, where Width is a length. On a sprite at 100 Pixels Per Unit a width of 0.1 is ten texels and the slider crosses several of them at once; on another sprite the same number is three. Set Width Mode to Pixels and the field becomes a whole texel count with a step button either side — 12.3.
15.15 The sprite's outline is thicker on one side than the other
The object's X and Y scale are not equal, so one texel is not square in the world. Make them
equal — any value will do, (2, 2, 1) is as good as (1, 1, 1), since it is
the ratio between them that stretches a texel and not the size.
On a smooth field there is nothing to do beyond rebuilding: the field is measured on the sprite's own stretched grid and the rim comes out even. Change the scale afterwards and the field is measured for a stretch it is no longer drawn at, which the Inspector says. On a pixel field the scale is the only fix — Stretched sprites.
15.16 A pixel art Pulse flickers instead of breathing
The width of a pixel rim can only change a whole texel at a time, so a rim of six texels swinging by half crosses three boundaries going out and three coming back. Raise Step Fade on the profile: it eases the outline to its faintest at full stretch and back, once per beat, so the steps land where the ring is least visible. If the pulse reads as a flash rather than a swell, lower Brighten — on a stepping rim the colour swing is often doing more of the work than the width is — 12.3.
15.17 What is different on HDRP
Keyline draws the same outlines on both pipelines, but HDRP reaches some of them by a different route, and four consequences of that are worth knowing before they look like faults. Nothing here is a setting to change — they are what HDRP is, and Keyline works within them.
Soft Edge changes how X-Ray is drawn, project-wide. HDRP leaves an outline shader two usable stencil bits, which is not enough to fence an X-Ray family against a soft rim on the camera. So when the Soft Edge pass is installed, Keyline draws the whole X-Ray family — rims and X-Ray Fill — inside that pass instead of on the camera, for every object, at any Edge Softness. Switching Soft Edge on or off therefore changes the route X-Ray takes. It does not change what it looks like, and if nothing in the scene has softness above zero the pass stands aside and the ordinary route is used. URP fences with the camera stencil and only moves soft rims.
Outlines composite before post-processing. The Soft Edge pass runs at
BeforePostProcess, so on HDRP an outline that goes through it is post-processed with the
rest of the frame: temporal anti-aliasing, depth of field, motion blur and any upscaler act on it. A
thin rim under TAA can shimmer, and depth of field will blur an X-Ray rim belonging to an object
that is itself in focus. On URP the rims are ordinary transparent geometry and take the same route as
everything else in the scene.
Outline colour is not exposure-compensated. Keyline writes the colour you chose, and HDRP's colour buffer is scaled by the camera's exposure. Under Fixed exposure that is stable and the colour is the colour. Under Automatic exposure the scene re-meters as the camera moves and the outline does not follow, so a rim that reads correctly in a bright room will read differently in a dark one. Pin the exposure, or pick the colour in the lighting the outline will mostly be seen in.
Outlines do not appear in ray-traced effects. The shaders carry no ray tracing passes, so
an outline is drawn in the direct view only — never inside a ray-traced reflection, ray-traced global
illumination, or the path tracer. Project Settings ▸ Keyline says so when ray tracing is
enabled in the HDRP asset.
And one that is fatal rather than awkward: both of Keyline's HDRP passes are Custom Passes. If Custom Pass support is switched off in the HDRP Asset, or the Custom Pass frame setting is off on a camera, they cannot run. The first shows on the Features page as "On, but HDRP Custom Passes are off" under each Pass In Pipeline, with a Select Pipeline Asset button. The second is per camera and worth checking if one view has outlines and another does not. Ordinary outlines are unaffected either way.
15.18 The URP Renderer says "Missing RendererFeature"
Keyline was deleted while one of its URP passes was still installed. A renderer feature is stored inside the Renderer asset it belongs to, so removing the package left the object there without the script that defined it.
Select the Renderer asset — …_Renderer.asset, not the URP Asset — press
Attempt Fix on the red block and answer Yes. Turning the two Pass In
Pipeline switches in Project Settings ▸ Keyline ▸ Features off before deleting the package
avoids it entirely; see 2.2.
15.19 The outline opens along a seam or a hard edge
The mesh keeps two vertices at that point, and each is pushed out along its own faces. Check, on the component's Geometry ▸ Mesh Cleanup: Join Coincident Vertices is on; Smooth Normals is on, or Sheet Solidify is on — joining applies only where the outline bakes its own normals; the vertices are within Join Distance (raise it a little for a mesh exported with a small gap); the mesh is Read/Write enabled or baked with Bake for Runtime. A seam between two separate meshes is not joined — merge them in the model. A pair that a blend shape or bone weights move apart is left split on purpose — Geometry.
16 · Reference
16.1 Menu paths
| Menu | Entry |
|---|---|
| Add Component | Keyline ▸ Keyline Outline 3D |
| Add Component | Keyline ▸ Keyline Outline 2D |
| Add Component | Keyline ▸ Keyline Draw Config — 3D only, one per scene |
| Add Component | Keyline ▸ Keyline Merge Group — meshes and sprites alike |
| Add Component | Keyline ▸ Keyline Occluder 2D |
| Add Component | Keyline ▸ Keyline Occluder Layers 2D |
| Add Component | Keyline ▸ Recipes ▸ … — fourteen entries |
A feature switched off in Project Settings ▸ Keyline ▸ Features takes its entries out of these menus — 2.3. | |
| Project Settings | Keyline — project-wide switches, 16.4 |
| Project Settings | Keyline ▸ Features — which parts of Keyline the project uses, 2.3 |
| Assets ▸ Create | Keyline ▸ Style Profile |
| Assets ▸ Create | Keyline ▸ Mobile Solid Style Profile — the same asset drawn by the smaller shader |
| Tools | Keyline ▸ Bake All Outlines In Scene |
| Tools | Keyline ▸ Setup… — the window shown once after import |
| Tools | Keyline ▸ Settings… — opens the page above |
| Tools | Keyline ▸ Features… — opens the Features page |
| Tools | Keyline ▸ Refresh Pipeline Defines |
| Tools | Keyline ▸ Restore Bundled Style Profiles |
| Tools | Keyline ▸ Fix Demo Materials For This Pipeline — only while the demo folder is present |
| Tools | Keyline ▸ Add Draw Config |
16.2 Enumerations
All in namespace FourSsets.Keyline.
KeylineStyle
Solid · Neon · Halo · Sketch ·
Pattern · Double · Electric · Rainbow ·
Gradient · Frost · Lava · Smoke ·
Crystal · Water · Fire — see 6.
KeylinePassKind
MainOutline | the Main rim |
XRayOutline | the rim drawn where the object is hidden |
MainFill | the fill |
XRayFill | the fill drawn where the object is hidden |
MainCutoutOverlay | the Cutout Overlay drawn with the Main rim — mesh only |
XRayCutoutOverlay | the Cutout Overlay drawn with the X-Ray rim — mesh only |
A sprite answers false for the last two and ignores an attempt to switch them: it
has four mirrors and no overlay pass. The 1.2.0 names Primary, XRay,
MainInterior and XRayInterior remain as [Obsolete] members
with the same values. KeylinePassKinds holds the helpers: IsDefined,
ProjectAllows, Label, Count and
HullPassCount.
KeylineWidthMode
World | metres; the outline keeps its proportion to the object |
ConstantScreen | pixels; the same thickness at any distance |
Pixels | whole texels of the sprite's texture; 2D pixel art |
KeylineSdfFieldMode
Smooth | Euclidean distance, sub-texel edge; round corners |
PixelArt8 | Chebyshev — a diagonal step costs one; outlines diagonals |
PixelArt4 | Manhattan — a diagonal costs two; thinner, no diagonals |
KeylineExpandMode
Obsolete since 1.3.0: every hull is built the way Mixed built it, solid parts
along their normals and sheets in their own plane. Kept, with Normal,
Planar and Mixed, so 1.2.0 code still compiles; nothing reads it.
KeylineCornerTopology
Rounded | a bevel at each hard corner of the hull; also rounds a Sheet Solidify shell's rim and corners. The default |
Simple | one vertex per corner, no added triangles, except a square rim with cut corners round the open edge of a double-sided surface; its reach is CornerSharpLimit |
KeylineExpandCenterMode
Obsolete since 1.3.0: the centre Planar grew from. Kept, with MeshBounds,
ObjectPivot and Custom, so 1.2.0 code still compiles; nothing reads it.
KeylineFaceCull
Front | draw front faces — Keyline's default |
Back | draw back faces — the classic inverted hull |
Both | draw both — for single-sided sheets seen from either side |
KeylineStyleSpace
ObjectSpace | the pattern is painted on the mesh |
WorldSpace | the object moves through a fixed field |
ScreenSpace | the pattern stays put on screen |
UVSpace | the pattern follows the unwrap |
KeylineGradientShape
Linear | a ramp along Angle, in the object's own space |
Radial | a sphere spreading from a world point |
Planar | a plane travelling along a world axis |
KeylineGradientRadiusMode
Relative | Radius is multiplied by the object's own size — one setting fits every model |
Absolute | Radius is metres — what a front crossing several objects needs |
KeylineMixedDetectMode
Thickness | one ray per face; cheaper, coarser |
MultiRay | a cone of rays per face; slower to bake, far fewer misses |
KeylineRainbowMotion
Vertical | bands travel up the object |
Circular | bands rotate around a centre |
KeylineBlendMode
Default | the style decides, as it always has |
Alpha | ordinary transparency — the only mode where Opacity covers |
Additive | light; the background always shows through |
Screen | light that approaches white instead of clipping at it |
Multiply | ink; darkens and tints rather than covering |
Subtract | the colour taken out of the frame |
Darken · Lighten | whichever is darker or brighter, channel by channel |
See 5.5.
KeylineShaderProfile
Full | every style, cutout |
MobileSolid | Solid only, no mesh cutout — fewer variants and less fragment work. The hull is the same as Full's. Called Light before 1.2.0; the value is stored as a number, so renaming it changed no asset. |
KeylineShaderFeatures
A [Flags] mask recording which shader variants a build needs:
None, Cutout, StyleNeon, StyleHalo,
StyleSketch, StylePattern, StyleDouble,
StyleElectric, StyleRainbow, StyleGradient,
StyleFrost, StyleLava, StyleSmoke,
StyleCrystal, StyleWater, StyleFire,
PlanarExpand, AllStyles, All. AllStyles is
every style bit; All is that plus Cutout and
PlanarExpand. PlanarExpand is kept for profiles saved with it: since
1.3.0 every hull is built with sheets, and the Sheets project feature decides whether the sheet
variant is built.
16.3 Shader properties
The outline material is driven by the controller, and almost every property on it is written every time the appearance is applied. Setting them yourself is possible and pointless — the next refresh overwrites them.
The two shaders are 4ssets/Keyline/Outline (Full) and
4ssets/Keyline/OutlineMobileSolid (Mobile Solid). Which one draws is decided by the
profile's
type: an ordinary Style Profile is drawn by Full, a Mobile Solid Style Profile
by the other. Both components read that and swap the material with it, which is why pointing a pass
at the other kind of profile rebuilds rather than reconfigures.
Profile_MobileSolid asset, the C# type
KeylineMobileSolidStyleProfile and the
KeylineShaderProfile.MobileSolid value. It was called Light before 1.2.0,
which read as a lighting feature: the one thing it has nothing to do with.It is a type rather than a switch on the profile because Mobile Solid honours fewer values — one style, no cutout branch on a mesh — and a separate type cannot show fields it would ignore.
It works on sprites too. It draws Solid and nothing else, with no style branches to step through, and it measures its rim against the same distance field the Full shader uses — from the same shared code, so the two cannot come out different shapes. On a phone that is the largest single saving available to a 2D project.
Shader.PropertyToID and a renamed property silently stops being written rather
than failing loudly. Assign your copy in the component's Outline Material slot.16.4 Project Settings
The project-wide switches live under Project Settings ▸ Keyline, or
Tools ▸ Keyline ▸ Settings…, which opens the same page. Beneath it is
Features — which parts of Keyline the project uses, 2.3 — and
that is also where the two render-pipeline passes are switched, each under the feature it belongs
to. The main page starts with a line saying how many features are on, and a button to the page
that sets them. A bar under the header of both pages switches between Settings and
Features and opens Keyline Setup, the Quick Start, this manual and the API Reference.
The two passes — Soft Edge and Layer Filtering — are the only switches that install something. Pass In Pipeline, under each feature on the Features page, puts Keyline's pass into your render pipeline; unticking it takes the pass out again. Both are project-wide in both pipelines: nothing is added to any scene, and nothing has to be repeated per scene. Switching the feature off takes its pass out too; switching it on installs nothing.
Keyline offers them once, in the Setup window. Neither is on until somebody says so, because on URP a pass is written into your own Universal renderer assets. Without them Edge Softness has no effect and every X-Ray Sees Through and Main Sees Through mask is ignored; each says so where it is set, and the rest of Keyline works as usual.
Where the switch is kept differs by pipeline, and it is worth knowing which you have.
- URP — the switch is the renderer. The pass is a renderer feature on every Universal renderer the project uses, which is an asset already in your version control and already read by every build. There is nothing else to store.
- HDRP — a custom pass has no renderer asset to live on, so the choice is stored with Keyline's other settings and a hidden pass volume is spawned from it: in edit mode, in play, and in a build. The volume is not saved into any scene and does not appear in your hierarchy. A build gets the setting through a small Resources asset that Keyline writes just before the build and deletes straight afterwards, so nothing of it is left in your project.
The Add Soft Edge Pass buttons on components and profiles and the Pass In Pipeline checkbox are the same switch.
Each switch says whether it is actually working, in a line under it, in Edit Mode and in Play Mode. On is not the same as working, and the two ways they part company are pipeline-specific, so you are only told about the one that can happen to you:
- URP — installing writes to every renderer in the project, including the one on each quality level. A quality level added afterwards brings its own renderer, and the pass is not on it: the game then looks right on one quality setting and wrong on another. The status line counts them — "On 2 of 3 renderers." — and offers Add To Remaining Renderers. This is the one thing that can quietly un-cover a URP project.
- HDRP — quality levels and scenes cannot affect a custom pass. The HDRP Asset can: with
Custom Passes off in it, the line reads "On, but HDRP Custom Passes are off" and offers
Select Pipeline Asset. What an upgraded project can also have is a
Keyline Soft Edge PassorKeyline X-Ray Occluder Passobject saved into a scene by a Keyline version before 1.2.0. It still works and is no longer needed; the status line points it out and offers Remove From Scenes.
The switches are read-only while the game is running — installing edits assets, and doing that mid-play gives you a change the running game has already gone past. The status line stays live.
Turning a pass off changes nothing you have authored. Soft Edge off draws rims hard, Layer Filtering off ignores every X-Ray Sees Through and Main Sees Through mask and gives you the ordinary X-Ray and the ordinary depth test — no component is edited and no value is lost, so ticking it back on restores everything exactly.
Reset To Defaults always asks first. It resets the Scene View, Assets and Runtime settings, keeps Project Features, and the dialog says when it would also take a pass out of the render pipeline. Adding or removing a pass asks once per action.
Three more are Editor preferences. The two that are on out of the box are the ones whose off state is confusing — an outline that ignores a child just added to it, or vanishes with its baked mesh. The one that is off changes how the Scene view answers a click.
And two are neither. The Runtime section holds the only settings on this page that reach a player build — see below.
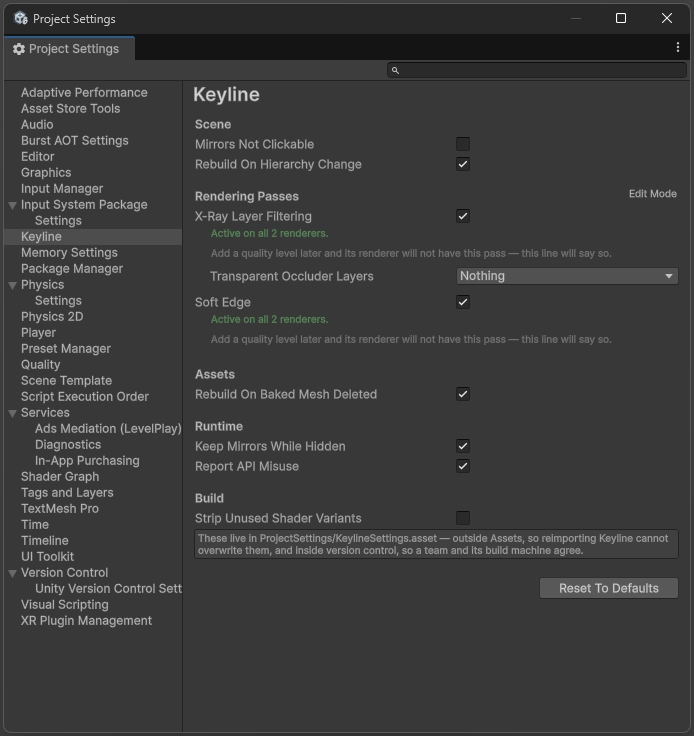
| Rendering pass | Default | What it does |
|---|---|---|
| Layer Filtering | Off | One pass behind three settings on the component. X-Ray Sees Through chooses which layers an X-Ray rim shows through — 3.5; Main Sees Through chooses which layers never hide Main Outline and Main Fill, so a rim stops being cut where it reaches into the floor — 3.6; Main Contact Depth answers the same complaint with no layer named, by judging those two passes at the object's own depth — 3.7. Costs nothing until one of them actually asks for something: with every X-Ray seeing through everything, every Main mask empty and Contact Depth off there is nothing to test, so no buffer is allocated and no geometry is drawn. |
| Soft Edge | Off | Draws Main and X-Ray rims into a separate buffer and blurs them, so Edge Softness and
world-space halos work — 4.4. The same switch as the
buttons on Keyline Outline 3D. |
| Setting | Default | What it does |
|---|---|---|
| Mirrors Not Clickable | Off | Takes Keyline's generated mirror objects out of Scene view picking. A mirror sits on top of the object it outlines and is usually a little larger, so a click lands on the mirror rather than on what you meant to select — and dragging it moves the outline off the object until the next rebuild throws the edit away. Takes effect at once, on the mirrors already in your open scenes as well as on the next ones built. |
| Rebuild On Hierarchy Change | On | Rebuilds an outline in the Editor when the renderers under it change, so a child added to an outlined object gets an outline without pressing anything. The hierarchy event only prompts a comparison — the rebuild happens when the set actually differs, not every time something moves in the scene. Editor only, for every outline in the project; for play mode and builds there is a per-component switch, below. |
| Rebuild On Baked Mesh Deleted | On | Rebuilds outlines whose saved bake has just been deleted from the project. A mirror is handed the baked mesh directly, so deleting the asset leaves it holding nothing and the outline disappears — with no message, and it stays gone until something unrelated forces a rebuild. On by default: it only runs after something has already broken. |
Runtime
Two switches that change what the game does rather than what the Editor does, and the only ones on this page that reach a player build. They travel in a small manifest Keyline writes at build time and deletes afterwards, so a project that never opens this page runs on the defaults below and gets no extra file in its Assets folder.
| Setting | Default | What it does |
|---|---|---|
| Keep Mirrors While Hidden | On | An outline switched off leaves its generated objects in place with their renderers disabled, so switching it back on is a flag per renderer and costs nothing. In Play mode the same goes for a disabled component or a deactivated object — what a pool does — which shows them again on enable if nothing they were built from has changed. Off, they are destroyed and the next show builds them again — less memory held by objects nobody is looking at, paid for at the moment somebody looks. On by default because the hide-and-show cycle is the common one: a hover, a selection, a ping, a pooled object. Turn it off when a scene hides or disables many outlines at once and leaves them that way. See 13.3. |
| Report API Misuse | On | Reports the two writes that fail silently: a look property written while the pass's slot is empty, and one written onto a shared project asset with Instance Override off. Each is said once per outline and pass. The first is reported in the Editor and in development builds; the second in the Editor only, because telling a project asset apart from one you made yourself means asking the asset database. A release build never checks — neither test is compiled into one. See 13.3. |
ProjectSettings/KeylineSettings.asset,
outside Assets, together with the project's features. Reimporting Keyline cannot
overwrite them, and version control carries them, so a team and its build machine agree — which
matters most for the features, since they decide what ships.Auto Rebuild In Play Mode, per component
The switch above covers the Editor and nothing else — it is compiled out of a build entirely. Both outline components carry their own Auto Rebuild In Play Mode under Objects for the other half, off by default — and the reason the defaults differ is that the two watch very different things. In the Editor a hierarchy change is a rare, human-speed event, so watching for one costs nothing. In a build it is a standing cost paid to catch a case most projects never have: code that spawns or destroys part of an outlined object without telling anything.
It listens for Unity's own child-list message rather than polling, so an untouched object pays
nothing per frame. What that message reports is the object's direct children: a renderer
added deeper down is not reported by Unity and needs Rebuild(), which is one call and
is already to hand in the code doing the restructuring.
17 · Licence and credits
Keyline is licensed under License.txt in the package root — the Unity Asset Store
EULA governs, and that file states in plain words what it means here.
The example art in the package — pattern textures, cutout textures, demo models and the demo
character — is by Kenney and is in the public domain under CC0 1.0
Universal. Every component, its path and the full licence text are listed in
Third-Party Notices.txt, also in the package root. CC0 asks for no attribution; the
credit here is given because the work deserves it.
Keyline is made by 4ssets, part of UnityCraft.org. Questions, bugs and requests go to the same address.